CONNECT
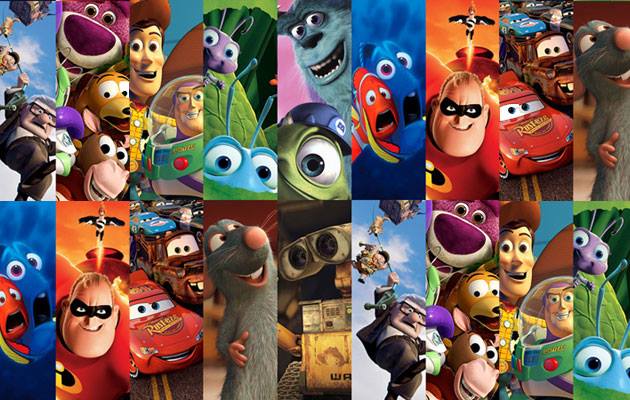 Animation is an art form that brings characters and stories to life through the illusion of movement, it is a way of telling stories and stimulating the imagination, whether in 2D or 3D. Animation has always enchanted people of all ages. We can see animation in Disney movies and cartoons on TV, which are examples of 2D animation, where artists draw each frame by hand. On the other hand, 3D animation, seen in films such as “Toy Story” and “Frozen”, uses computers to create digital models of characters and settings, offering a visually realistic and immersive experience.
CONTEMPLATE
DO YOU KNOW WHAT IS PROGRAMMING LANGUAGE?
Programming language is a set of rules and symbols used to write code that computers can understand and execute.
Scratch is software that allows you to write a sequence of commands to instruct the computer on what should be done. Created by the Media Lab at MIT (Massachusetts Institute of Technology) in 2007, it stands out for its ease and accessibility, allowing people from all over the world to begin their studies in programming.

![]()
It is easy to learn programming through Scratch, as it uses a graphical interface and blocks that are assembled like LEGO.
Watch the video and see some project examples:
WHAT CAN BE CREATED USING SCRATCH?

With Scratch, you can create a variety of projects, such as interactive stories, games, animations, educational projects and interactive applications.
The platform offers a wide range of creative possibilities for users to explore.
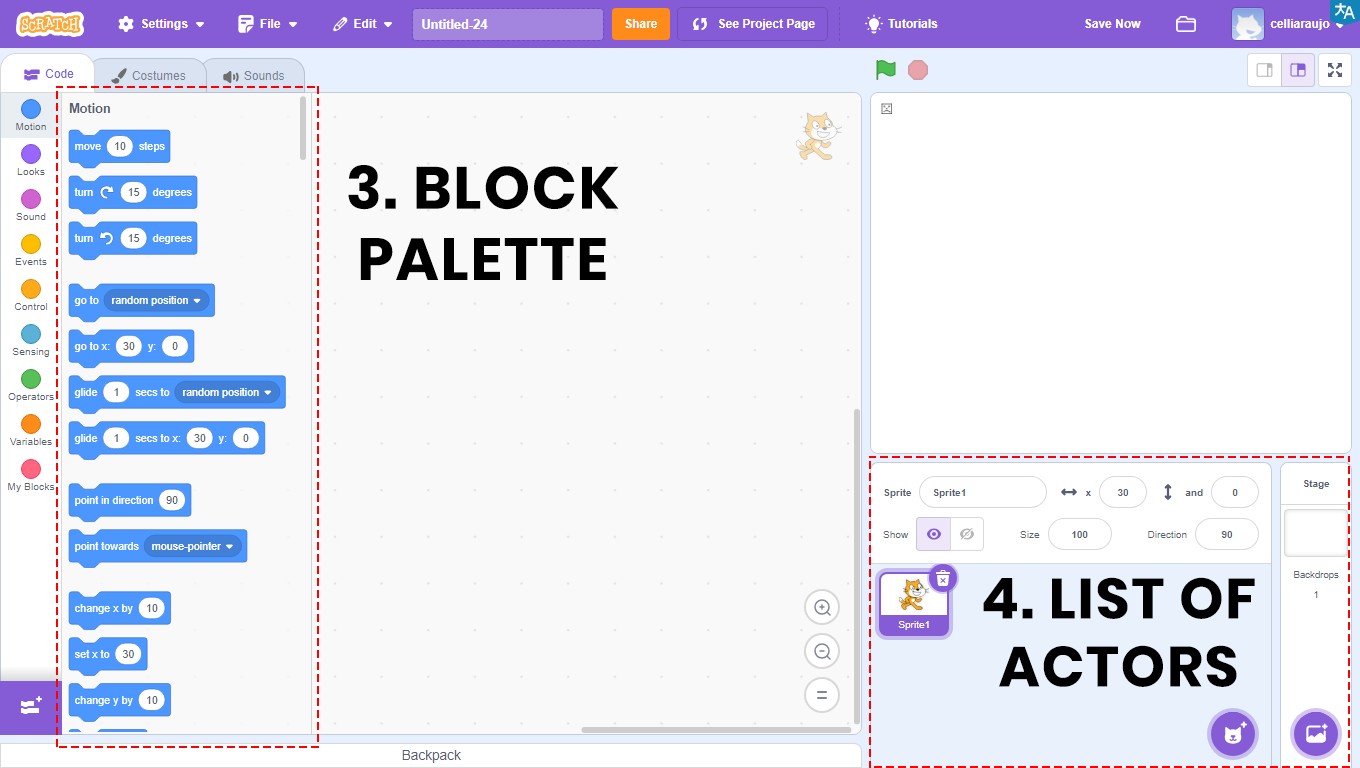
GETTING TO KNOW THE PROGRAM INTERFACE
The program’s interface is very intuitive and simple to use.
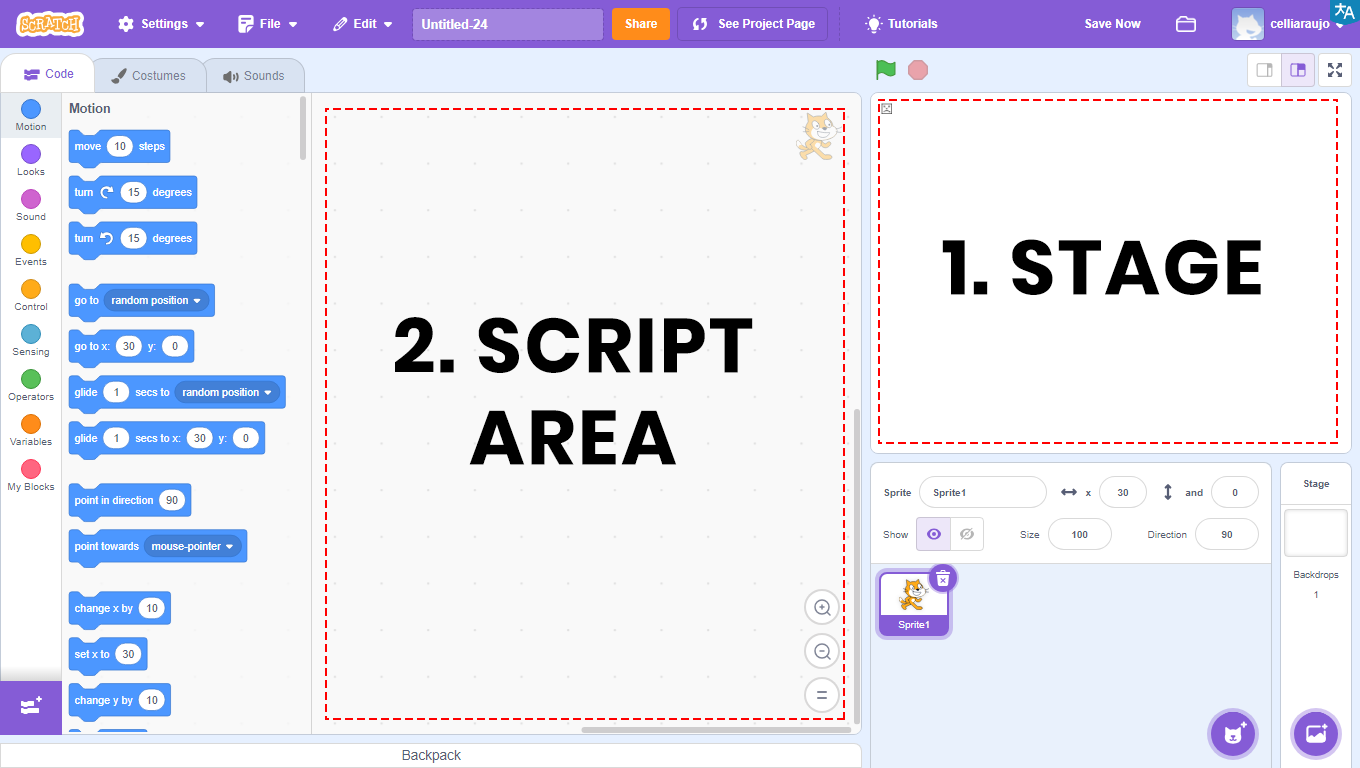
1 – Stage: area that will allow the visualization of the entire graphic and animated part of the project, and where the tests will be carried out.
2 – Script Area: area where the programming will take place. Here will be the codes that will be developed and the blocks that will be dragged.
![]()
3 – Block Palette: all used blocks will be in this area. They are divided by color, and within each color, the blocks have different shapes. Each color is responsible for a function, and depending on the format, the block returns or reads a type of value.
In the Scripts Area there will be the blocks that will be compiled, that is, transformed into a program, which will be viewed on the Stage.
4 – List of Actors and Scenarios: It is the space where we can insert and modify the images displayed on the stage. Actors can range from characters, animals, people, objects, food, letters and numbers. Scenarios, on the other hand, are backgrounds, which can be images of real locations or artistic backgrounds, used to personalize the programming.
CONSTRUCT
SAY SOMETHING
Access Scratch at https://scratch.mit.edu/ and add two actors to compose simple dialogue. Follow the step by step and, at the end, see the animation you created.
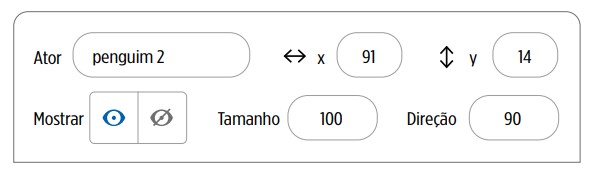
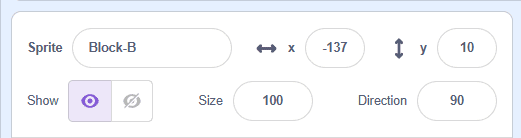
GETTING TO KNOW SOME FEATURES OF THE PROGRAM
1. To rename the actors, click on the field next to the text “Actor”.
2. To adjust the position of the actors on the stage, enter numbers in the x and y coordinate fields.
3. To make the actor visible or invisible, click on the icons in the “Show” item.
4. To change the size of the sprite, adjust the numbering in the “Size” field.
5. To change the actor’s direction, adjust the numbering in the “Direction” field.
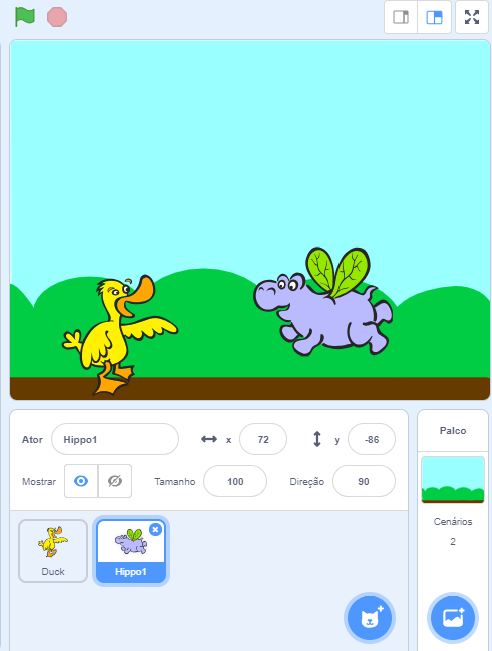
CREATING A DIALOGUE
1. Click on the actor Cat and than on the trash icon to delete it.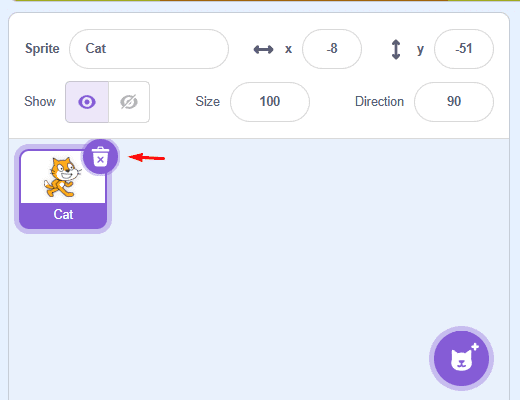
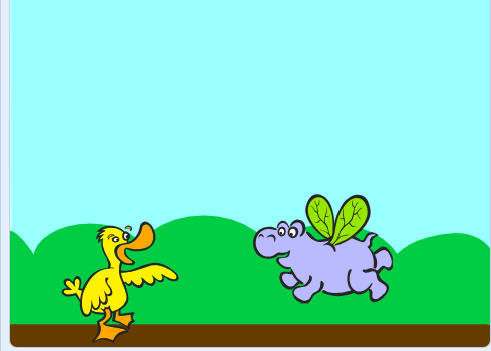
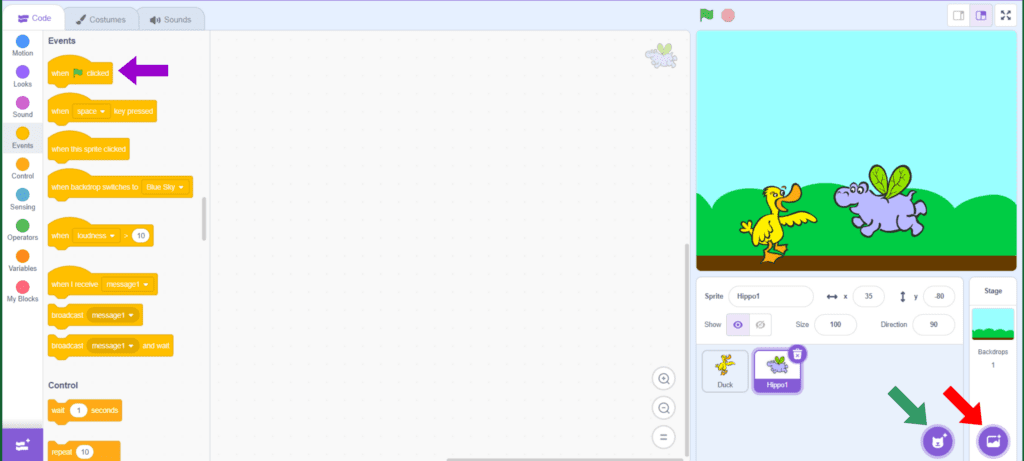
2. Click on the location indicated by the green arrow to insert the characters (new Actors: Duck and Hippo).
3. Click on the location indicated by the red arrow to insert the garden background as a new Scenery (Blue Sky).
4. Click on the character to begin entering the schedule.
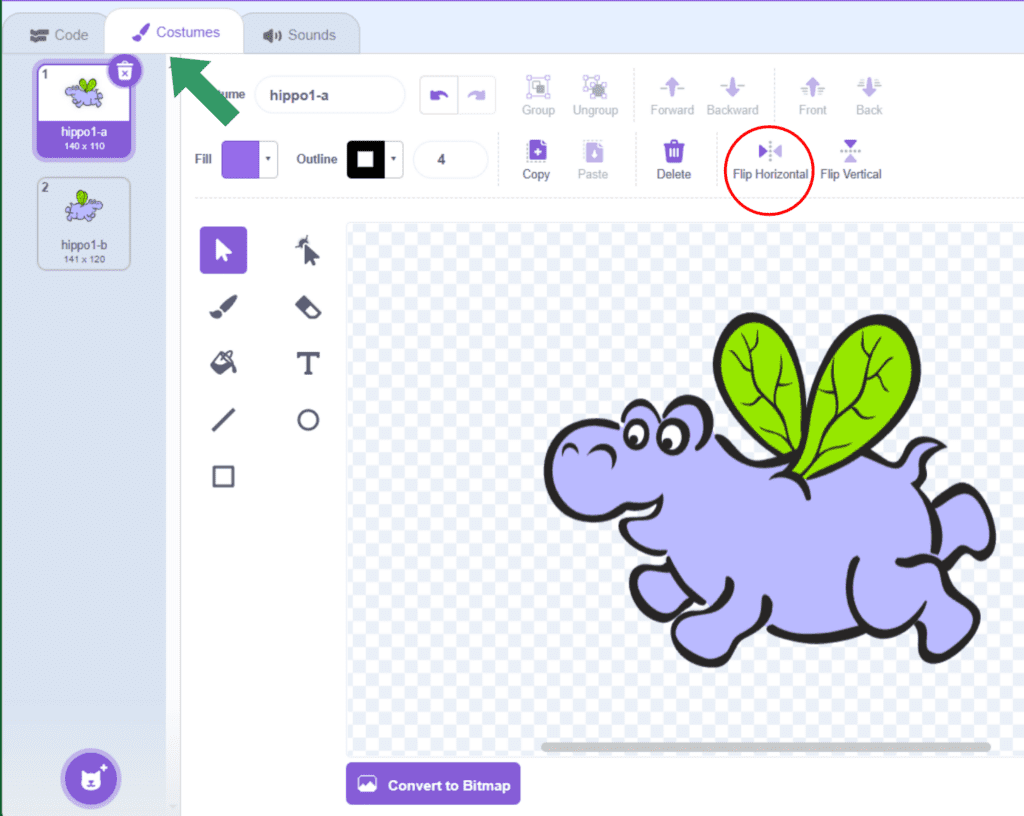
5. To invert the character’s position, click on the Costumes tab, indicated by the green arrow, and on the Mirror Horizontally icon (red circle).
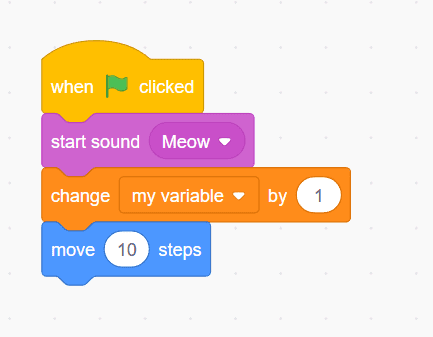
6. In “Code”, click on “Events” and drag the block “when ![]() clicked” to the Script Area (purple arrow).
clicked” to the Script Area (purple arrow).
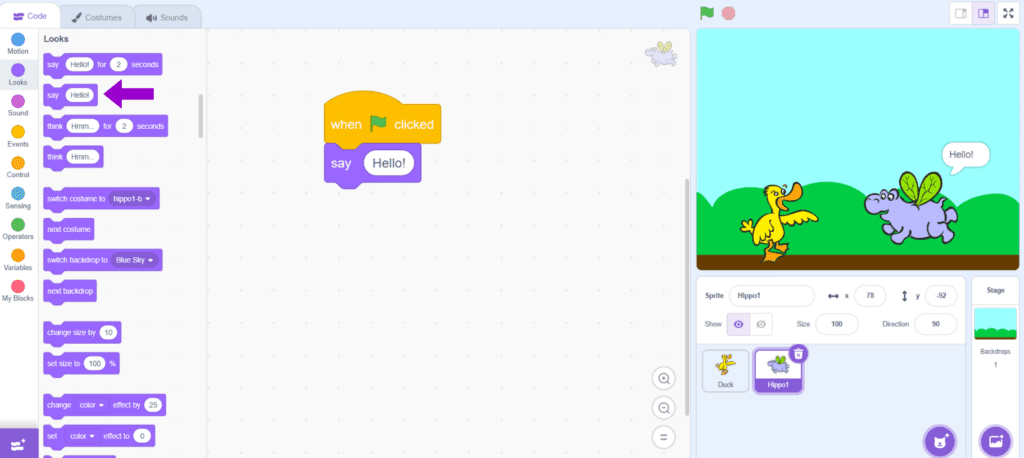
7. Then click “Appearances” and drag the block “say Hello!” to the Script Area (purple arrow). Write a sentence inside the white box (where it says “Hello!”).
8. Select the other character, and in “Code” click on “Events” and drag the block “when ![]() clicked” to the Script Area.
clicked” to the Script Area.
9. Then click “Control” and drag the block “wait 1 sec” (purple arrow).
10. Now click on “Appearances” and drag the block “say Hello!” to the Script Area. Write the second sentence of the dialogue inside the white box.
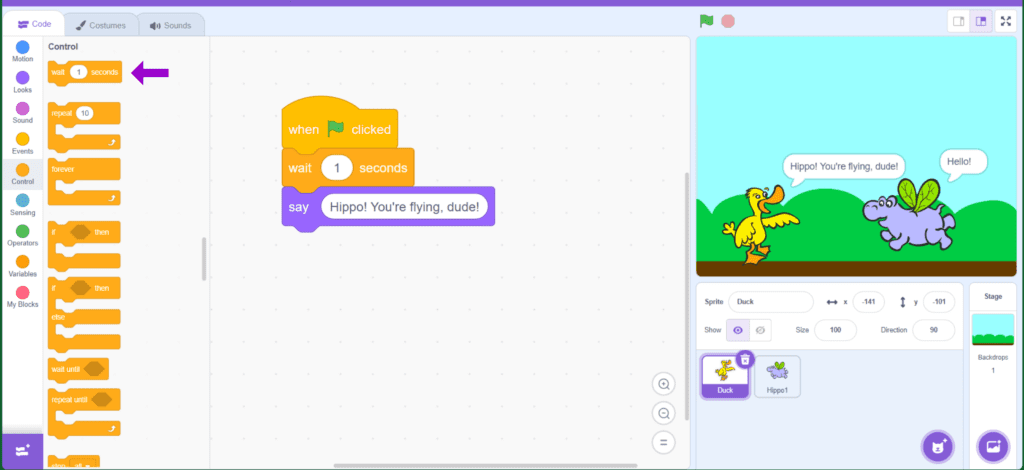
The first dialogue will be ready. Continue the story.
CONTINUAR
Share the construction results with the class:
• Did you manage to change your character’s costume? And mirror?
• What dialogue did you create?