CONNECT
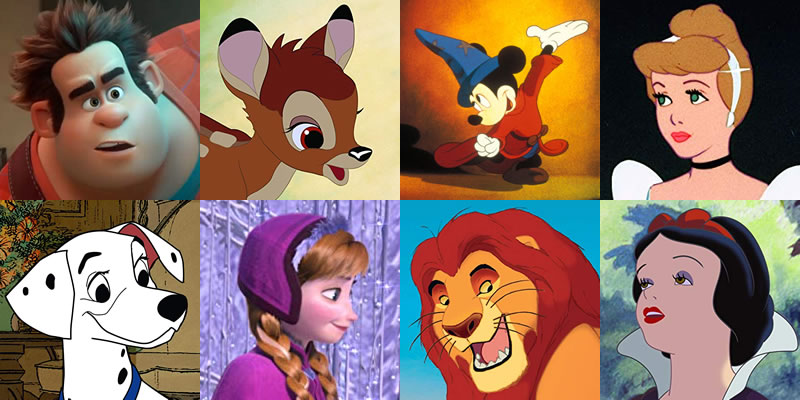 Animation is the technique of creating the illusion of movement through static images. It has evolved from the optical devices of the 19th century to today’s digital advancements. Initially in 2D, with hand-drawn images, and later in 3D, with digital models manipulated by computers. Classic films like those from Disney and innovations like “Toy Story” propelled 3D animation. Despite this, 2D animation is still valued for its style and nostalgia. Today, animation is found in a variety of forms and platforms, from cinemas to online content and games. Constant technological evolution continues to drive the industry, with areas like virtual reality and real-time animation emerging as new territories for innovation.
CONTEMPLATE
DO YOU KNOW WHAT A PROGRAMMING LANGUAGE IS?
A programming language is a set of instructions that allows humans to communicate with computers, providing directions on what to do and how to perform those tasks.
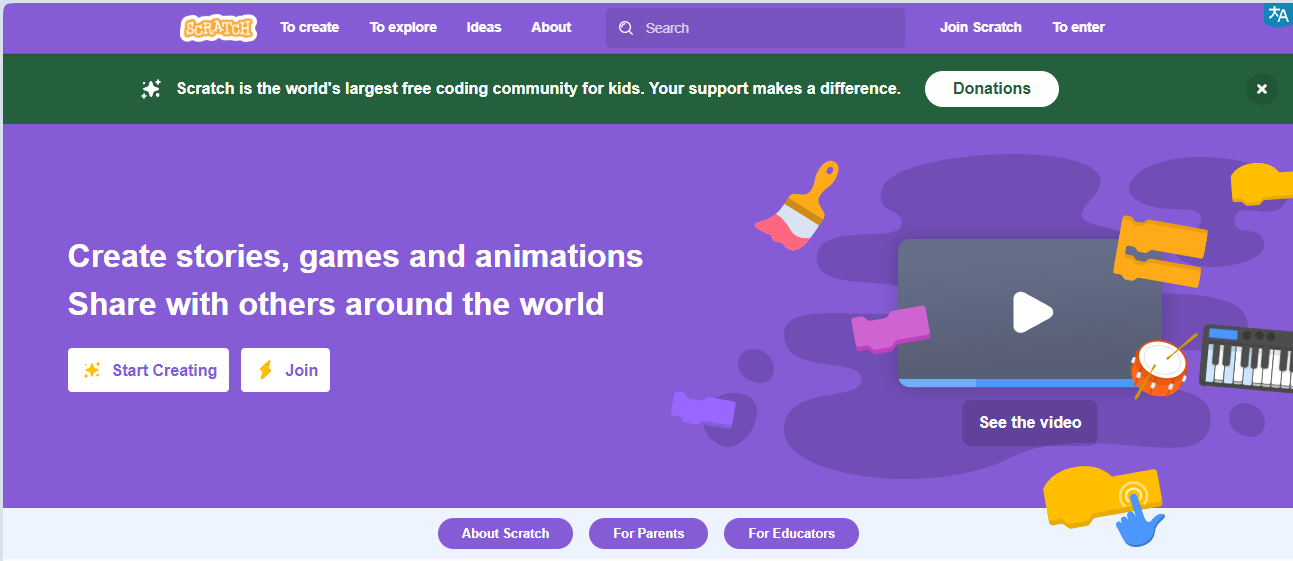
Scratch, a visual programming language created by MIT, provides an accessible and fun way to learn programming, replacing lines of code with colorful blocks in a graphical interface. It can be accessed at: https://scratch.mit.edu/
Learning to program with Scratch is simple because it uses a graphical interface and blocks that fit together like LEGO pieces.
Watch the video and see some project examples:
WHAT CAN BE CREATED USING SCRATCH?

With Scratch, it is possible to create a variety of projects, such as interactive stories, games, animations, educational projects, and interactive applications.
The platform offers a wide range of creative possibilities for users to explore.
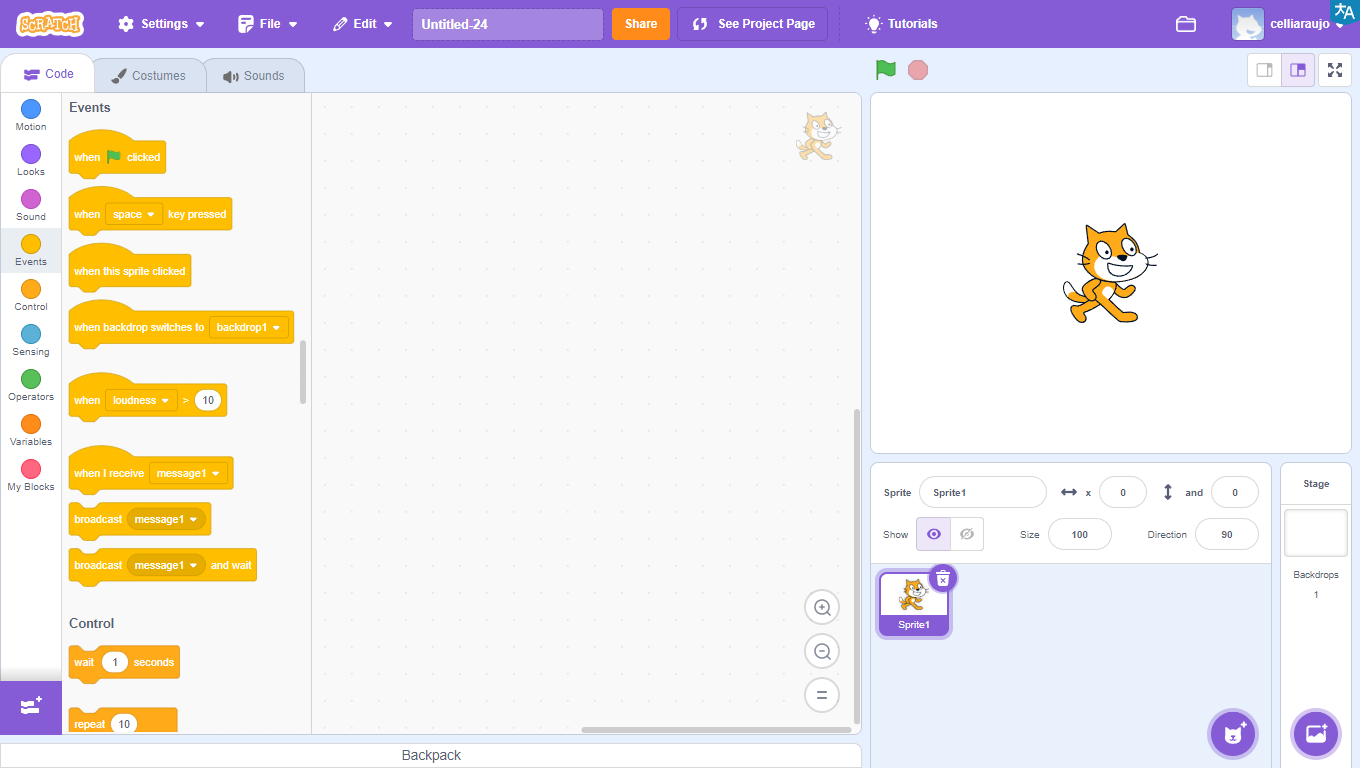
UNDERSTANDING THE PROGRAM INTERFACE
The program interface is very intuitive and easy to use.
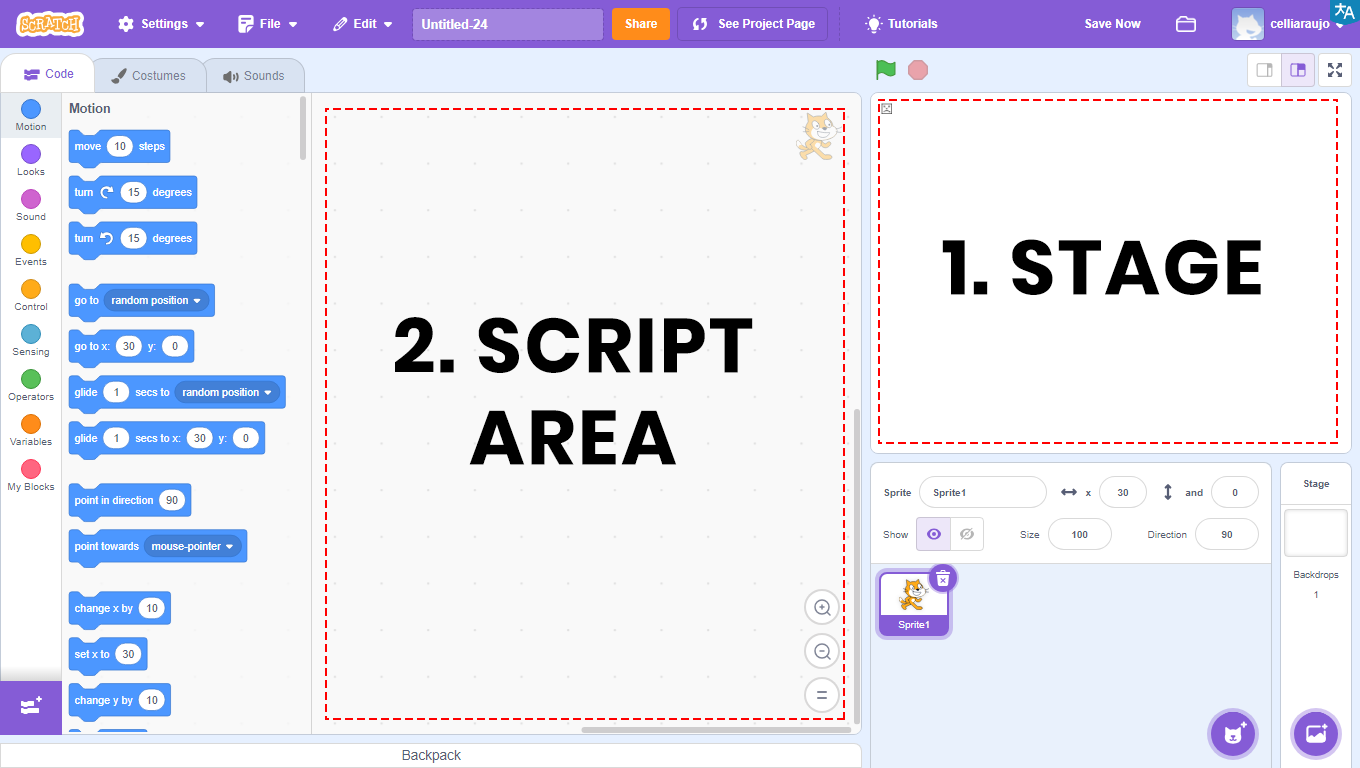
1 – Stage: area that will allow the visualization of all graphical and animated parts of the project, and where tests will be conducted.
2 – Scripts Area: area where the programming will take place. Here will be the codes that will be developed and the blocks that will be dragged.
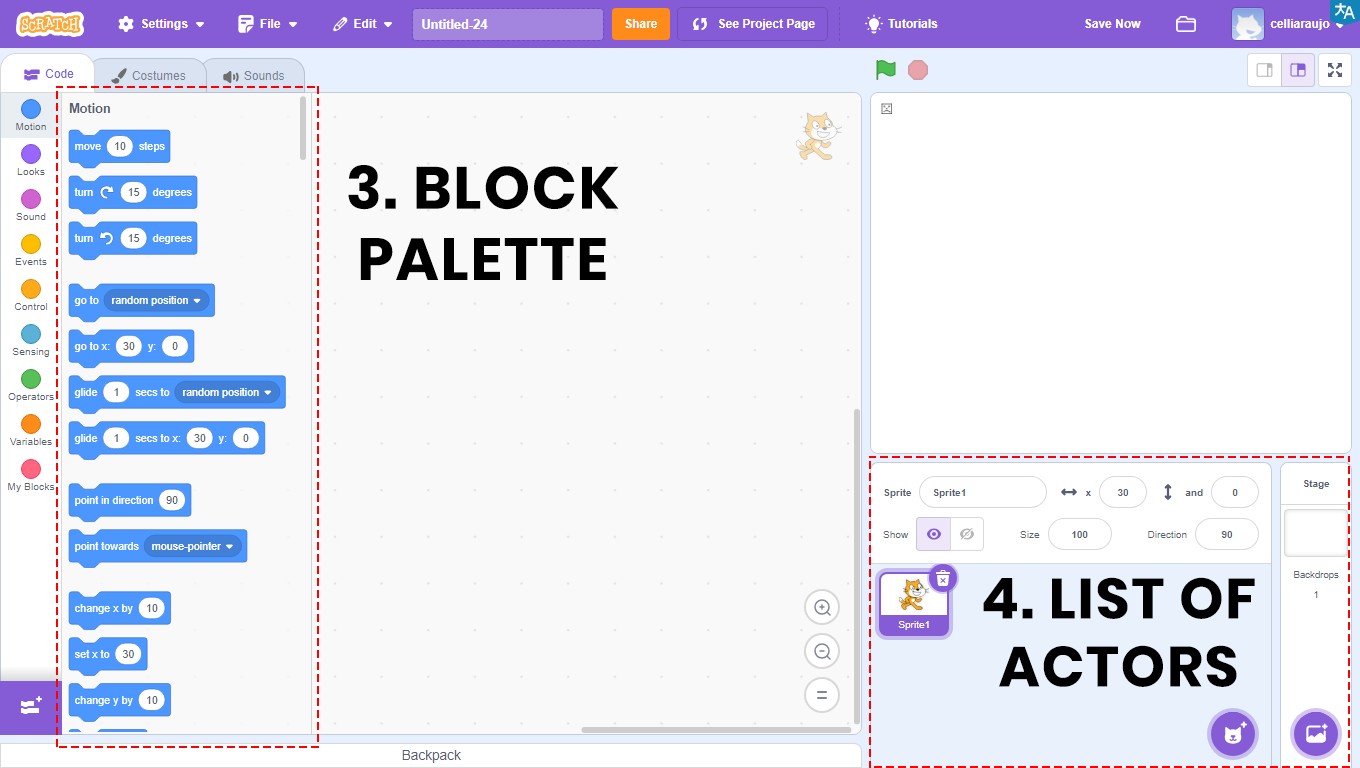

3 – Blocks Palette: all the blocks used will be in this area. They are color-coded, and within each color, the blocks have different shapes. Each color is responsible for a function, and depending on the shape, the block returns or reads a type of value.
In the Scripts Area will be the blocks that will be compiled, that is, transformed into a program, which will be visualized through the Stage.
4 – Actors List: area that will allow the visualization, insertion, and alteration of images that will appear on the Stage. Also known as Actors.
BUILD
ADD AN ACTOR
Visit the Scratch website at https://scratch.mit.edu/ and add two Actors to create a simple dialogue. Follow the step-by-step instructions and, when finished, click the green flag and watch the animation you developed.
PROGRAMMING THE PROJECT
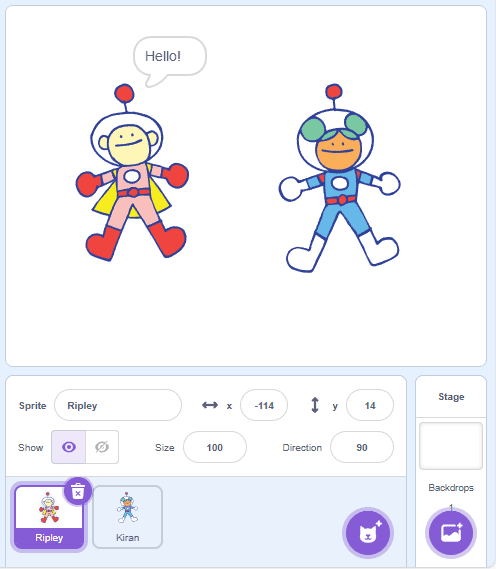
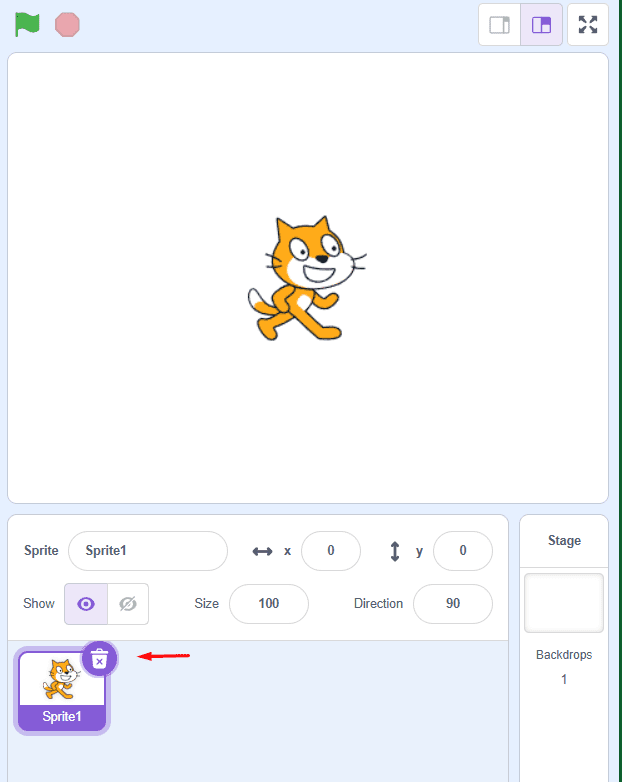
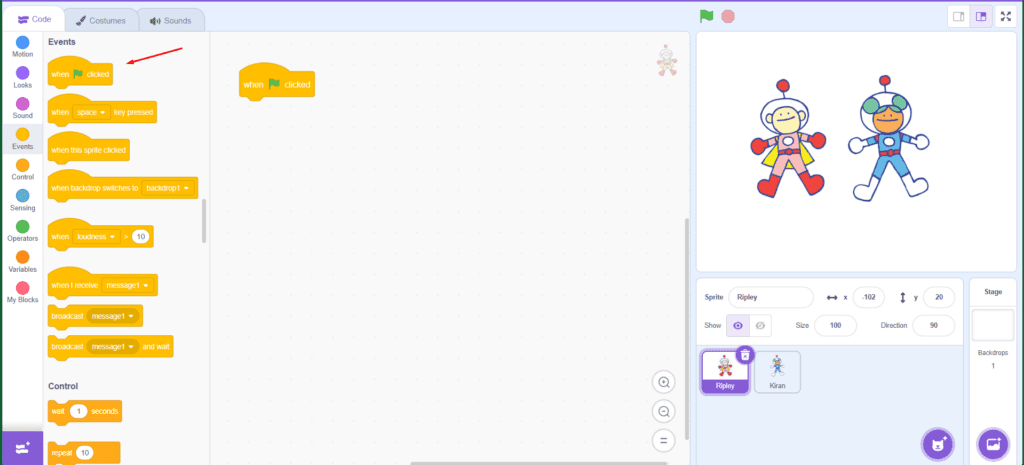
1. Click on the Cat Actor and then on the trash can icon to delete it.
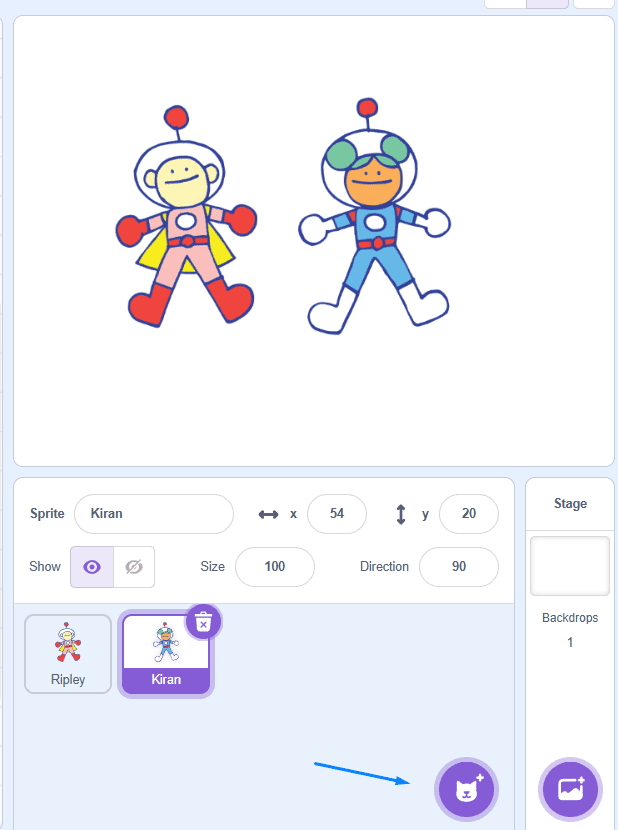
2. Click where indicated by the green arrow to insert the Actors: Ripley and Kiran.
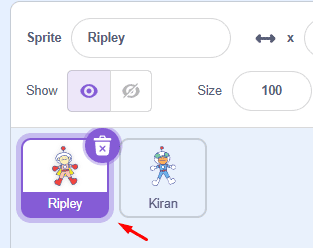
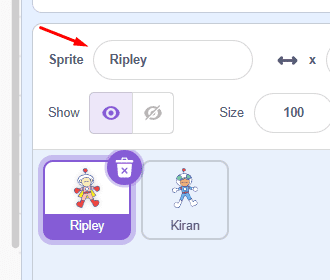
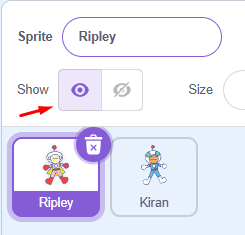
3. To rename the actor, click the area indicated by the red arrow (Figure 1), then in the “Actor” field (Figure 2) marked by another red arrow, enter the new name. Then click the other actor and repeat the steps.
4. To adjust the position of the actors on the stage, indicate the numbers in the X and Y coordinate fields, indicated by the yellow arrow, or click on the actor you want to move and drag them to where you want to position them.
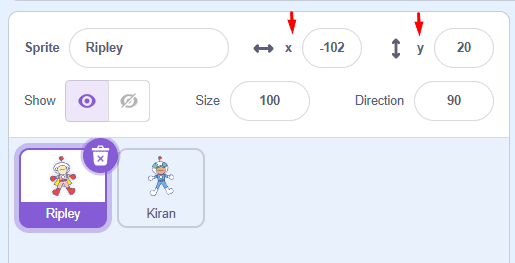
5. To make the actor visible or invisible, click the Show field, indicated by the purple arrow.
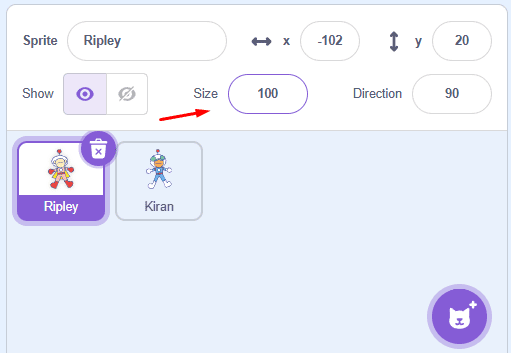
6. To change the size of the actor, adjust the number in the Size field, indicated by the pink arrow.
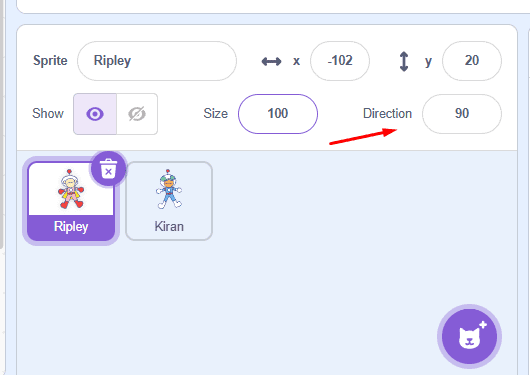
7. To change the direction of the actor, adjust the number in the Direction field, indicated by the blue arrow.
CREATING A DIALOGUE FOR RIPLEY
8. Select the Ripley Actor, in Codes, click on “Events” and drag the block “when ![]() clicked” to the Scripts Area (purple arrow).
clicked” to the Scripts Area (purple arrow).
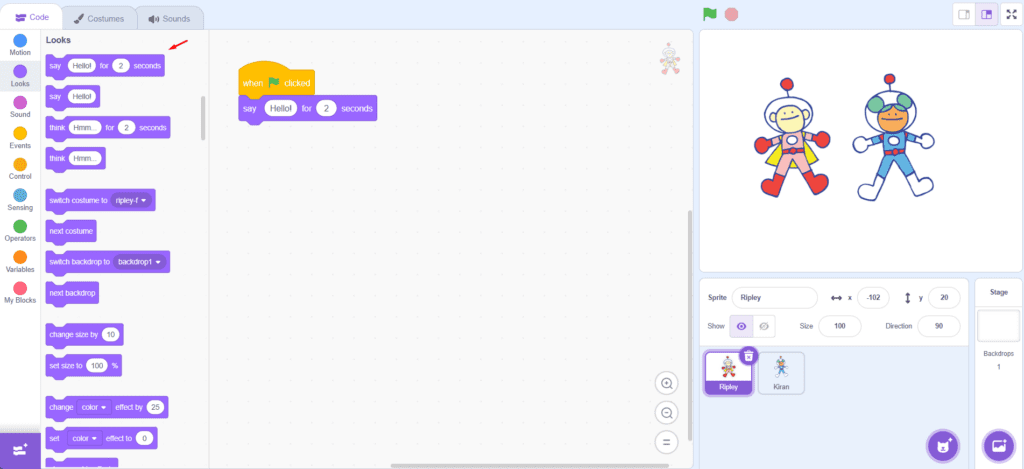
9. Then click on “Looks” and drag the block “say…for ….seconds” to the Scripts Area (purple arrow). Write a phrase inside the white box (where it says “Hello!”).
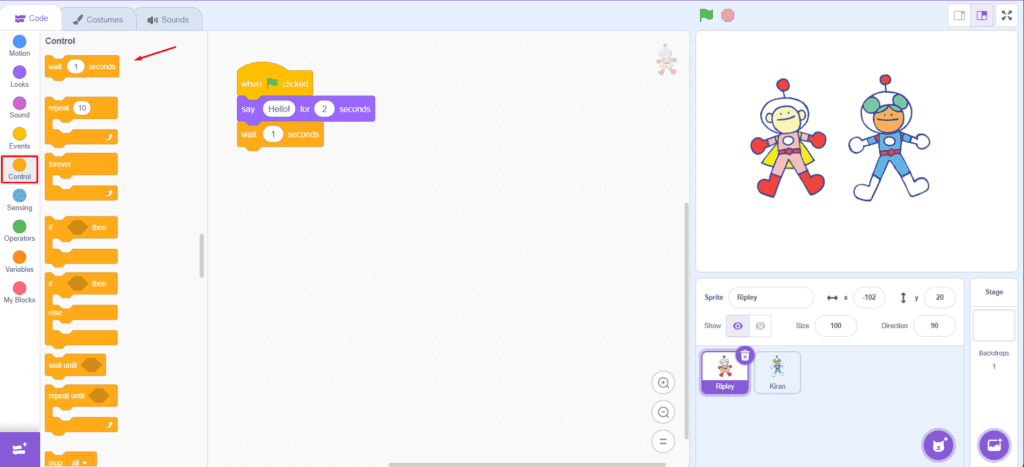
10. Now click on “Control” and drag the block “wait 1 sec” (blue arrow).
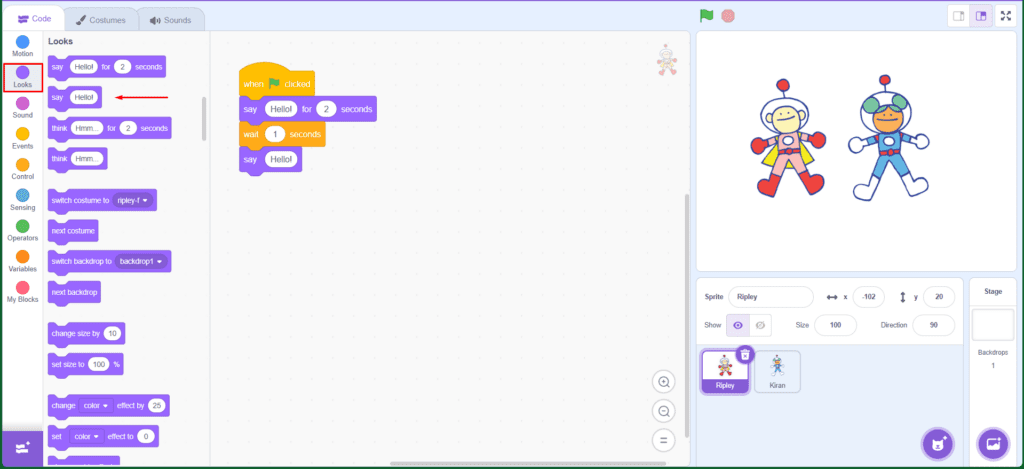
11. Click on “Looks” and drag the block “say Hello!” to the Scripts Area (pink arrow). Write a phrase inside the white box (where it says “Hello!”).
12. Now it’s your turn, add a third Actor and finish the dialogue.
CONTINUE
Share the results of your construction with the class:
- In the color palette, what is the function of Control?
- How can a new dialogue be inserted?