CONNECT
DO YOU KNOW WHAT A PROGRAMMING LANGUAGE IS?
A programming language is a set of instructions that allows humans to communicate with computers, providing indications of what to do and how to perform these tasks.
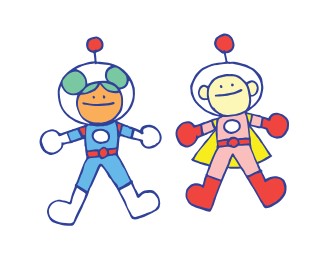
We use the Scratch programming language to create interactive projects, develop ideas creatively, and explore logic and programming concepts in a simple and intuitive way.
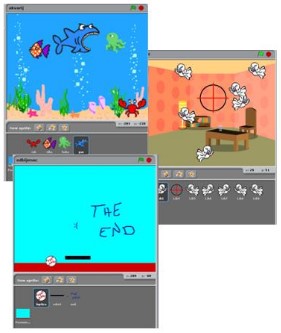
Watch the video and see some examples of projects:
EXPLORE
At this moment, we will explore the programming language using the Scratch platform. This tool is extremely educational, allowing students to understand programming concepts, create animations, develop games, and also save and publish their projects. With Scratch, it is possible to produce a wide variety of works, such as interactive stories, games, animations, educational projects, and interactive applications. The platform offers countless opportunities for users to exercise their creativity and experiment with new ideas.
GETTING TO KNOW THE PROGRAM
Access the website: https://scratch.mit.edu
ABOUT THE SCRATCH LANGUAGE:
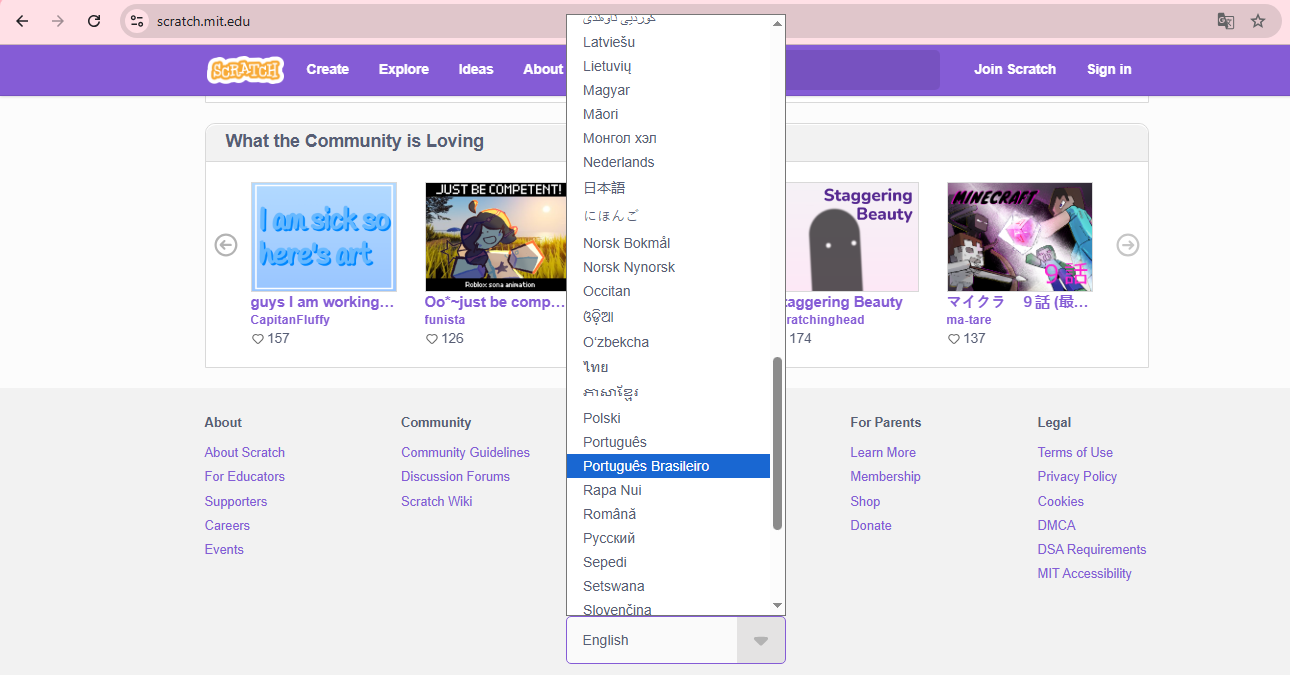
If Scratch is in Portuguese, you can change the language by following these steps:
At the bottom of the home page, there is a box that shows the current language.
If it shows Portuguese 🇧🇷, click on it and choose the option 🇺🇸 English.
ATTENTION:
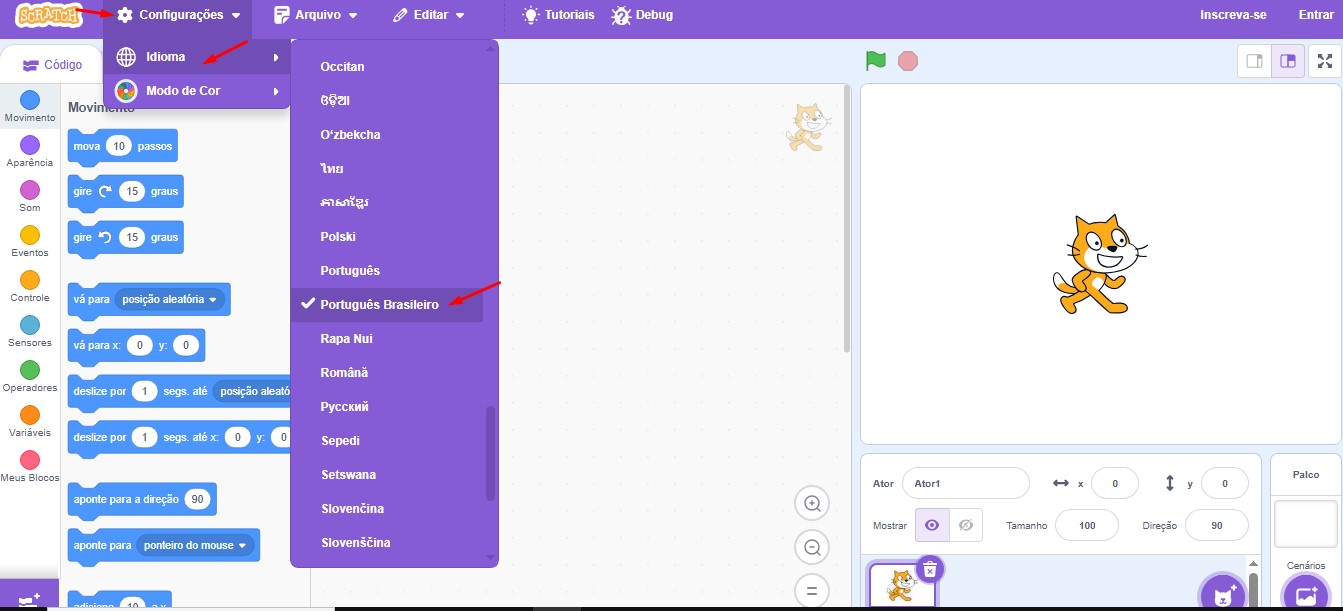
If you are already on the Scratch creation screen, it is also possible to change the language directly there. Follow these steps:
- Click on the gear icon next to the Scratch logo.
- From the displayed options, choose Languages.
- Then scroll through the list until you find English.
- The change will be applied automatically.
LEARNING ABOUT SCRATCH
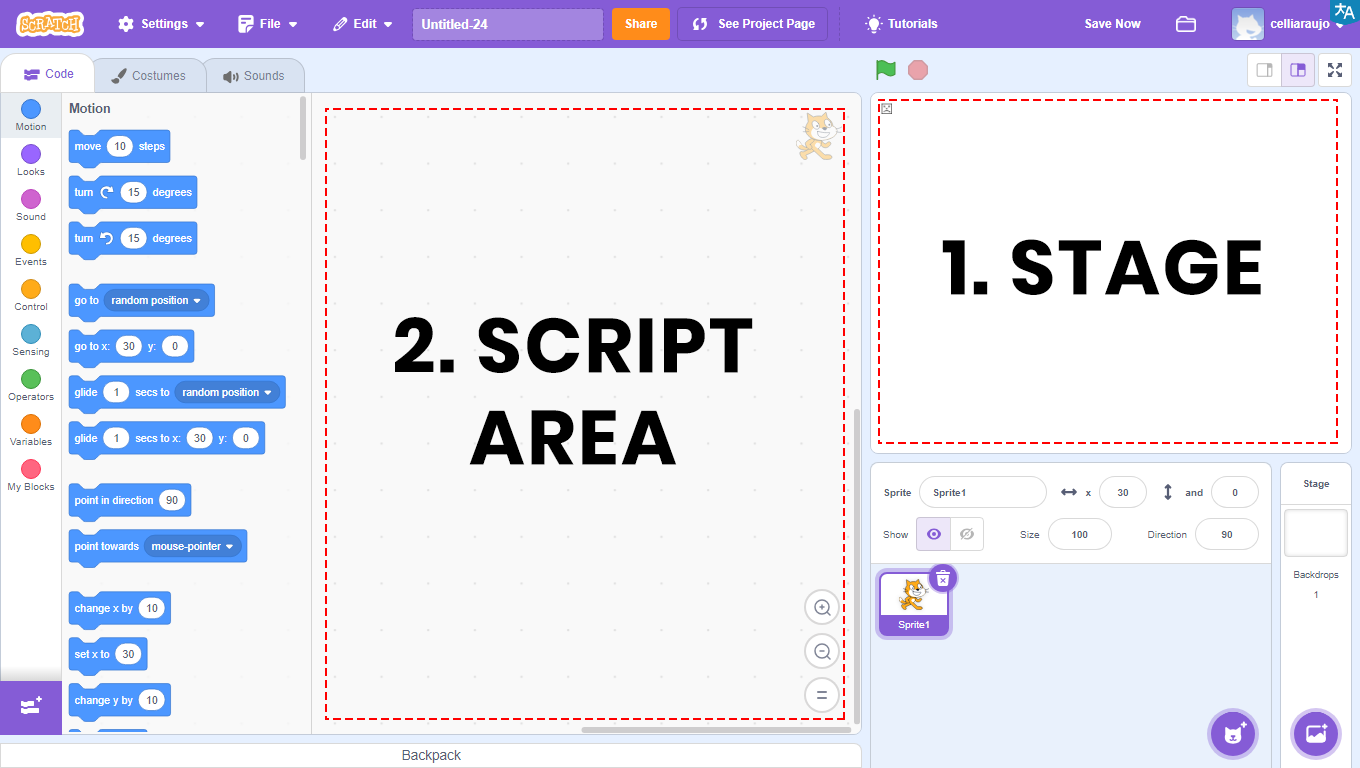
Scripts Area:
This is the space where the code blocks used to build projects are organized. It is to this area that we drag the blocks, as they determine how the characters (sprites) will act, as well as control costume changes, sounds, and backdrops.
DETAILING SCRATCH
In this area of the platform, there are three main commands, which will be explained in more detail below.

PROGRAMMING CODES / BLOCKS
In Scratch, the instructions that define what characters will do are presented in colorful blocks. Each color corresponds to a type of command that controls movement, appearance, sounds, and different decisions within the project. Below, you will learn the function of each group of blocks.
MOTION
Controls the movement and rotation of sprites within the scripts area.
Examples: move, turn, point in a direction, go to a random position.
LOOKS
Changes costumes, colors, backdrops, and character expressions.
Examples: next costume, think, switch backdrop, show or hide.
SOUND
Adds sounds, sound effects, music, or voice recordings.
Examples: play sound, stop sound, adjust sound, remove sound, change volume.
EVENTS
Trigger the start of programming actions.
Examples: when green flag clicked, when a key is pressed, when a message is received.
CONTROL
Creates repetitions, pauses, and logical conditions.
Examples: repeat, wait 1 second, forever, if/else.
SENSING
Allow the project to detect what happens during execution.
Examples: touching color?, mouse down?, mouse X position.
OPERATORS
Blocks used to perform calculations, compare information, and create conditions.
Examples: addition, subtraction, comparison.
VARIABLES
Work like small boxes that store information.
Examples: change variable, show variable.
MY BLOCKS
Space to create custom command blocks.
Example: create a new block made by you that executes several instructions at the same time.
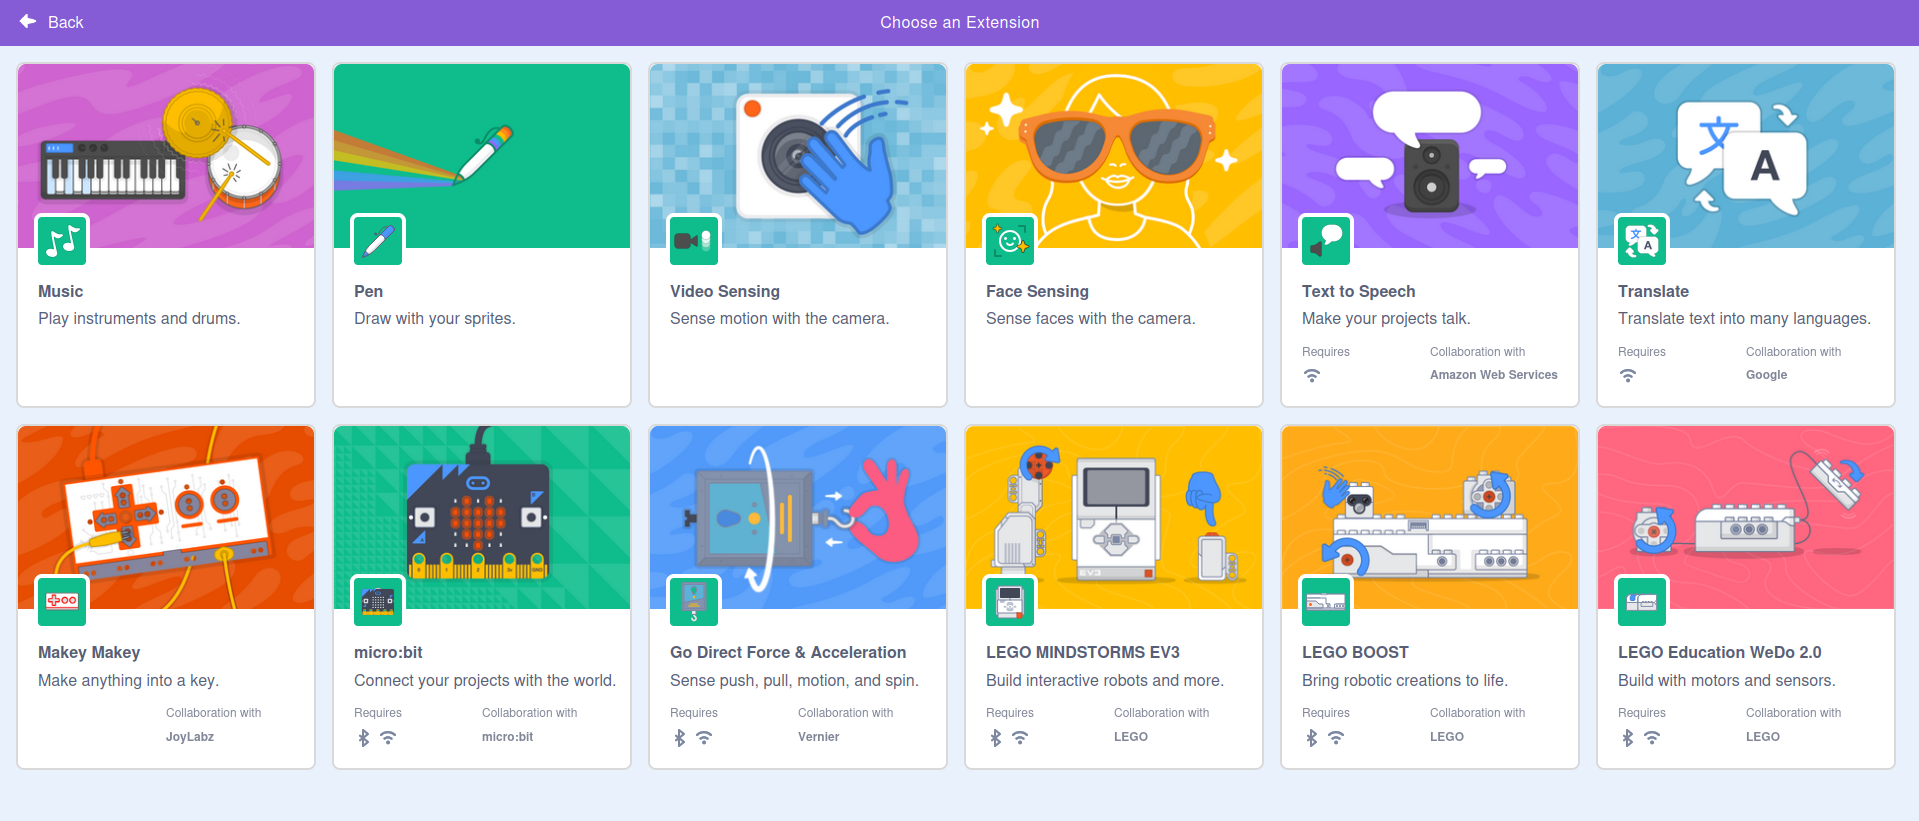
EXTENSIONS
The Extensions area expands Scratch’s resources by adding sets of blocks that do not appear in the main area. With them, it is possible to connect external devices such as Makey Makey, micro:bit, or LEGO, as well as access extra features like text translation, voice detection, advanced music, and video interaction. This makes Scratch even more complete, allowing the creation of more interactive, creative, and technological projects.
STAGE
The stage is the environment where everything happens in Scratch: it is where animations, characters, and games appear. It is in this space that students see, in practice, the result of what they programmed.
When opening a new project, the default character — the well-known Scratch cat — already appears automatically.
The green flag is used to start the project, while the red button stops execution.
SPRITES AND BACKDROPS
Sprites are all the elements that appear on the screen and can be animated, such as characters, objects, or figures that move, speak, or interact according to the programming.
Backdrops form the background of the scene, defining the environment where everything happens, whether it is a landscape, an indoor space, or any other chosen location.
In this panel, it is possible to view, add, modify, or remove both sprites and backdrops from the project.
- Characters/Sprites: figures, objects, or any element that takes part in the action of the project.
- Backdrops: represent the environment where everything happens, serving as the scene background — such as a beach, forest, or city.
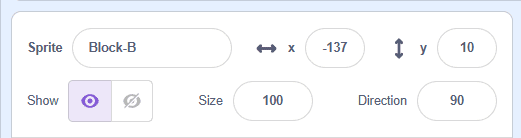
- Sprite Name/Character Identification: each sprite can be renamed, for example, changing “Sprite1” to “Cat,” “Player,” or “Ball.” This helps with organization, especially when multiple characters are part of the project.
SIZE:
Allows you to adjust the size of the character, making it larger or smaller.
- The value 100 corresponds to the original size. Smaller numbers reduce the image, while larger numbers enlarge it.
SHOW:
This command allows you to show or hide the character on the screen. When clicked, you define whether the sprite will be visible or not during project execution.
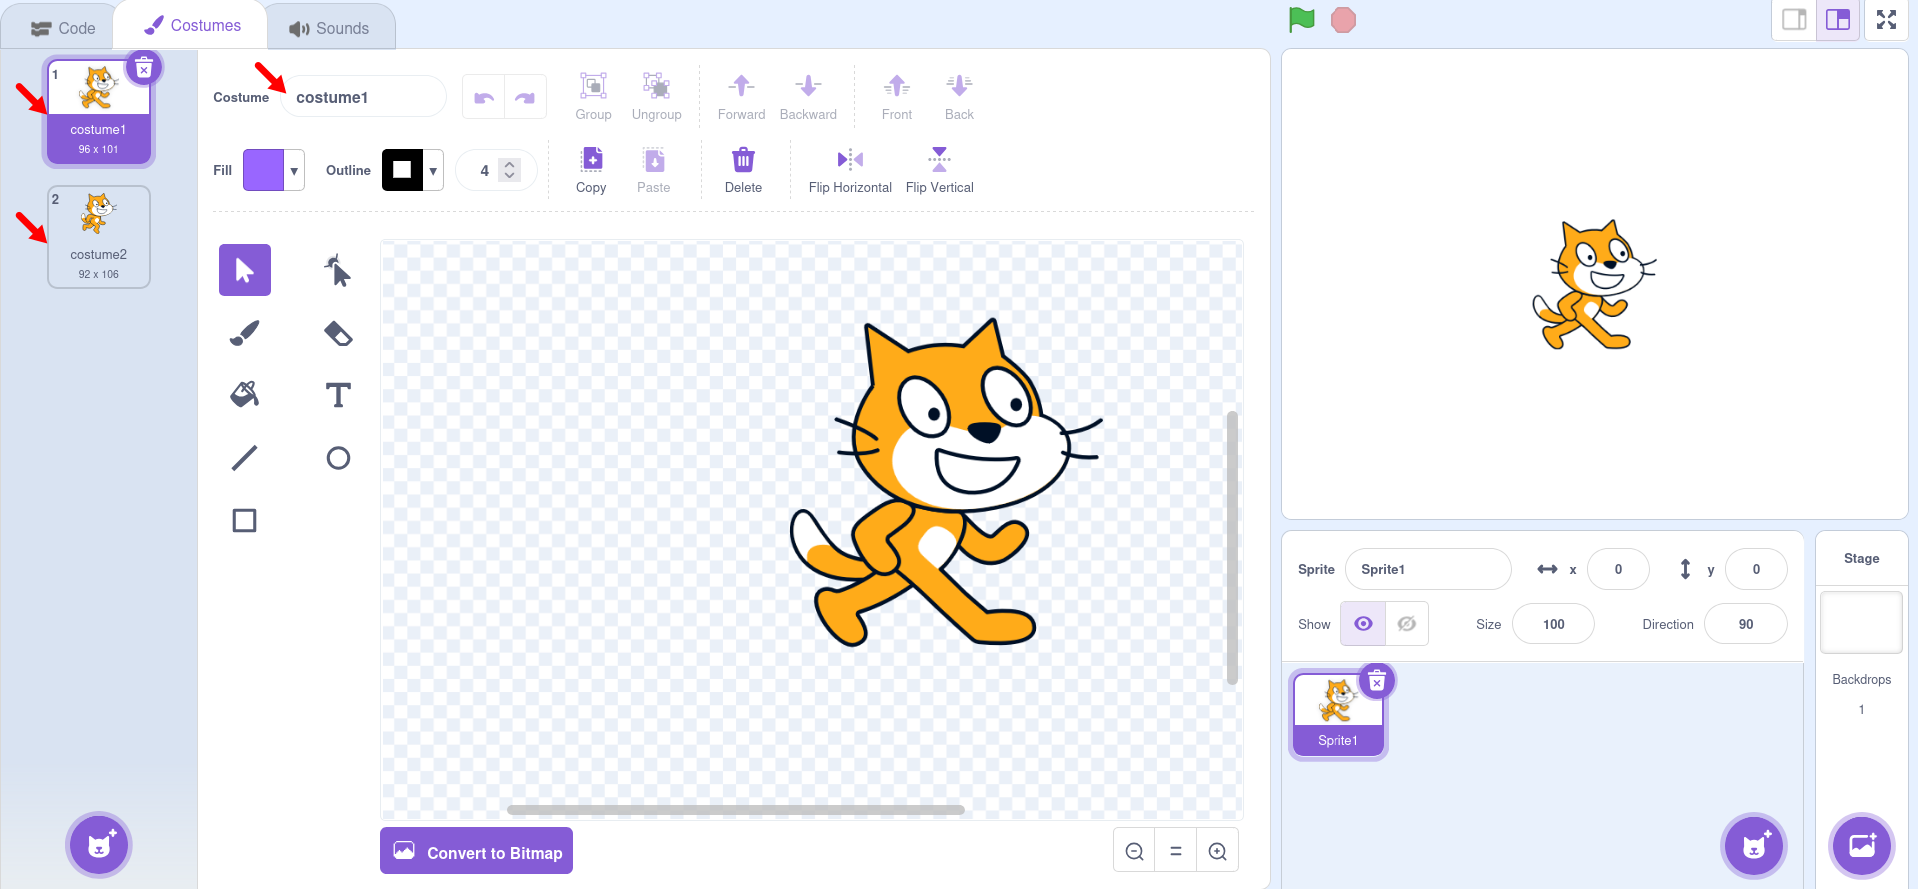
COSTUMES AND SOUNDS
The Costumes tab is the place used to change the character’s appearance. There, you can change the sprite’s look or “outfit,” adjust colors, shapes, and details, as well as create movement effects by drawing different poses. These variations make it possible to animate actions such as walking, jumping, smiling, or running.
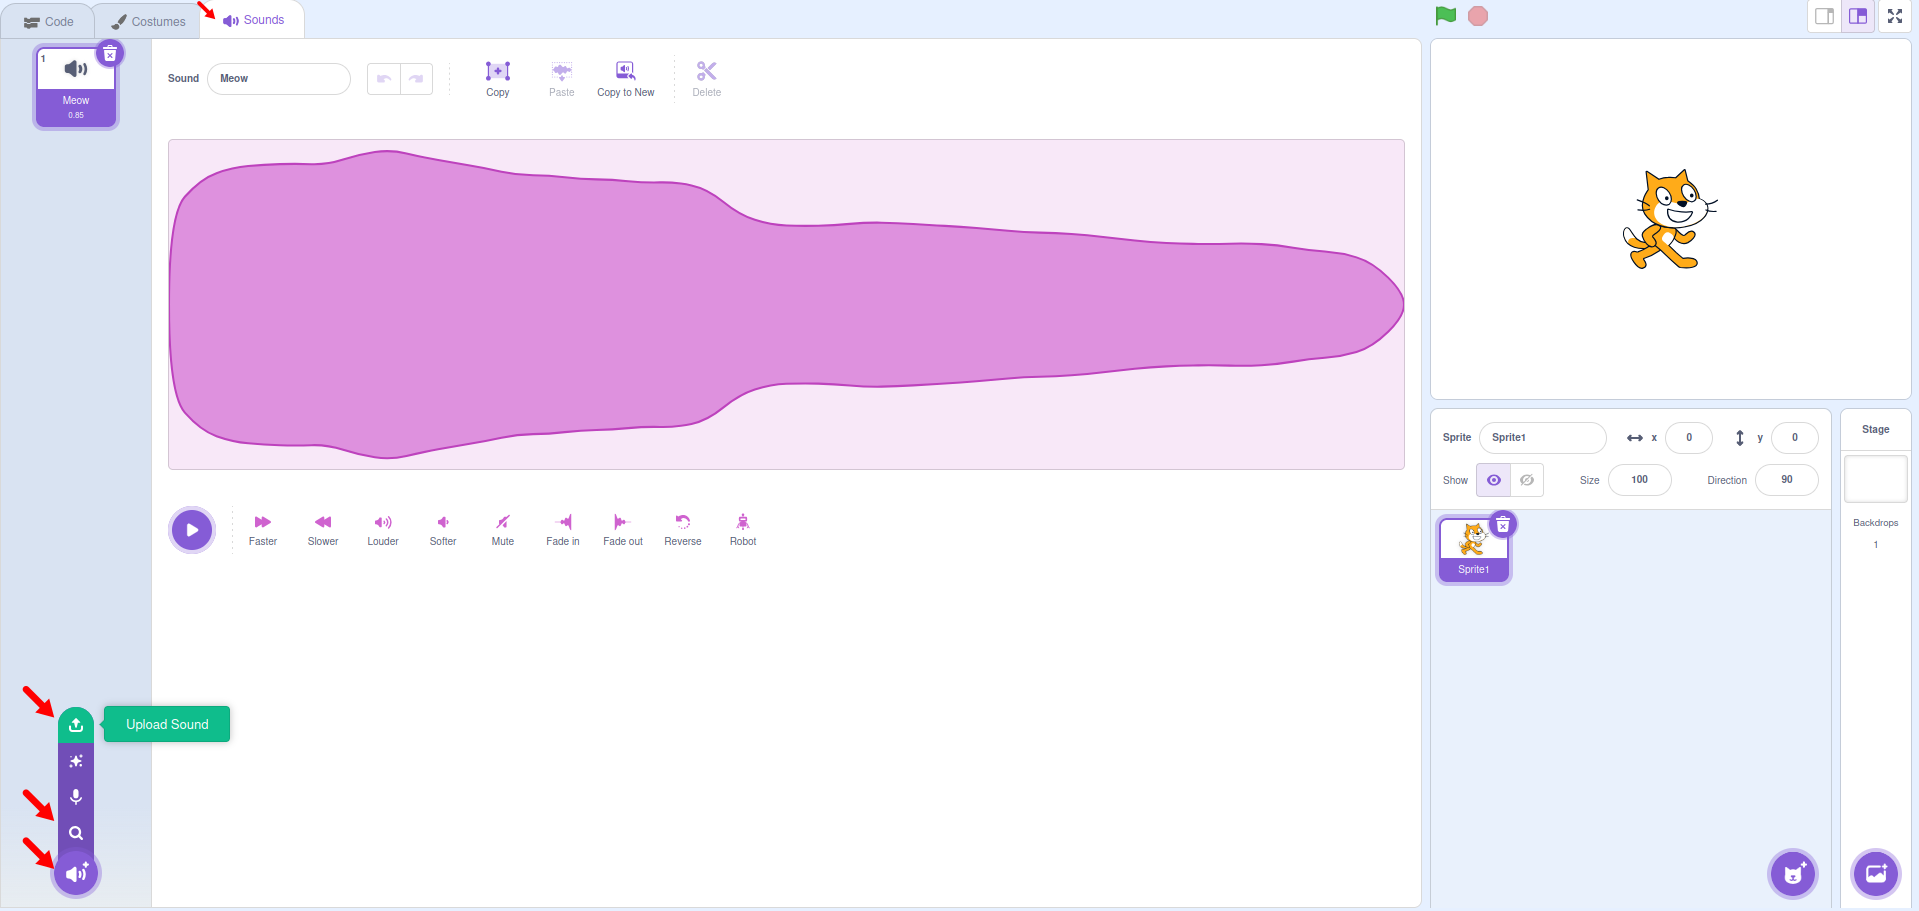
The Sounds tab is the space where you add, listen to, and adjust the audio of your project. There, you can import music and sound effects, record your own voice, and modify aspects such as volume, speed, and other effects. Sounds make the game or animation more interesting and help bring what is being created to life.
Note:
Scratch only accepts two audio formats: WAV and MP3.
Only these formats can be imported, played, and edited on the platform.
BUILD
ADD AN ACTOR
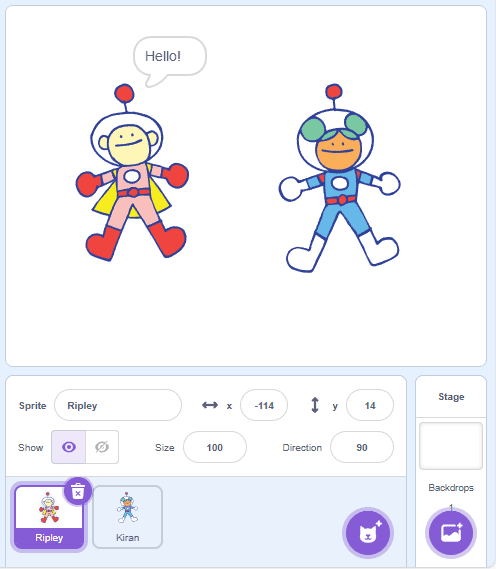
Visit the Scratch website at https://scratch.mit.edu/ and add two Actors to create a simple dialogue. Follow the step-by-step instructions and, when finished, click the green flag and watch the animation you developed.
PROGRAMMING THE PROJECT
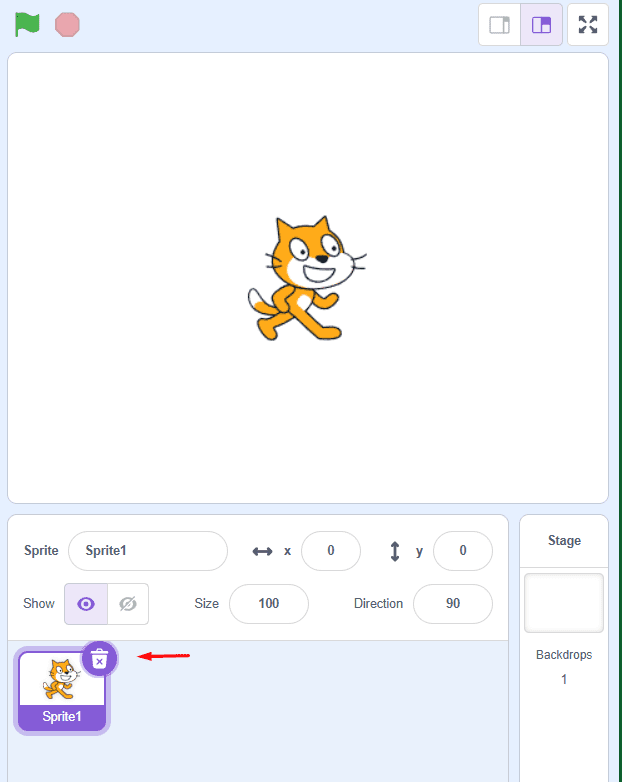
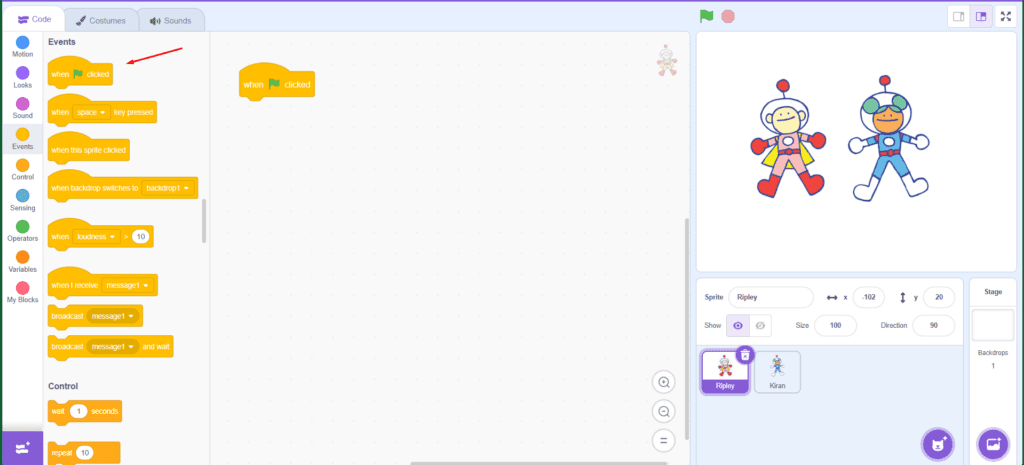
1. Click on the Cat Actor and then on the trash can icon to delete it.
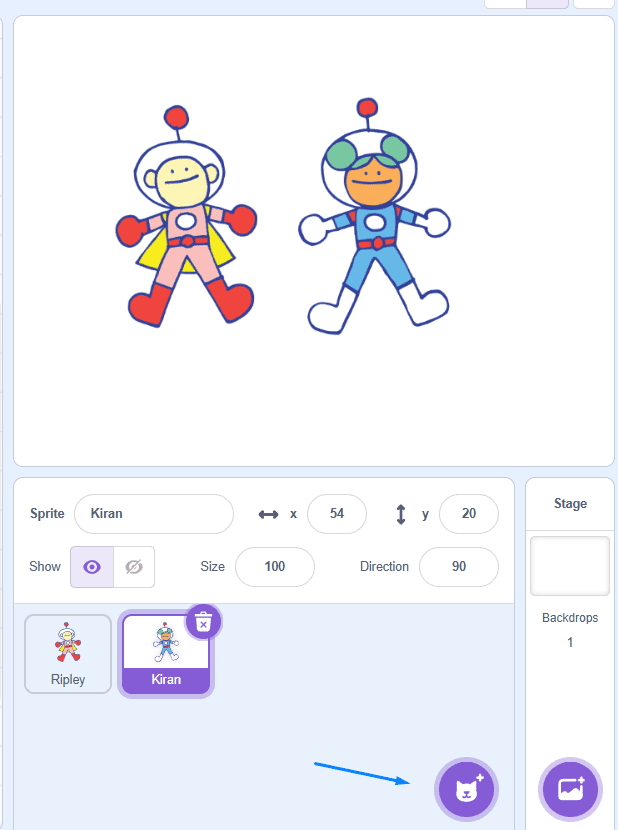
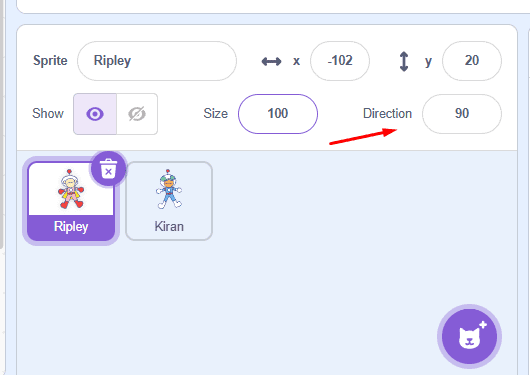
2. Click where indicated by the green arrow to insert the Actors: Ripley and Kiran.
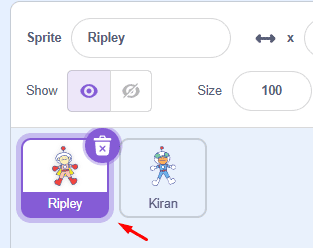
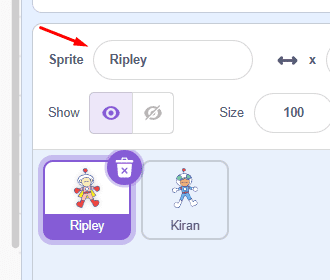
3. To rename the actor, click the area indicated by the red arrow (Figure 1), then in the “Actor” field (Figure 2) marked by another red arrow, enter the new name. Then click the other actor and repeat the steps.
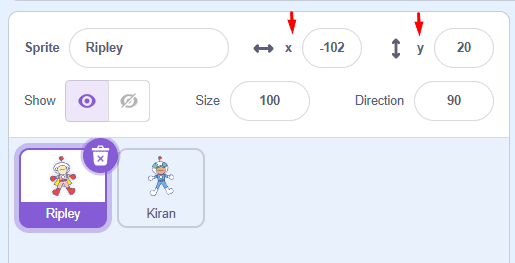
4. To adjust the position of the actors on the stage, indicate the numbers in the X and Y coordinate fields, indicated by the yellow arrow, or click on the actor you want to move and drag them to where you want to position them.
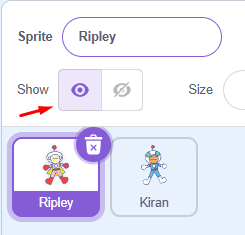
5. To make the actor visible or invisible, click the Show field, indicated by the purple arrow.
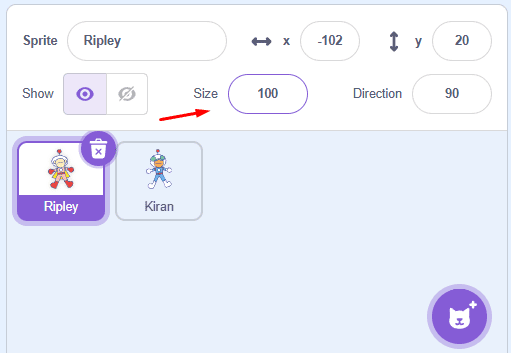
6. To change the size of the actor, adjust the number in the Size field, indicated by the pink arrow.
7. To change the direction of the actor, adjust the number in the Direction field, indicated by the blue arrow.
CREATING A DIALOGUE FOR RIPLEY
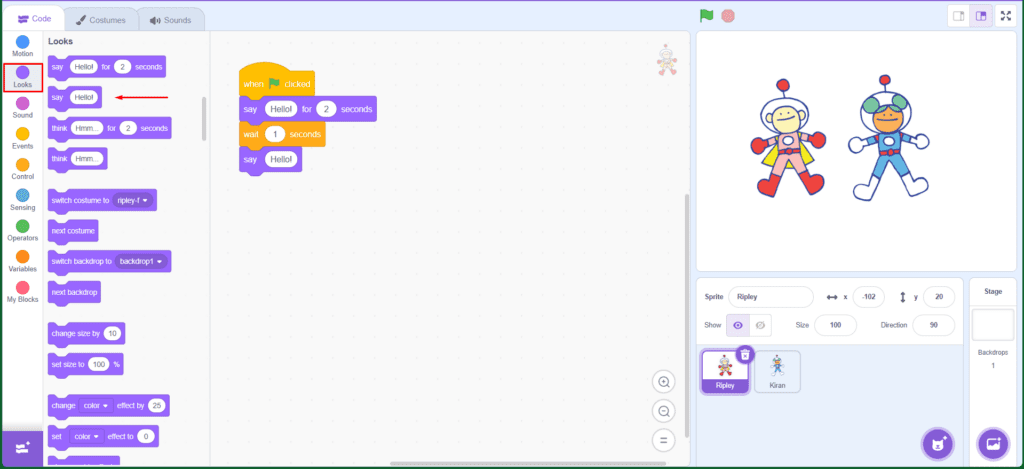
8. Select the Ripley Actor, in Codes, click on “Events” and drag the block “when ![]() clicked” to the Scripts Area (purple arrow).
clicked” to the Scripts Area (purple arrow).
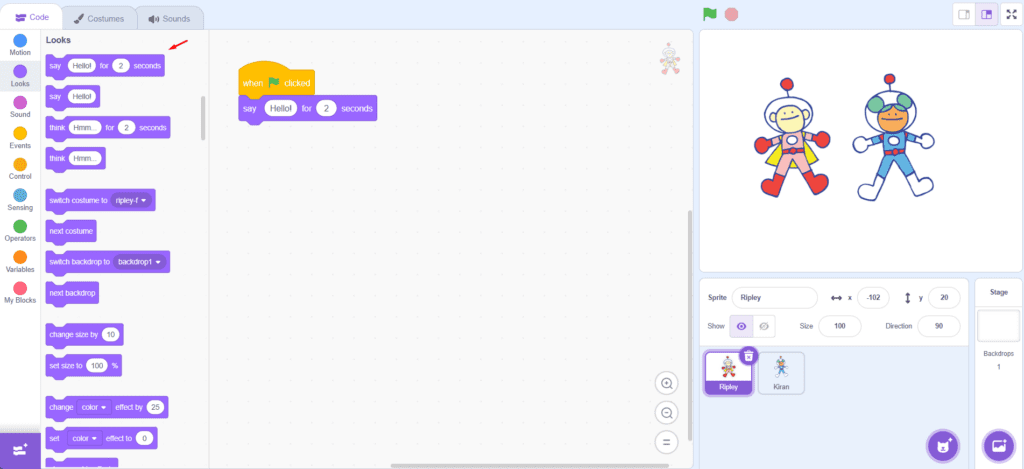
9. Then click on “Looks” and drag the block “say…for ….seconds” to the Scripts Area (purple arrow). Write a phrase inside the white box (where it says “Hello!”).
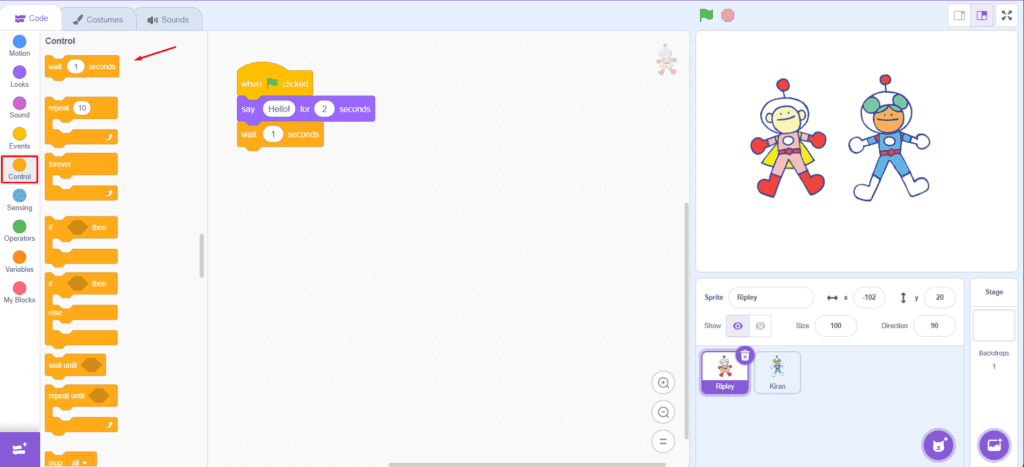
10. Now click on “Control” and drag the block “wait 1 sec” (blue arrow).
11. Click on “Looks” and drag the block “say Hello!” to the Scripts Area (pink arrow). Write a phrase inside the white box (where it says “Hello!”).
12. Now it’s your turn, add a third Actor and finish the dialogue.
CONTINUE
Share the results of your construction with the class:
- In the color palette, what is the function of Control?
- How can a new dialogue be inserted?