CONNECT
 Combining block programming with circuit boards like Makey Makey to create games is an effective and versatile way to prepare students for the future. It makes learning more interesting, easy to understand, and fun.
Working with block programming develops logical and sequential thinking. Students learn to decompose problems, recognize patterns, and create algorithms. The combination of Makey Makey with programming encourages creativity.
Students can create unique games using various objects as controllers, stimulating innovation and exploration.
CONTEMPLATE
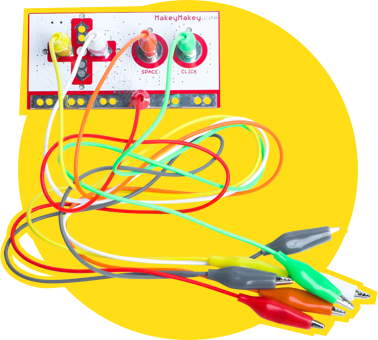
The circuit board is part of a creative interaction kit.
This board allows the transformation of common objects into “commands,” which means they become touchpads*. These objects send information to the computer just like input devices such as a keyboard and mouse. With it, we can create various projects, even a banana piano or a video game controller with playdough.
*Touchpad: a sensitive device that executes a command when touched.
For the circuit board to work, the use of conductive materials is necessary. These are materials that conduct energy, such as metals (copper, gold, silver, and aluminum), seawater, and our bodies. But there are also materials that do not conduct energy, such as rubber, styrofoam, glass, pure water, and oil, which cannot be used to make the circuit board work.
As we have seen, the board makes projects more fun because it turns any object that conducts energy into a real keyboard.
Meet some of these objects:
• Fruits and vegetables: bananas, apples, lemons, or carrots can be used as keys or buttons.
• Aluminum foil sheets: small pieces of aluminum foil connected to the board’s pins can be touched or pressed to send signals.
• Pencil: used to draw circuits or connect objects directly to the board’s pins.
• Water: is a conductor of electricity, so containers of water can be used as part of the circuit. For example, by dipping your fingers in glasses of water and touching conductive objects, signals are sent to the computer.
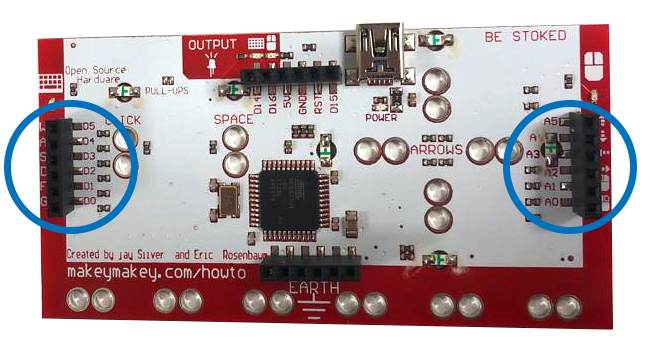
KNOWING THE BOARD
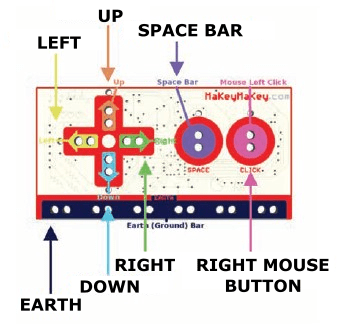
The board is shaped like a video game controller. On the front, there are contact points for the functions of directional arrows (left, right, up, and down), space bar, and mouse click.
It is important to know that there is a lower bar called Earth, which acts as a grounding wire, meaning it diverts the electrical current from devices to the ground.
On the back of the board, there are jumpers (connectors) to be used as other keys (W, S, A, D, F, G) of a common keyboard, as well as connections to control all mouse functions (right/left click).
HOW TO CONNECT THE BOARD
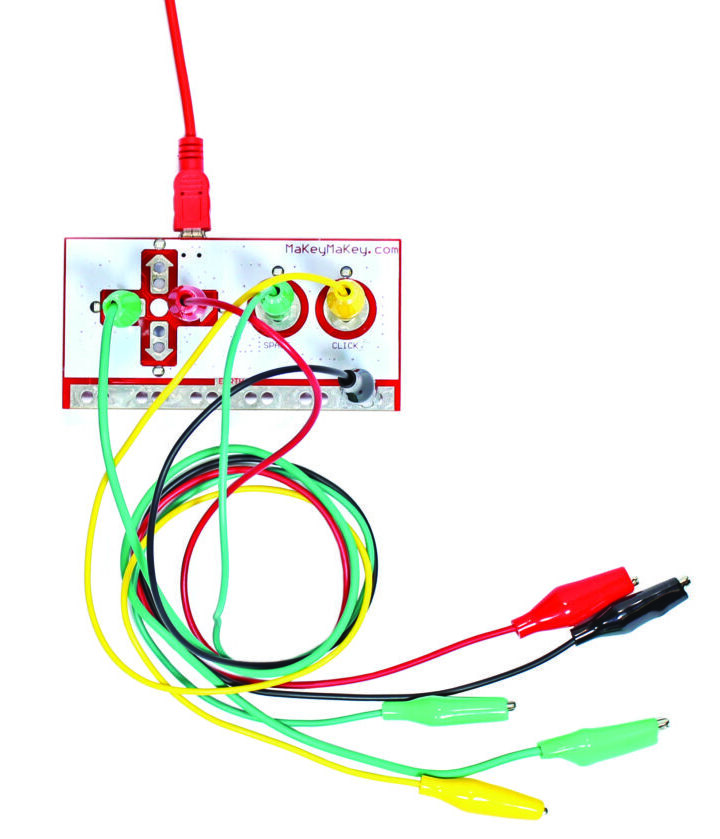 Connect the USB cable to the computer and connect the alligator clips to the contact points on the board and the conductive objects that will be used in the project.
The circuit with objects requires grounding. For this project, grounding will be done by the colleague interacting with the circuit. They should hold the alligator clip connected to the Earth bar with one hand while pressing the object. Then see what happens!
HOW TO ADD THE MAKEY MAKEY EXTENSION IN SCRATCH
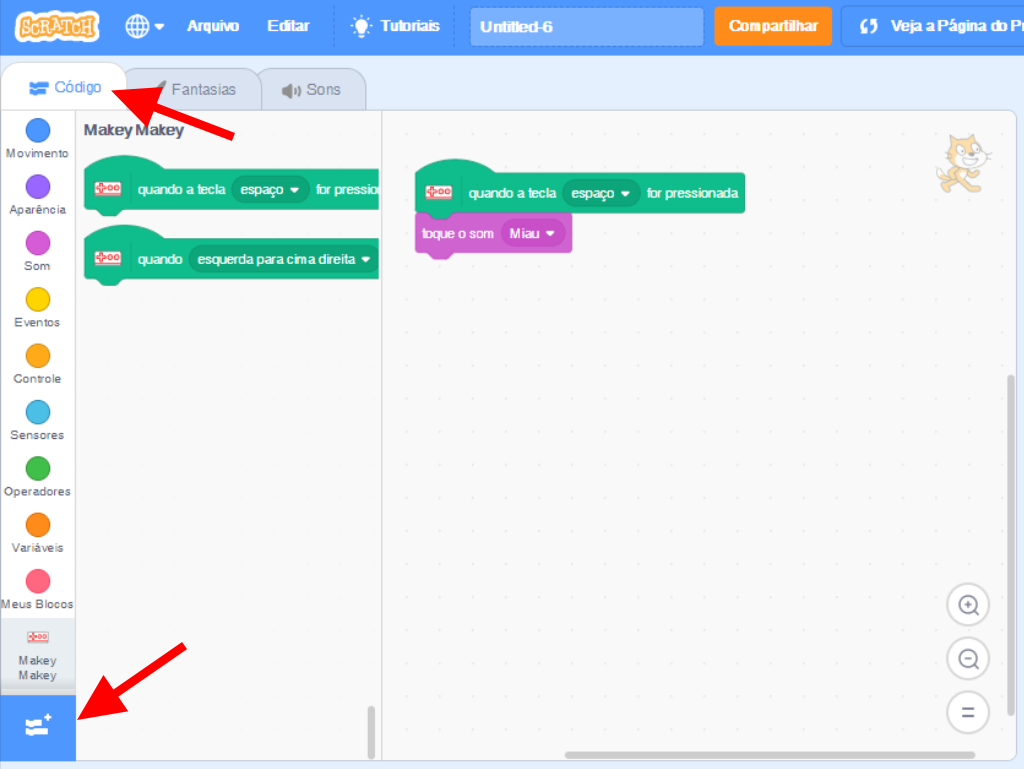 In the “Code” tab, click on the “Add an Extension” button and then select the Makey Makey option.
Done! The board will be added to the program.
You can also choose the language of the program.
In the Menu Bar, click on the icon ![]() and select the Portuguese (Brazil) option.
and select the Portuguese (Brazil) option.
Watch the video to see some project examples:
BUILD
Divide the class into teams of no more than five students and distribute the circuit board kit to each team.
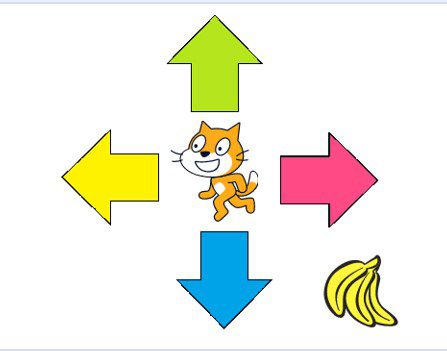
Propose that students build a controller with arrows to move the cat. Guide them to follow all the steps in order.
Step 1: gather the materials.
• 1 circuit board;
• 1 USB cable;
• 4 sheets of colored cardstock;
• aluminum foil;
• 1 blunt-tip scissors;
• 1 glue stick;
• pencils;
• ruler;
• 1 banana or modeling clay.
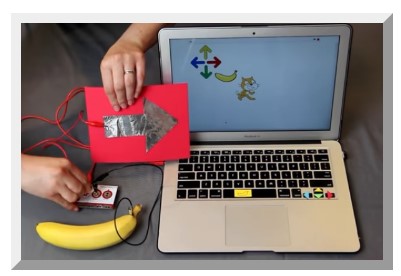
Step 2: start constructing the arrows. Cut 4 pieces of cardstock into rectangles and draw an arrow in the center using the ruler. Then cut out the drawn arrows from the cardstock, leaving the space empty.
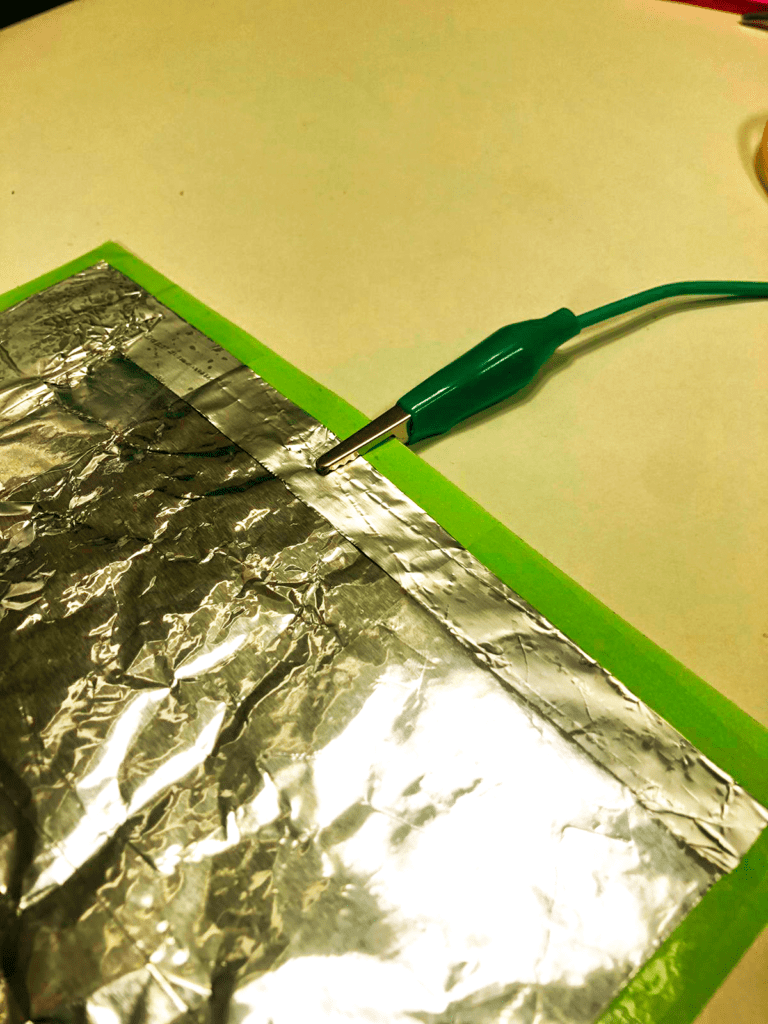
Step 3: cut pieces of aluminum foil and glue them to the back of the arrows. The aluminum foil should fill the entire empty space of the arrow. 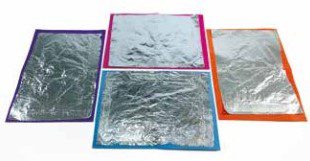
Step 4: connect one side of the alligator clips to each created arrow and the other side to the corresponding inputs on the circuit board. Reserve one for grounding. The alligator clip needs to touch the aluminum foil as shown in the image.

Step 5: to connect the circuit board to the computer, use the USB cable.
Step 6: run the Scratch program at <https://scratch.mit.edu>.
Step 7: click here to download the arrow images. Then, select the “Upload” option and insert the colored arrow images into the program. ![]()
Step 8: in the “Select a Sprite” option, insert the sprite that will represent the banana or the modeling clay.
Step 9: select each arrow, change the size to 50, and place them in the correct position.
![]()
Step 10: select the “Cat” sprite and start programming.
a. Drag the block when the space key is pressed to the scripts area.
b. Click on Sounds, select the Meow sound. Drag the block play sound meow to the scripts area and place it under the previous block.
c. Create another command block. Drag the block when the up arrow key is pressed to the scripts area.
d. Drag the block point in direction and enter the number “0” in the white field, then place it under the previous block.
e. Drag the block move 20 steps and place it under the previous block.
f. For each arrow key, follow the steps described in items c through e. Remember to change the “up arrow key” option in item c to the corresponding options for the connections made on the circuit board.
Step 11: Done! To move the cat, you must hold the grounding alligator clip with one hand, touch the object (modeling clay or banana), and touch the arrows (up, down, left, and right).

Click here to see the programming used in this project.
CONTINUE
 Share the construction results with the class.
• How was it to create a controller with the arrows and the circuit board?
• Did the programming to move the cat work?
When finished, all materials must be stored.