CONNECT

Programming language is a formal and written way to specify a set of rules and instructions used to create computer programs. There are several tools available for writing these instructions, such as Scratch (https://scratch.mit.edu), which will be used in our classes.
Scratch is a programming tool that uses blocks, similar to interlocking toys. This approach makes learning programming easier, as the blocks can be dragged and snapped together to create sequences of commands.
CONTEMPLATE
WHAT CAN BE CREATED USING SCRATCH?
With it, you can create a variety of projects, such as interactive stories, games, animations, educational projects, and interactive applications.
The platform offers a wide range of creative possibilities for users to explore.
LET’S LEARN A LITTLE MORE ABOUT THIS PLATFORM:
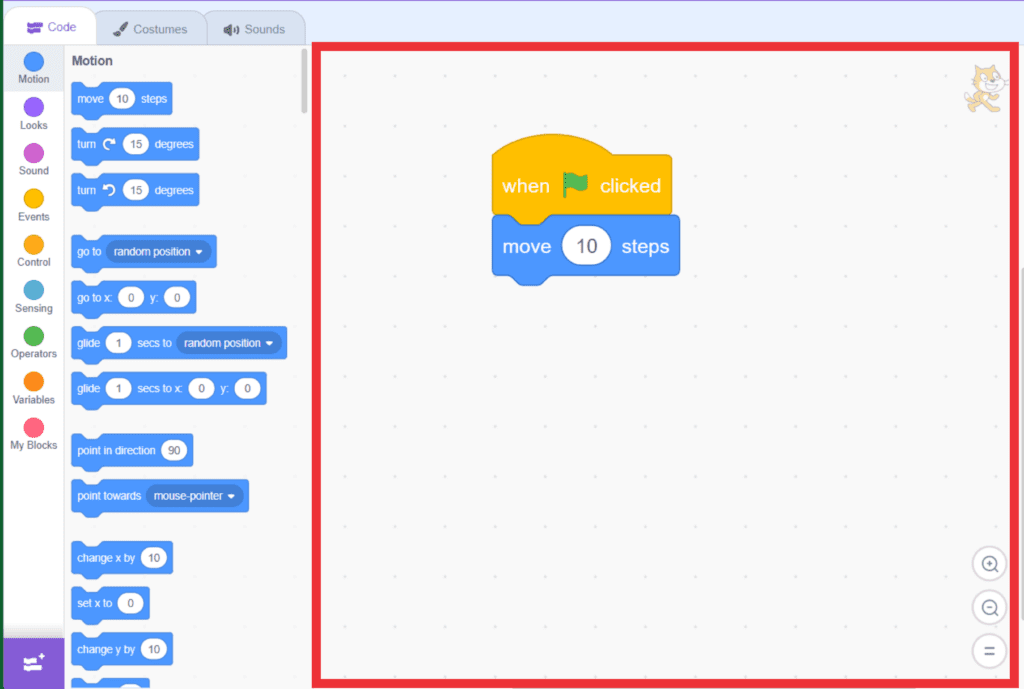 The SCRIPTS AREA occupies the center of the screen, where the codes will be developed, as well as the blocks that will be dragged and snapped together for the programming to be executed.
This area is essential for creating projects in Scratch, as it defines the logic of the program and the interactions of the student are programmed. By using the blocks strategically, it’s possible to create amazing projects and bring virtual characters and objects to life.
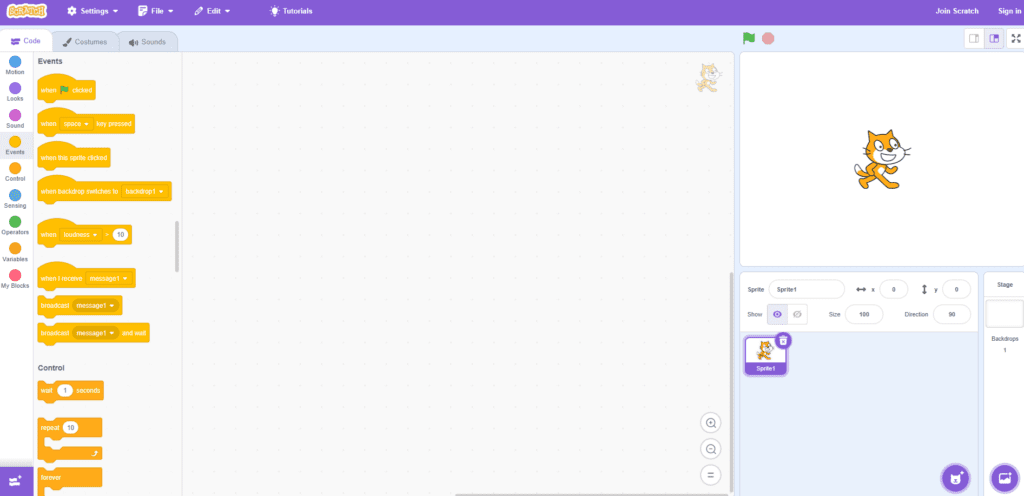
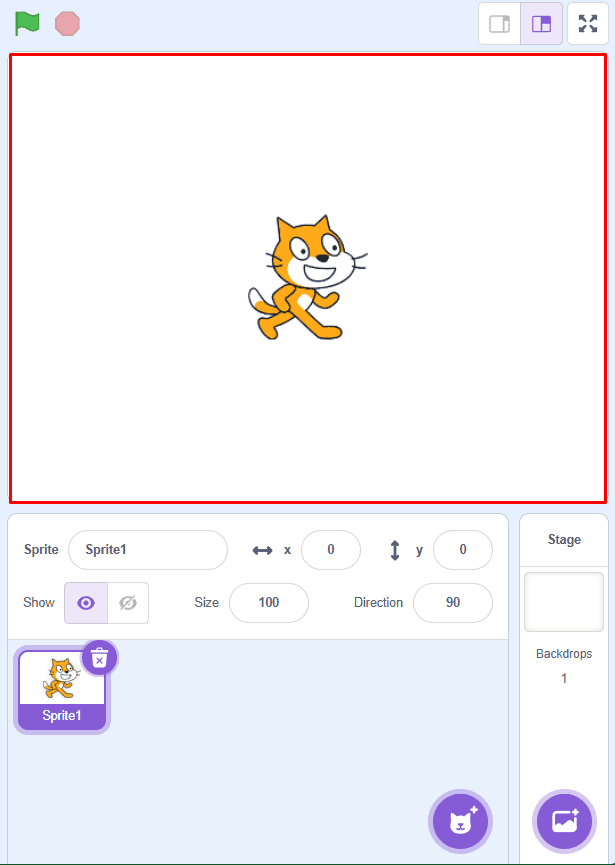 Next to the SCRIPTS AREA is the STAGE, which displays the graphical and animated part of the project and where tests will be conducted. This is where the cat (an actor) and other visual elements of the project will be shown, allowing for the visualization of all the produced content. Furthermore, it’s possible to interact with the objects on the screen and test the program’s functionality in real-time, which helps identify potential issues and improve the project more efficiently.
The STAGE is a fundamental part of the Scratch environment and offers an interactive and fun way to
create and explore programming projects.
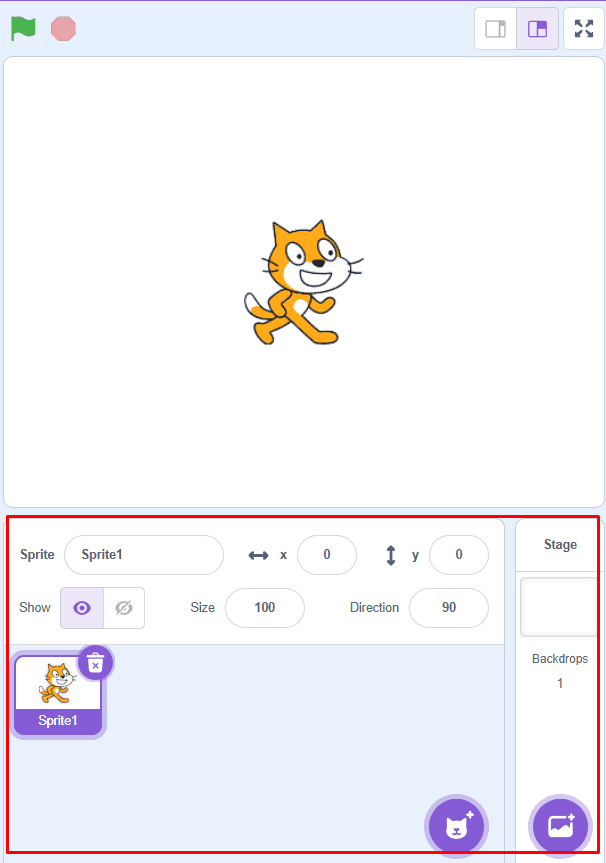
Below the STAGE, we have the LIST OF ACTORS AND BACKGROUNDS. In this area, it is possible to view, insert, change, and delete the images that will be displayed on the STAGE. The actors can be various types of elements, such as characters, animals, objects, food, letters, and numbers, while the backgrounds are the backdrops that will be used to customize the programming, representing places or artistic environments.
BUILD
CHALLENGE:
Access Scratch at https://scratch.mit.edu/ and add an actor and change the effects.
Follow the steps and see the animation at the end.
1. To rename the actors, click on the field next to the “Actor” text.
2. To adjust the position of the actors on the stage, enter the numbers in the x and y coordinate fields.
3. To make the actor visible or invisible, click on the icons in the “Show” item.
4. To change the size of the actor, adjust the number in the “Size” field.
5. To change the direction of the actor, adjust the number in the “Direction” field.
PROGRAMMING THE COLORS OF THE BUTTERFLY
a. Click on the Cat actor and then on the trash can icon to delete it.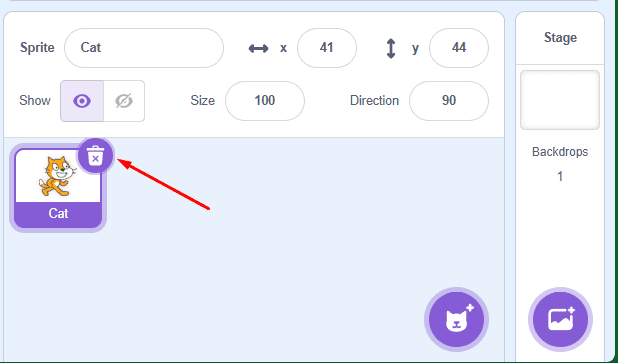
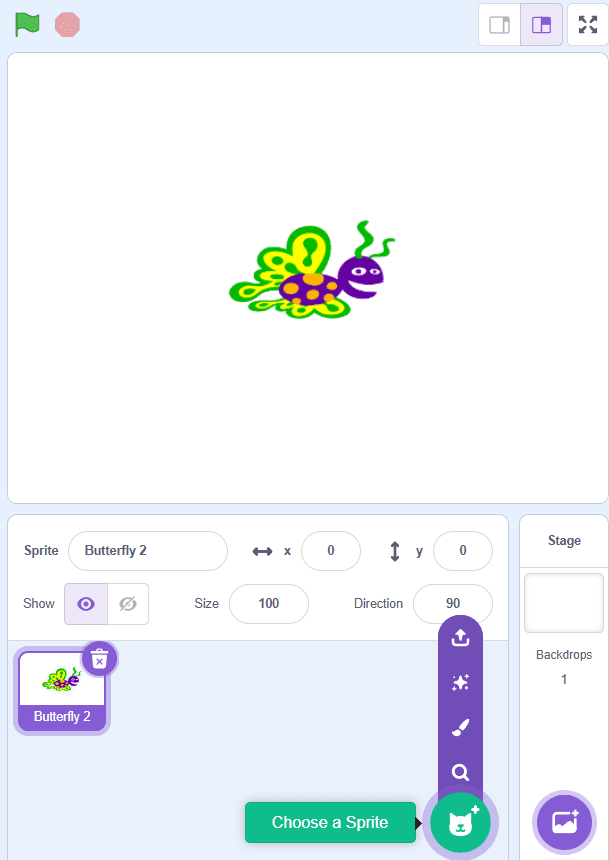
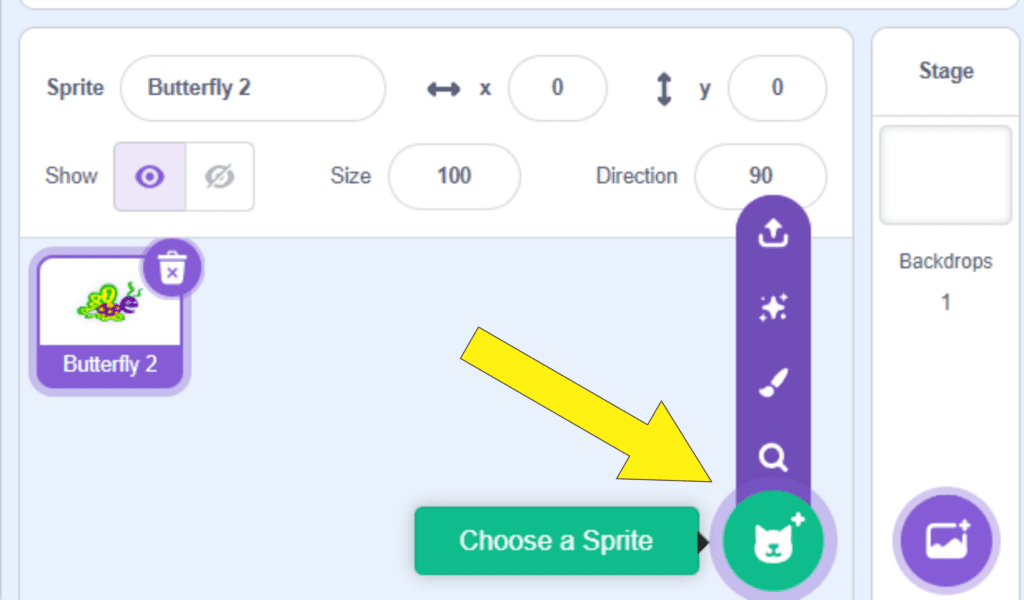
b. Click on the location indicated by the yellow arrow to insert the butterfly as a new Actor. Then, increase the size of the butterfly to 200.
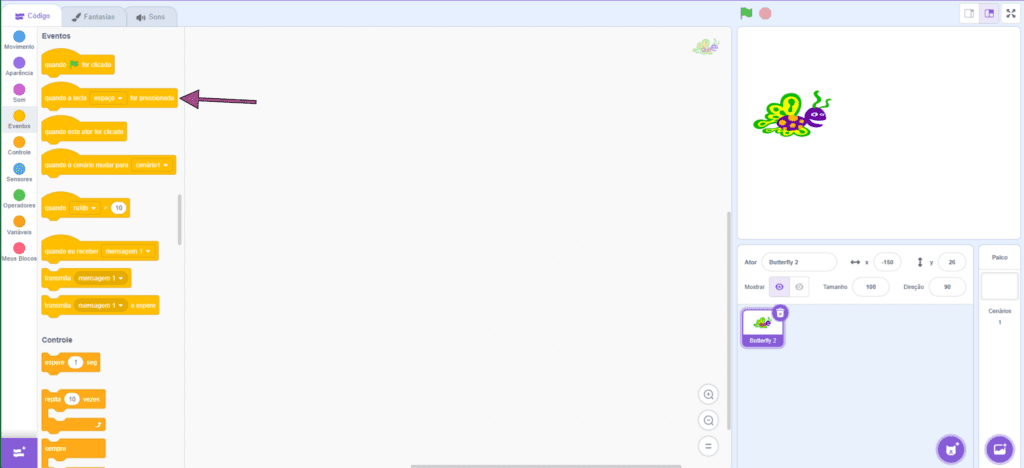
c. Click on Events, drag the Block “when the space key is pressed” to the Scripts Area.
d. In Appearance, select “set color effect to 0” and place it below the block “when the space key is pressed”.
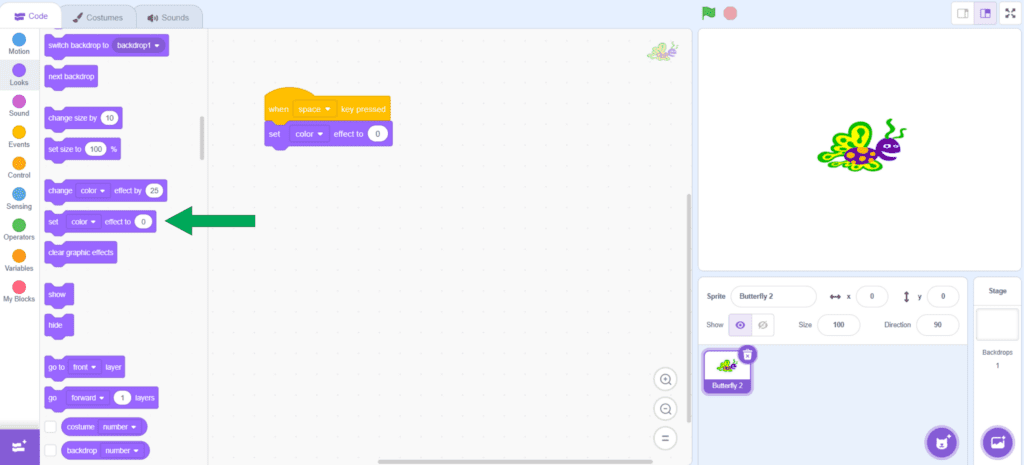
e. Change the value of the Block to 10 and see what happens when you press the space bar. Then, change the value to 25 and then 40.

f. Change the values and create new effects.
CONTINUE
After creating the animations, share the experience with the class.
What block was used to change the color?
In the color palette, the blocks in Events, what are their functions?

