CONNECT
 Animation is the technique of creating the illusion of movement by displaying a sequence of static images in rapid succession. Initially developed with traditional methods such as hand-drawn and stop-motion, animation has evolved with computer graphics, allowing for the creation of highly detailed and realistic 2D and 3D animations. Cartoons are classic examples of animation, and today it is widely used in films, TV series, video games, advertising, education, and emerging technologies like virtual and augmented reality. Constant technological evolution continues to expand the possibilities of animation, providing increasingly innovative and impactful creations.
CONTEMPLATE
DO YOU KNOW WHAT A PROGRAMMING LANGUAGE IS?
A programming language is a set of commands that allows humans to communicate with computers, specifying what needs to be done and how it should be executed.
Scratch is a visual programming language developed by MIT, offering an accessible and fun way to learn programming. Instead of typing lines of code, users manipulate colorful blocks in an intuitive graphical interface. It can be accessed at: https://scratch.mit.edu/
Learning to program with Scratch is easy, as it uses a graphical interface with blocks that snap together like LEGO pieces.
Watch the video and see some project examples:
WHAT CAN BE CREATED USING SCRATCH?

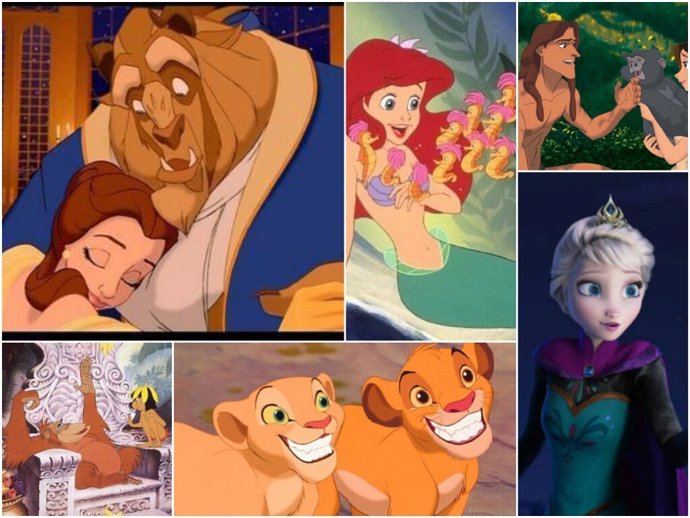
With Scratch, it is possible to create a variety of projects, such as interactive stories, games, animations, educational projects, and interactive applications.
The platform offers a wide range of creative possibilities for users to explore.
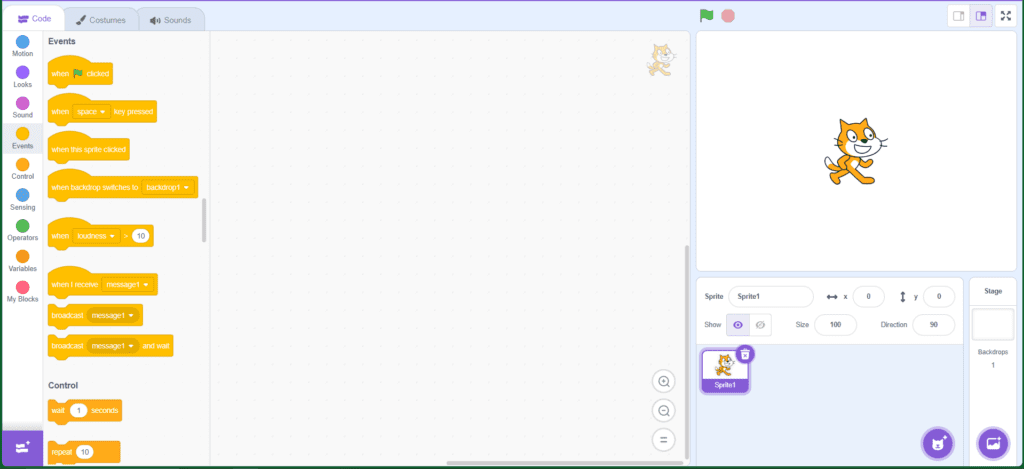
GETTING TO KNOW THE PROGRAM INTERFACE
The program interface is very intuitive and easy to use.
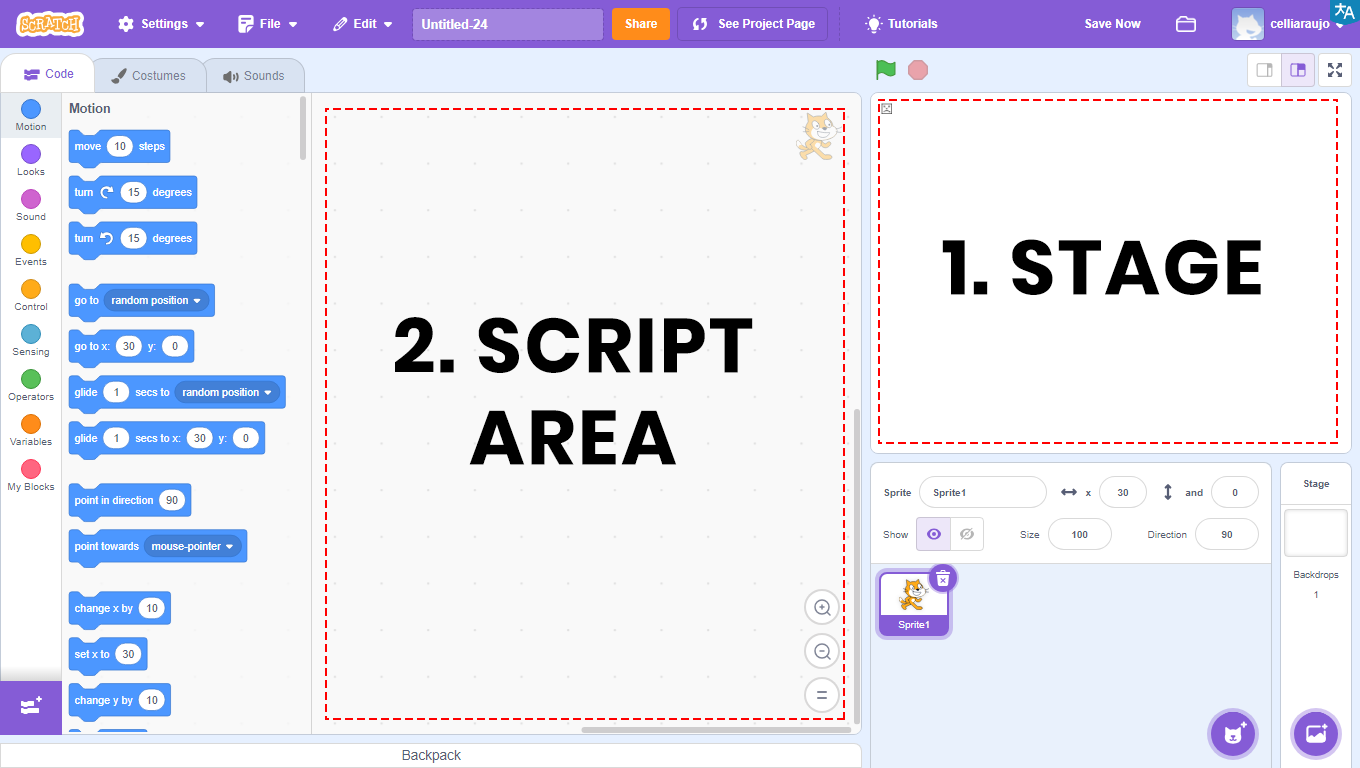
1 – Stage: the area that will display all the graphic and animated parts of the project, and where tests will be conducted.
2 – Scripts Area: the area where programming will take place. Here will be the codes that are developed and the blocks that are dragged.
![]()
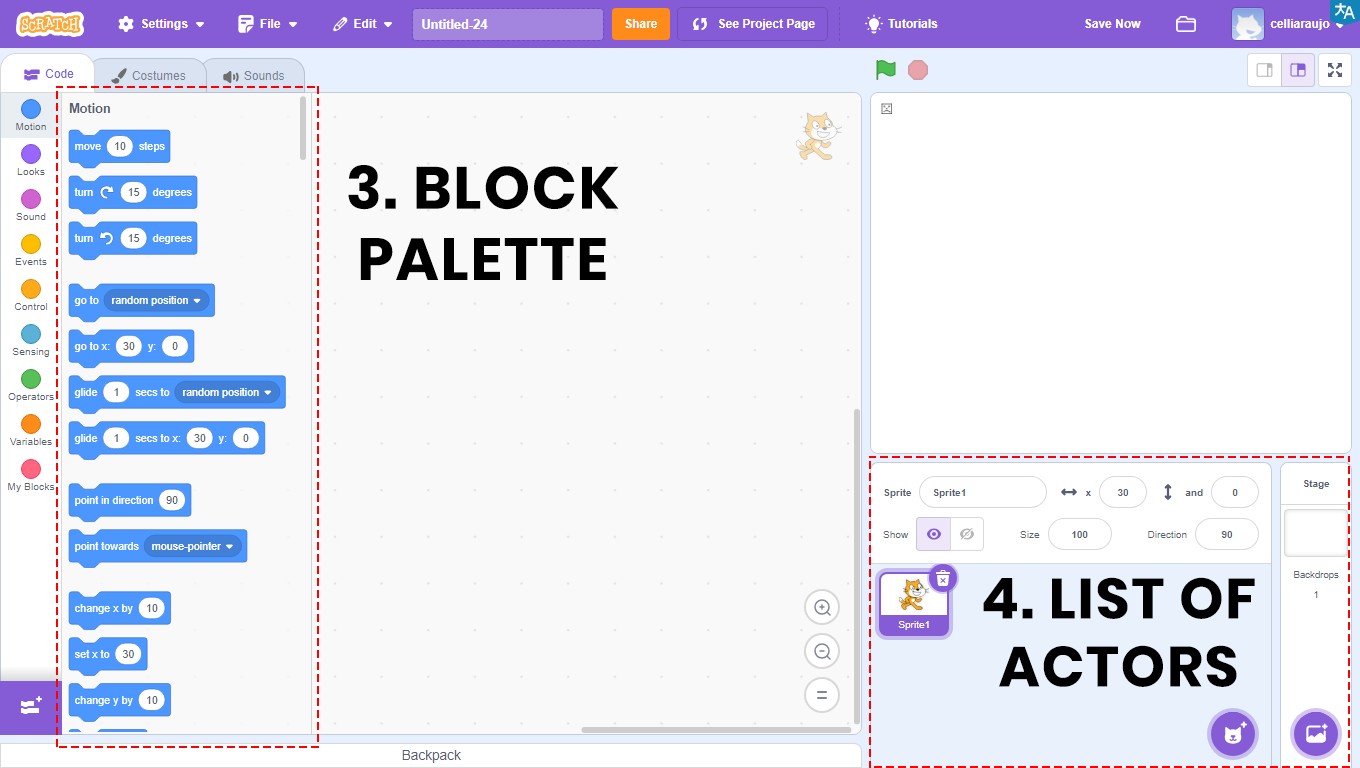
3 – Block Palette: all the blocks used will be in this area. They are color-coded, and within each color, blocks have different shapes. Each color is responsible for a function, and depending on the shape, the block returns or reads a type of value.
In the Scripts Area, the blocks will be compiled, that is, turned into a program that will be visualized through the Stage.
4 – Sprite List: an area that allows viewing, inserting, and altering images that will appear on the Stage. Also known as Sprites.
BUILD
ACTIVITY PROPOSAL
CREATING A STORY
Go to the Scratch website at https://scratch.mit.edu/ and create a story with dialogue between your Actors and scene changes. Follow the step-by-step instructions and, when finished, click the green flag and observe the animation you developed.
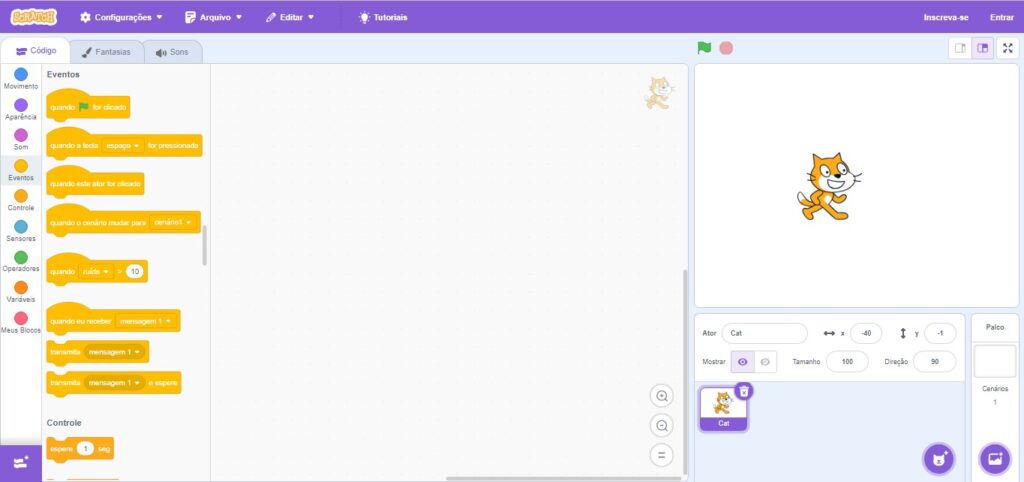
GETTING TO KNOW SOME PROGRAM FEATURES
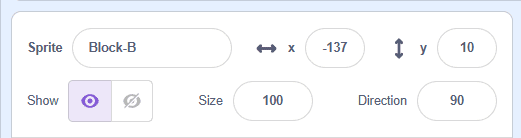
1. To rename the actors, click in the field next to the text “Actor”.
2. To adjust the position of the actors on the stage, enter the numbers in the x and y coordinate fields.
3. To make the actor visible or invisible, click on the icons in the “Show” item.
4. To change the size of the actor, adjust the number in the “Size” field.
5. To change the direction of the actor, adjust the number in the “Direction” field.
PROGRAMMING THE PROJECT
1. Click on the Cat Actor and then on the trash can icon to delete it.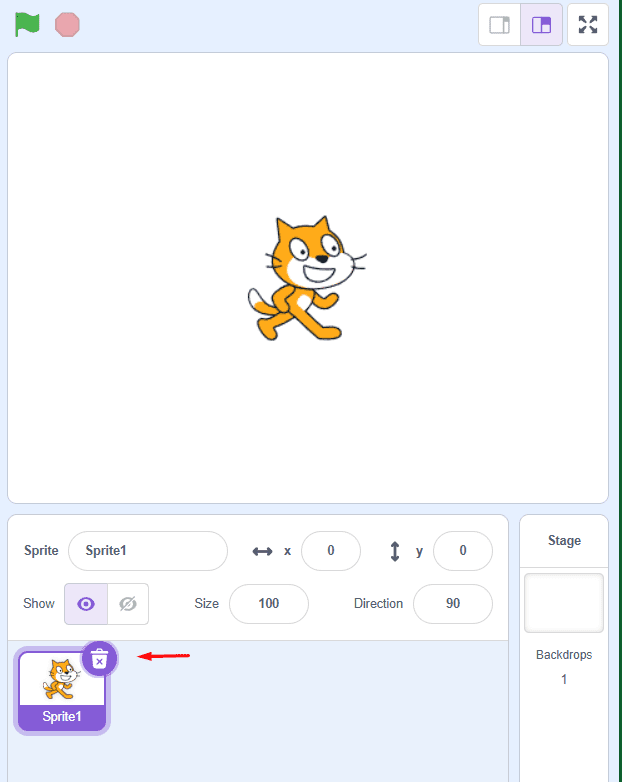
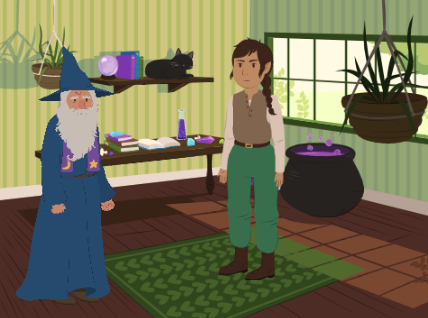
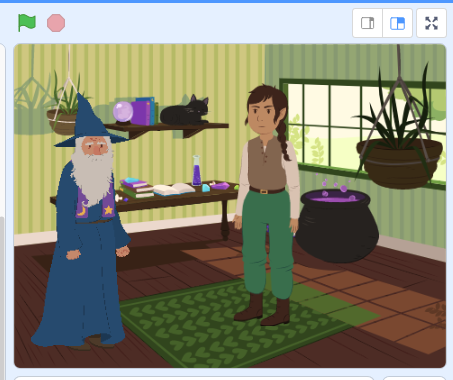
2. To add the scene, click on the Scenes tab, then on Select Scene (black arrow) to add more than one. Choose the images: Witch House and Mountain.
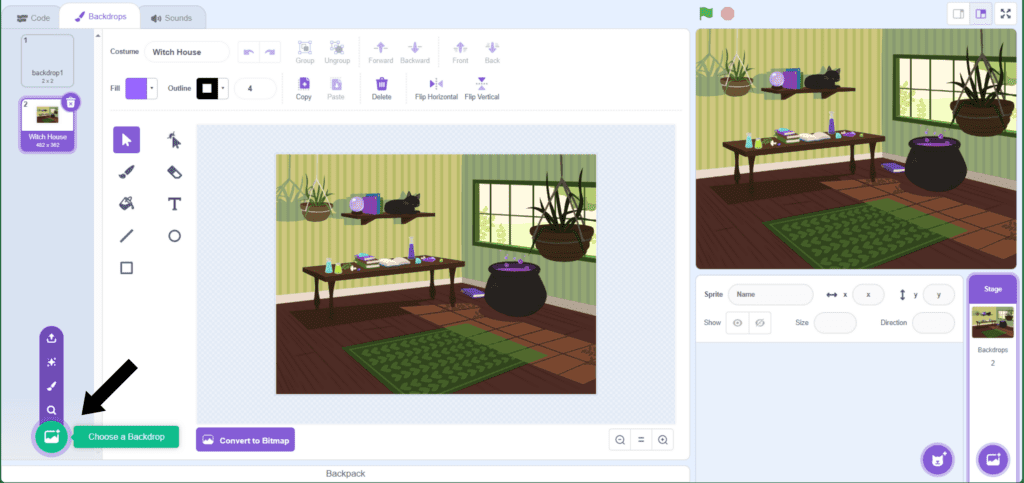
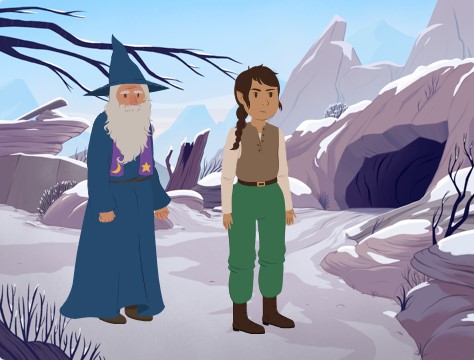
3. Click on the location indicated by the red arrow to insert the Actors (Wizard and Elf).
![]()
• The Wizard Actor will only have one costume: Wizard-b. After inserting, go to the Costume tab and delete the other costumes, leaving only the Wizard-b costume (as shown in the image).
![]()
• The Elf Actor will have three costumes: Elf-a, Elf-b and Elf-d. After inserting, go to the Costume tab and keep only the requested costumes.
4. In the Costumes tab, click on each costume and click on Flip Horizontal to change the actor’s position.
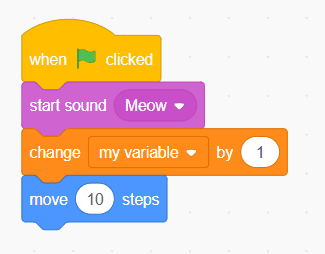
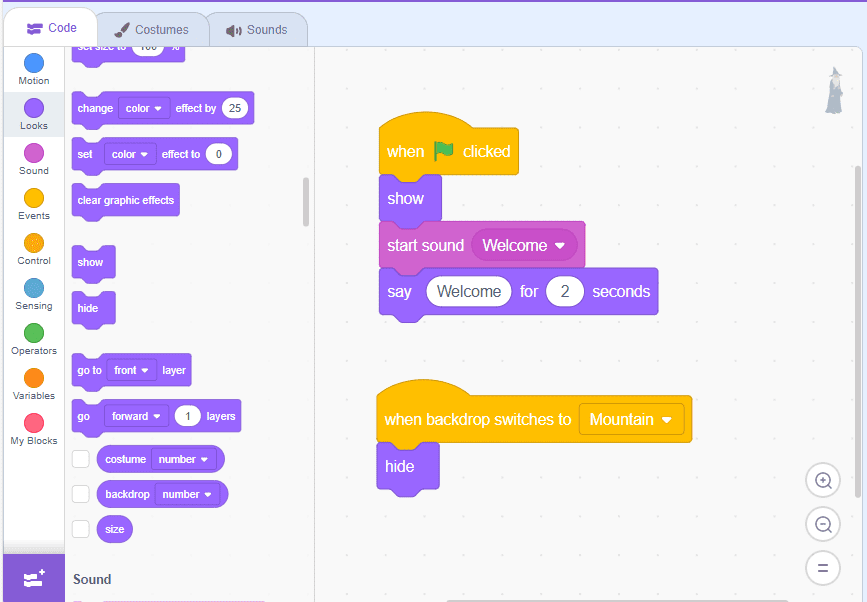
5. The Wizard Actor will welcome the other actor, to make this happen: click on the Wizard Actor and start building the first command block. In Events, drag the block “when ![]() is clicked” to the Scripts Area. In Looks, drag the block: “show” to the Scripts Area.
is clicked” to the Scripts Area. In Looks, drag the block: “show” to the Scripts Area.
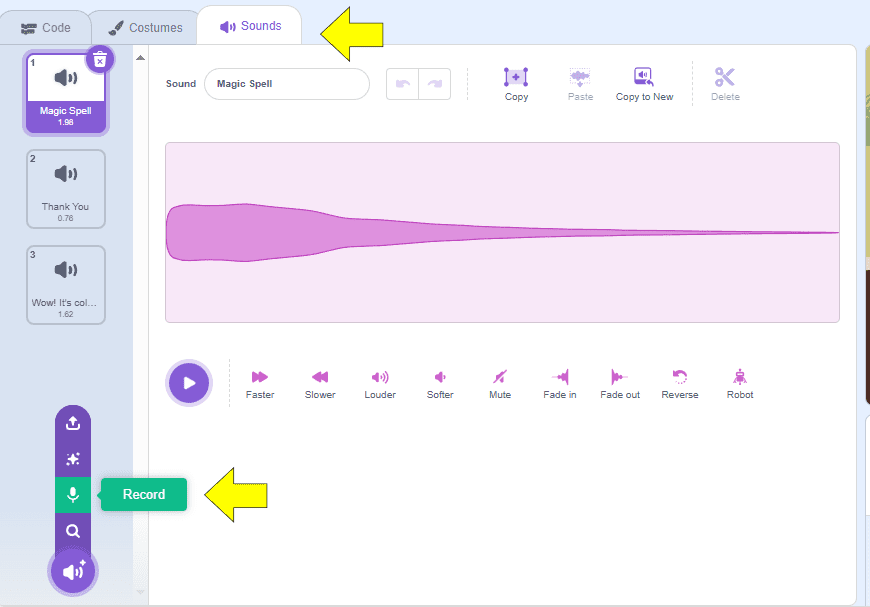
6. Click on the Sound tab, then click on Record (as shown in the image). Record the Wizard Actor’s speech, save it with the name “Welcome!”.
7. Click on the Code tab. In Sound, drag the block “play sound”, change it to “Welcome!”. In Looks, drag the block “say… for… seconds” to the Scripts Area and type Welcome! in the first white box.
8. Start building the second command block. Again in Events, drag the block “when backdrop switches to” and change it to Mountain. In Looks, drag the block “hide” to the Scripts Area.
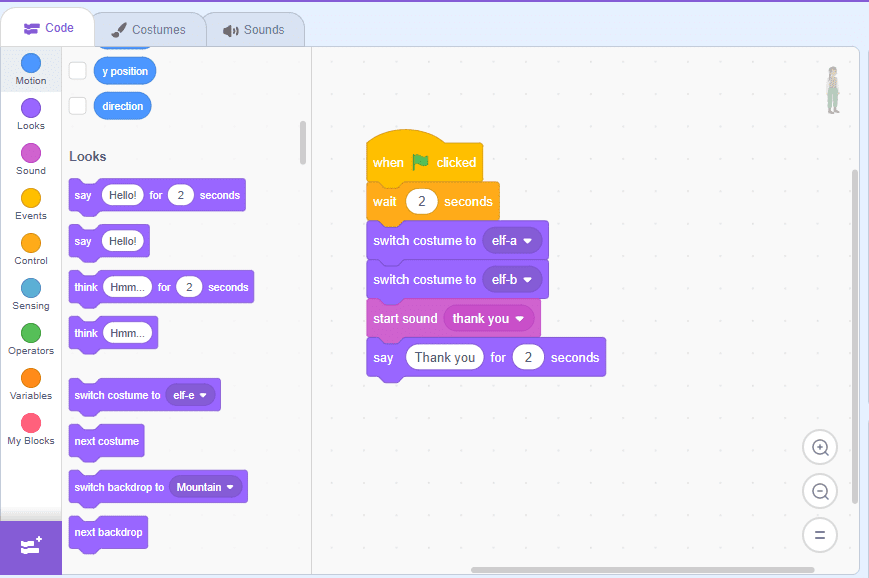
9. The Actor Elf will thank the Actor Wizard for the welcome. To make this happen: click on the Actor Elf and start assembling the first command block. In Events, drag the block “when ![]() clicked” to the Scripts Area.
clicked” to the Scripts Area.
10. In Control, drag the block “wait 1 sec” to the Scripts Area and type 2 in the white box.
11. In Looks, drag the block “switch costume to”, change the first to Elf-a and the second to Elf–b.
12. Click on the Sound tab, then click Record. Record the speech of the Actor Elf saying “Thank you” and save it as Thank you. In Sound, drag the block “start sound”, change to “Thank you!”.
13. In Looks, drag the block “say Hello! for 2 seconds”, type in the first white box “Thank you!“, all to the Scripts Area.
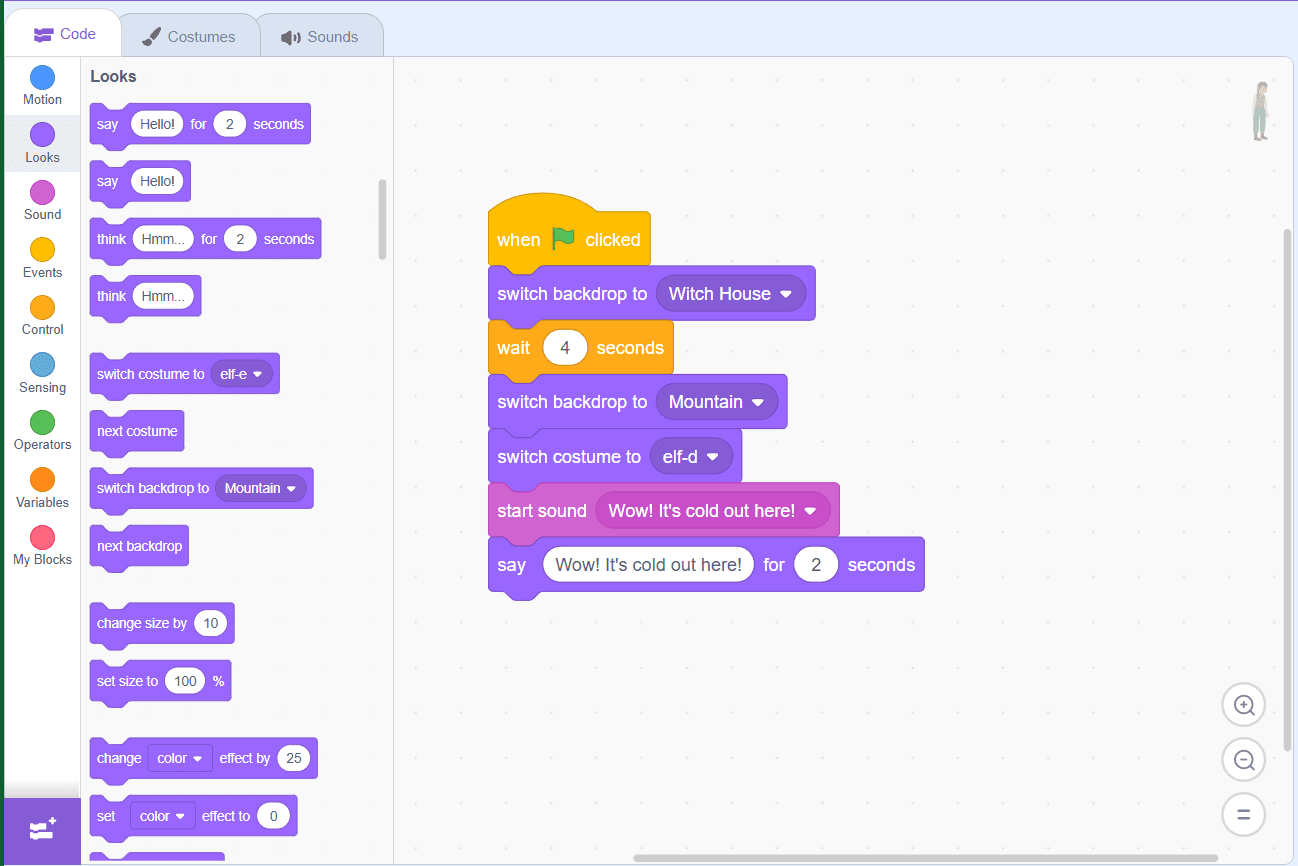
14. Start assembling the second command block. In Events, drag the block “when ![]() clicked” to the Scripts Area. In Looks, drag the block “switch backdrop to” to the Scripts Area, change to the option Witch House.
clicked” to the Scripts Area. In Looks, drag the block “switch backdrop to” to the Scripts Area, change to the option Witch House.
15. In Control, drag the block “wait 1 sec” and type 4 in the white box.
16. Again in Looks, drag the block “switch backdrop to”, change to the option Mountain, drag the block “switch costume to”, change to Elf-d and the block.
17. Click on the Sound tab, then click Record. Record the speech of the Actor Elf saying: “Wow, it’s so cold out here”. Go to the Sound tab, drag the block “play sound”, change to “Wow, it’s so cold out here”.
18. In Looks, drag the block “say Hello! for 2 seconds” and type “Wow, it’s so cold out here!” in the first white box, all to the Scripts Area.
19. The first dialogues have already been created, continue creating other dialogues or new stories.
CONTINUE
Share the construction results with the class:
• Did you have any difficulties recording the sound?
• What else did you add to the story?