CONNECT
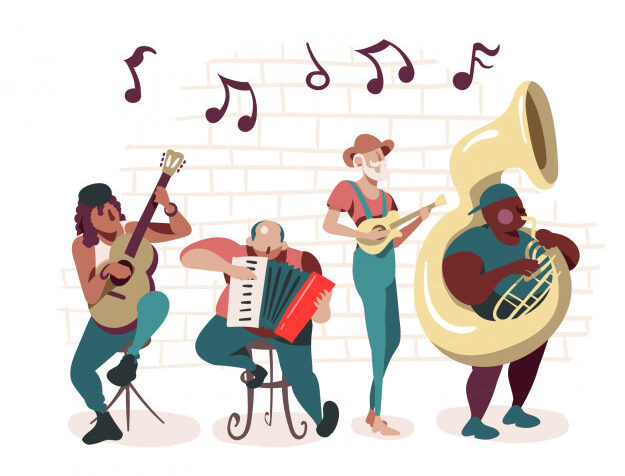
Musical instruments are essential tools for creating and performing music, each with its own sound characteristics and unique playing techniques.
They can be categorized into strings, winds, percussion, keyboards, and electronic instruments, each category encompassing a variety of examples.
Instruments play varied roles in different musical genres and cultures, from solo performances to large orchestras. They are fundamental for expressing emotions, telling stories, and musically communicating with the audience.
Ask the students:
- Do you own any musical instruments?
- Which one is your favorite?
CONTEMPLATE
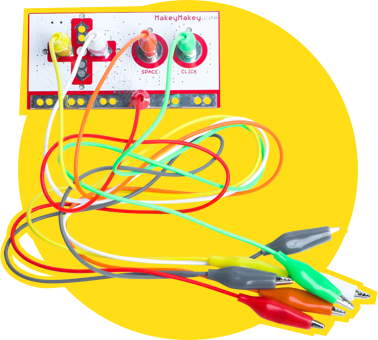
The circuit board is part of a creative interaction kit. This board allows the transformation of ordinary objects into “commands,” which means they become touchpads*. These objects send information to the computer just like input devices such as the keyboard and mouse. With it, we can create various projects, even a banana piano or a video game controller with modeling clay.
*Touchpad: A sensitive device that executes a command when touched.
To make the circuit board work, the use of conductive materials is necessary. They are materials that conduct energy, such as metals (copper, gold, silver, and aluminum), seawater, and our bodies. But there are also materials that are not conductors of energy, such as rubber, Styrofoam, glass, pure water, and oil, which cannot be used to make the circuit board work.
As we have seen, the board makes projects more fun because it turns any object that conducts energy into a real keyboard.
Get to know some of these objects:
• Fruits and vegetables: bananas, apples, lemons, or carrots can be used as keys or buttons.
• Aluminum foil sheets: small pieces of aluminum foil connected to the board’s pins can be touched or pressed to send signals.
• Pencils: used to draw circuits or connect objects directly to the board’s pins.
• Water: it conducts electricity, so it is possible to use containers with water as part of the circuit. For example, by dipping fingers into water cups and touching conductive objects, signals are sent to the computer.
GETTING TO KNOW THE BOARD
The board has the shape of a video game controller. On the front, there are contact points for directional arrows (left, right, up, and down), space bar, and mouse click functions.
It is important to know that there is a bottom bar called Earth, which serves as a grounding wire, meaning it diverts the electrical current from devices to the earth.
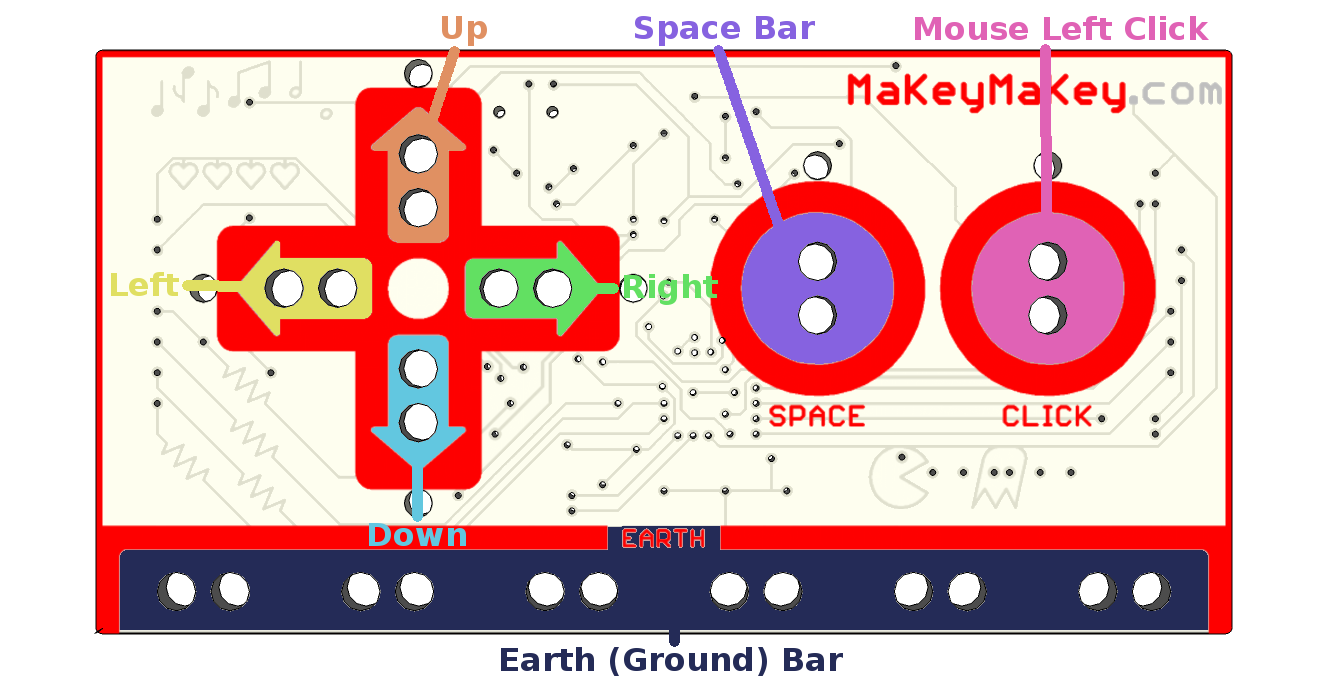
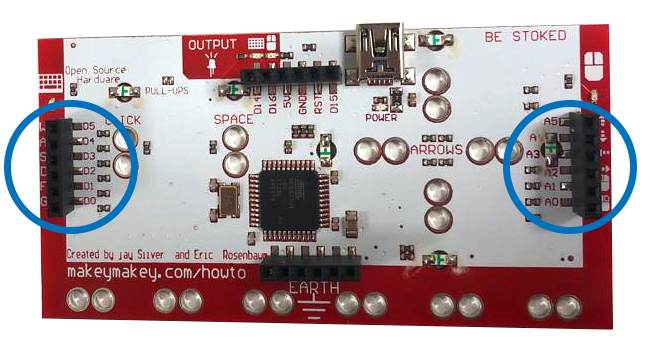
On the back of the board, there are jumpers (connectors) to be used as other keys (W, S, A, D, F, G) of a standard keyboard, as well as connections to control all mouse functions (right/left click).
HOW TO CONNECT THE BOARD
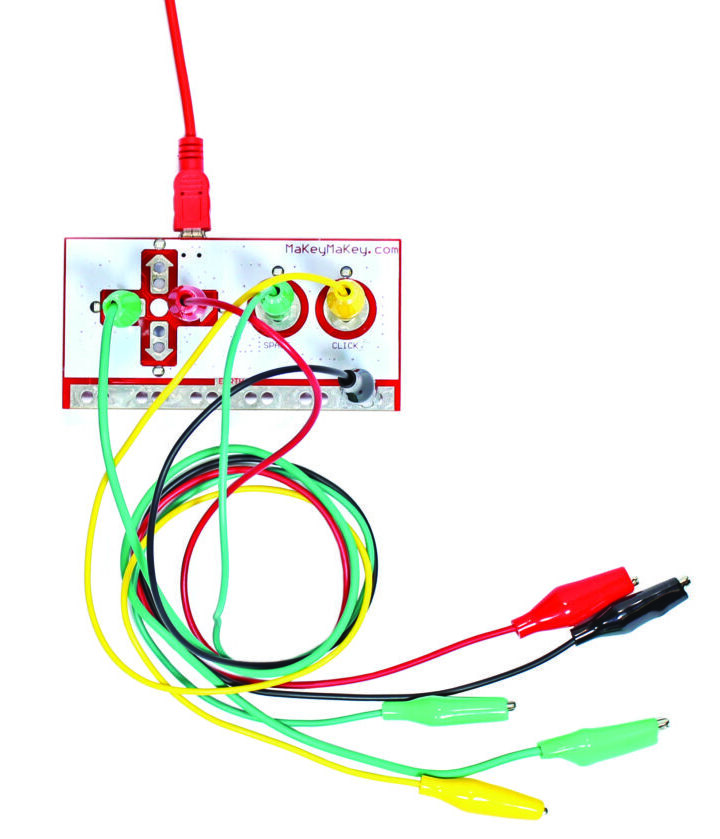 Connect the USB cable to the computer and connect the alligator clips to the contact points of the board and to the conductive objects that will be used in the project.
The circuit with objects requires grounding. For this project, grounding will be done by the colleague interacting with the circuit. They should hold one end of the alligator clip connected to the Earth bar with one hand while pressing the object with the other hand. See what happens!
HOW TO ADD THE MAKEY MAKEY BOARD EXTENSION TO SCRATCH
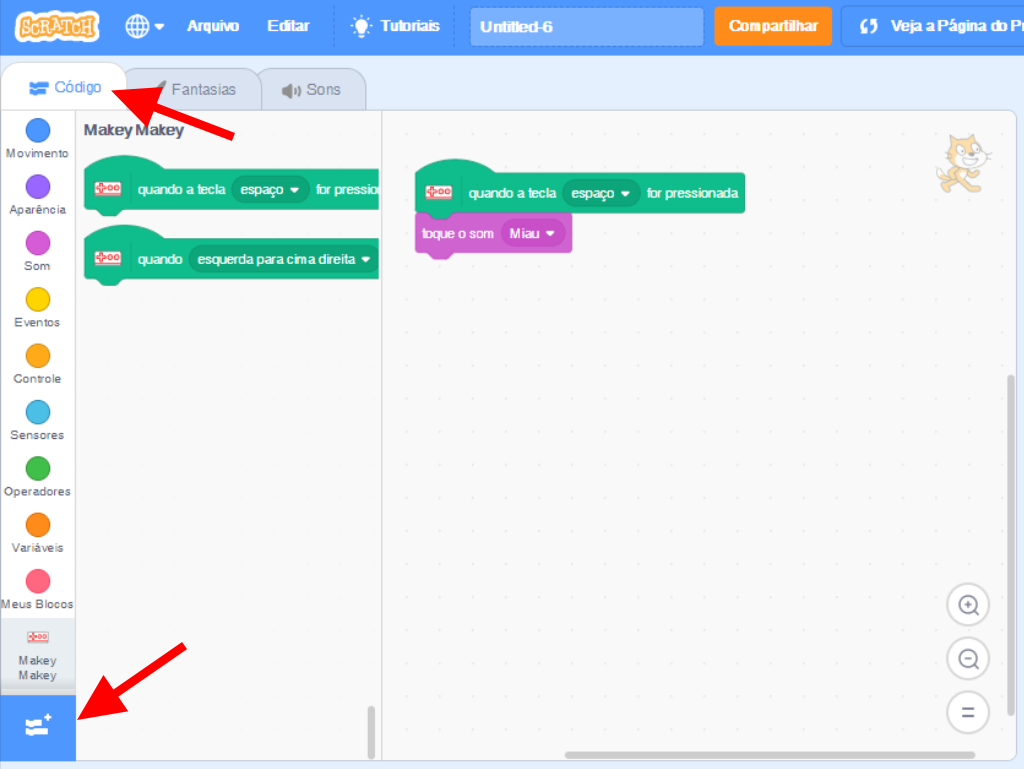 In the “Code” tab, click the “Add Extension” button and then select the Makey Makey option.
There you go! The board will be added to the program.
You can also choose the program’s language.
In the Menu Bar, click the ![]() icon and choose the Brazilian Portuguese option.
icon and choose the Brazilian Portuguese option.
BUILD
Organize the class into teams of up to five students and distribute the circuit board kit.
ATTENTION!
• When starting and finishing the projects, make sure to clean the alligator clips, as there should be no residues. Use a brush or cotton swab for cleaning.
• Each kit should be connected to a computer. If the school does not have the necessary number of computers per team, each group can alternate the use of the computer to execute their project. At this moment, be mindful of the time of use so that everyone participates.
• When the project needs to be presented on a metal table, it is advisable to cover the table with a cloth or plastic towel, with cardboard or brown paper to not interfere with the project’s operation. If presented on the floor, a rubberized surface, such as EVA, is recommended.
• Opt for newer modeling clay, as older ones may be dried out and may not work.
• The wires cannot touch each other and must be secured with masking tape or Scotch tape.
• The contact between the alligator clip and the aluminum foil needs to be very firm. Use insulating tape to secure them.
Propose to the students the construction of indicative boards with images of some musical instruments and simulate the respective sounds, using the circuit board. Guide them to follow all the steps in order.
Step 1: gather the materials.
1 circuit board
alligator clips and/or jumpers
USB cable
different colored cardboards or colorset
printed models of musical instruments or A4-sized white sheets
colored markers or colored pencils
pieces of aluminum foil
glue
blunt scissors
insulating tape
ruler
 To assist in the construction of the boards, below are some templates of instruments:
Strings: guitar, piano, and violin.
Wind: flute, saxophone, and trumpet.
Percussion: drum, triangle, and tambourine.
Students can also illustrate the instruments.
Step 2: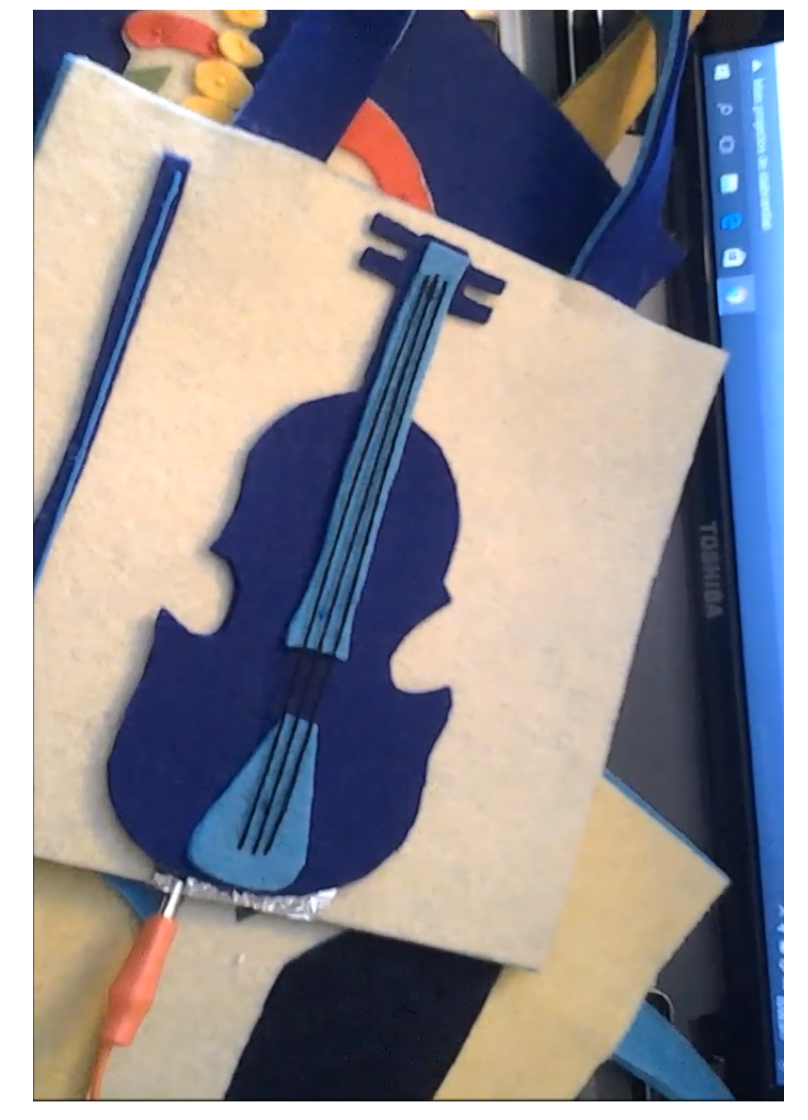 build boards (A4 size) with images of various types of musical instruments (strings, winds, and percussion).
Step 3: in this project, we will use a different element, aluminum. And we will learn about the importance of using aluminum foil in cable connections and project interactivity, simulating an electrical circuit, as it is a good conductor of electricity.
Cut small pieces of aluminum foil and glue them to the bottom of each constructed board, as if they were labels.
To assist in making the boards, click here!
Step 4: connect the alligator clips to the aluminum foil on the boards of the musical instruments and then to the makey makey board, attach the alligator clips to the specific locations of the board according to the condition:
| Right and left arrows | Sounds of each string instrument. |
| Space bar and mouse click | Sounds of each wind instrument. |
| Down and up arrows | Sounds of each percussion instrument. |
Step 5: program the above condition using the Scratch programming language.
To finish the project, make the boards with images of musical instruments, when touched, emit the specific sounds of each instrument, through the following programming:
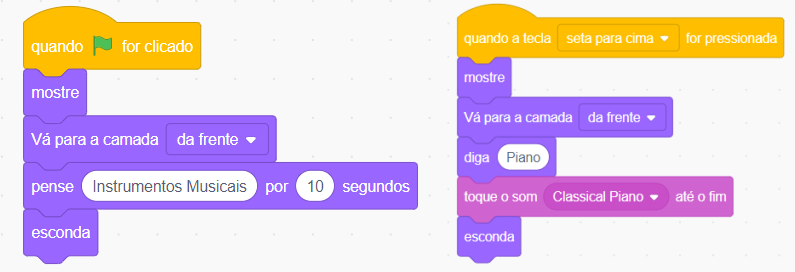
Remember: for grounding to occur, it is necessary for a student to hold an alligator clip (which will play the role of the ground wire) in their hand or to keep it in contact with any part of their body.
Watch the project’s model video:
SUPPLEMENTARY ACTIVITY
 To add a differential to the project, create an extra board, which should have the image of an open book with the students’ photo on one page, and a brief explanation of what they think about “the benefits of learning a musical instrument” on the other.
The construction of the board, placing the label, the connection (the letter “G” should be used), and the programming, in other words, everything will work the same way as in the first assembled boards, except that the sound of the book should be the narration of the short text produced by the students.
CONTINUE
Share with the class the results of the construction:
• How was it to associate music with the circuit board?
• Did the sound programming in Scratch work?
When finished, all materials should be stored.