
CONNECT

The evolution of poster presentations is remarkable, going from simple manual creations to today’s highly interactive versions.
Today, posters offer the possibility of interaction through resources such as videos, animations, and graphics. They transform the learning environment, making it more engaging and are an essential tool for conveying information in a clear and visually appealing manner.
Furthermore, the use of circuit boards in poster projects adds an extra layer of interactivity and creativity. These boards allow the creation of simple circuits that allow students to interact with the information by touching electrically conductive objects, further enriching the educational experience.
CONTEMPLE
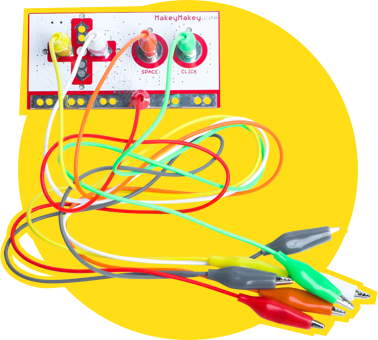
The circuit board is part of a creative interaction kit. This board allows the transformation of ordinary objects into “commands,” which means they become touchpads*. These objects send information to the computer just like input devices such as the keyboard and mouse. With it, we can create various projects, even a banana piano or a video game controller with modeling clay.
*Touchpad: A sensitive device that executes a command when touched.
To make the circuit board work, the use of conductive materials is necessary. These are materials that conduct energy, such as metals (copper, gold, silver, and aluminum), seawater, and our bodies. But there are also materials that are not conductors of energy, such as rubber, Styrofoam, glass, pure water, and oil, which cannot be used to make the circuit board work.
As we have seen, the board makes projects more fun because it turns any object that conducts energy into a real keyboard.
Get to know some of these objects:
- Fruits and vegetables: bananas, apples, lemons, or carrots can be used as keys or buttons.
- Aluminum foil sheets: small pieces of aluminum foil connected to the board’s pins can be touched or pressed to send signals.
- Pencils: used to draw circuits or connect objects directly to the board’s pins.
- Water: it conducts electricity, so it is possible to use containers with water as part of the circuit. For example, by dipping fingers into water cups and touching conductive objects, signals are sent to the computer.
GETTING TO KNOW THE BOARD
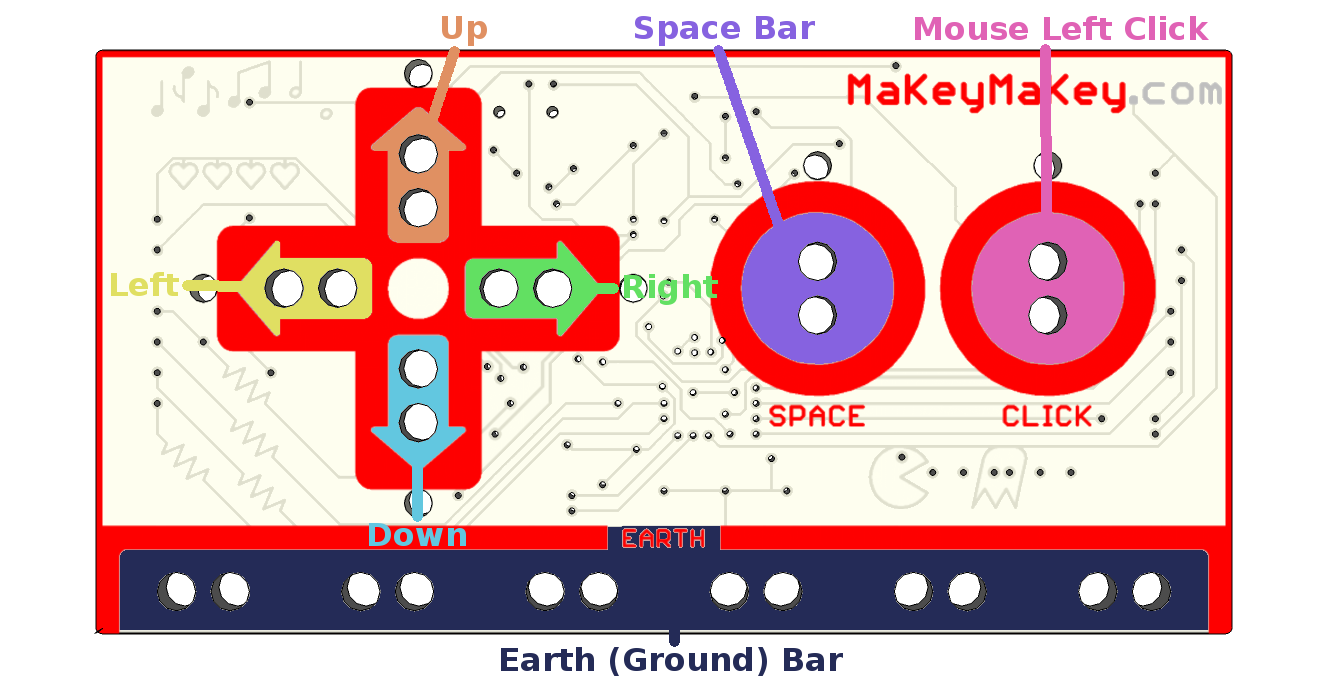
The board has the shape of a video game controller. On the front, there are contact points for directional arrows (left, right, up, and down), space bar, and mouse click functions.
It is important to know that there is a bottom bar called Earth, which serves as a grounding wire, meaning it diverts the electrical current from devices to the earth.
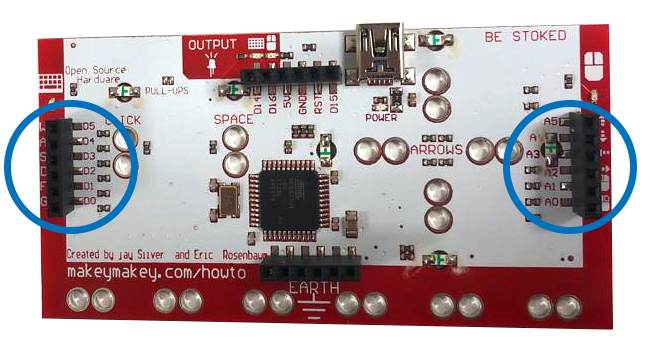
On the back of the board, there are jumpers (connectors) to be used as other keys (W, S, A, D, F, G) of a standard keyboard, as well as connections to control all mouse functions (right/left click).
HOW TO CONNECT THE BOARD
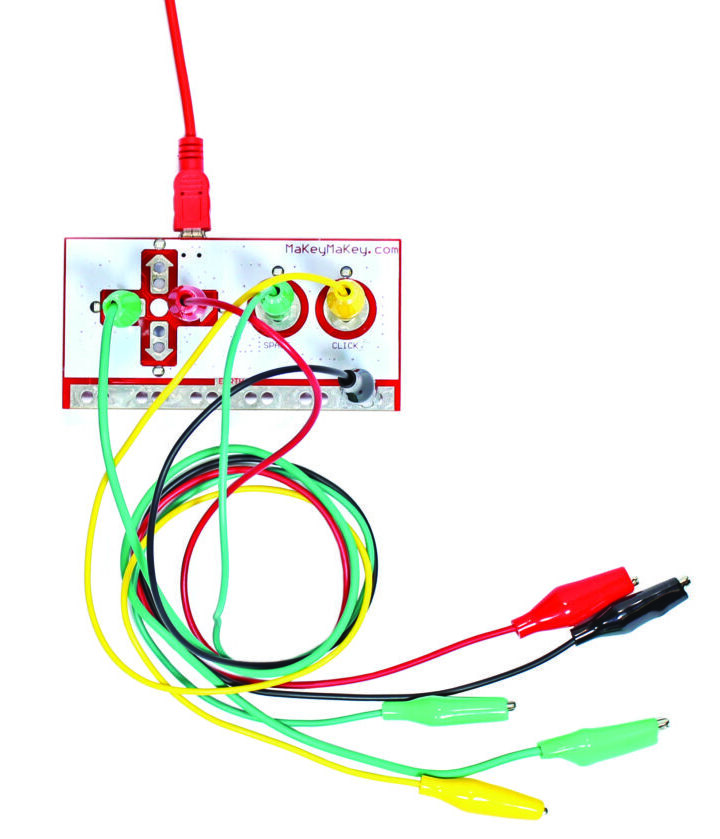 Connect the USB cable to the computer and connect the alligator clips to the contact points of the board and to the conductive objects that will be used in the project.
The circuit with objects requires grounding. For this project, grounding will be done by the colleague interacting with the circuit. They should hold one end of the alligator clip connected to the Earth bar with one hand while pressing the object with the other hand. See what happens!
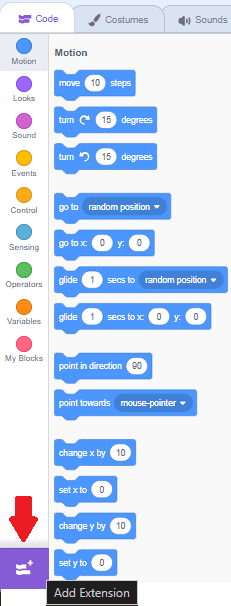
HOW TO ADD THE MAKEY MAKEY BOARD EXTENSION TO SCRATCH
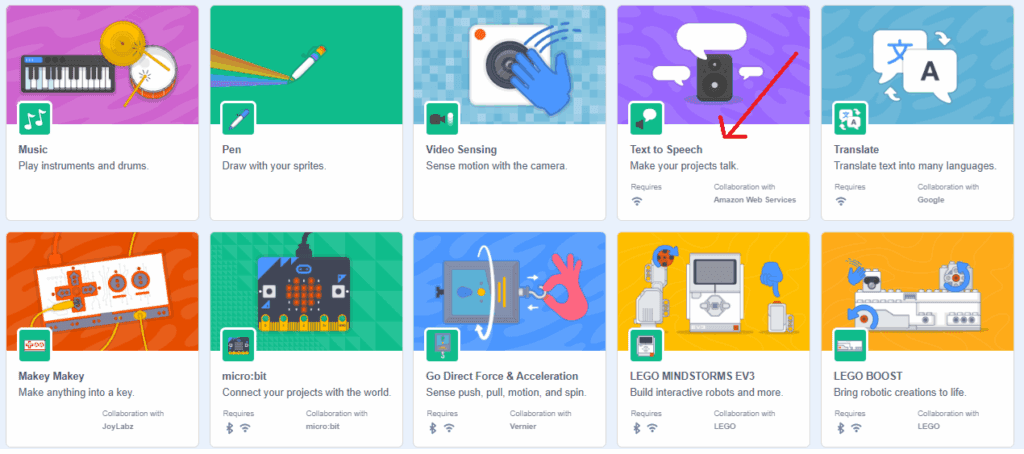
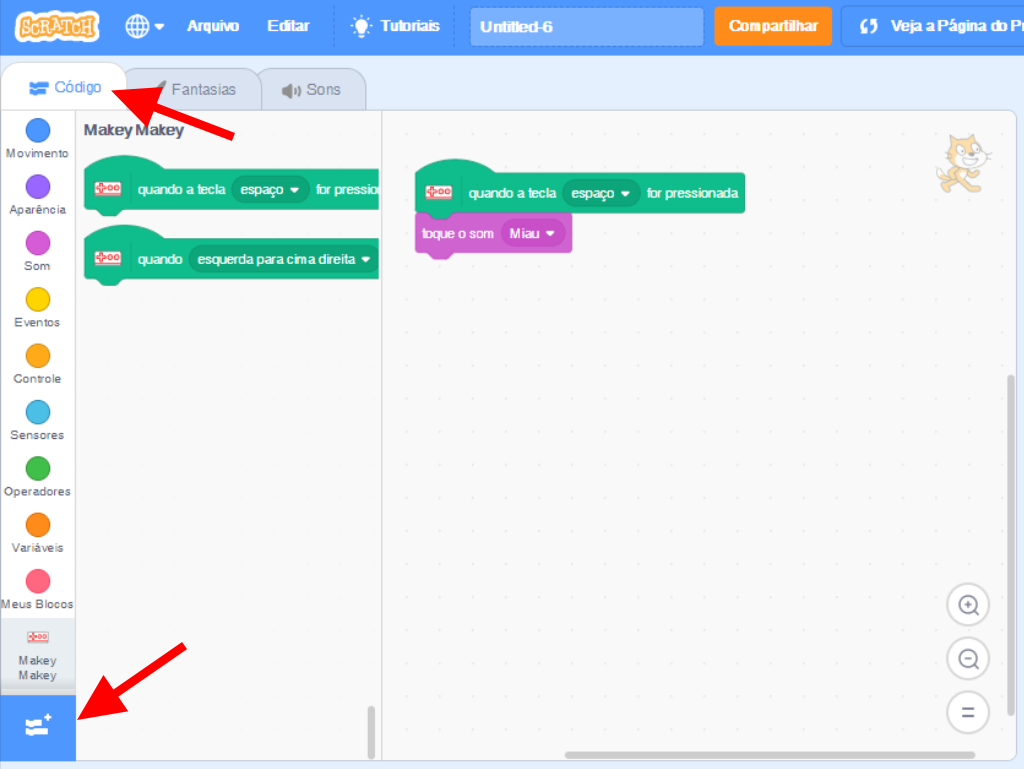 In the “Code” tab, click the “Add Extension” button and then select the Makey Makey option.
There you go! The board will be added to the program.
You can also choose the program’s language.
In the Menu Bar, click the ![]() icon and choose the Brazilian Portuguese option.
icon and choose the Brazilian Portuguese option.
Watch the video and see some project examples:
BUILD
Divide the class into teams of up to five students and distribute the circuit board kit to each of them.
Instruct students to create a sound poster with the circuit board. Instruct them to follow all the steps in order. In the example, we used the Earth-Moon-Sun System theme; you can choose another theme.
ATTENTION!
• When starting and finishing the projects, make sure to clean the alligator clips, as there should be no residues. Use a brush or cotton swab for cleaning.
• Each kit should be connected to a computer. If the school does not have the necessary number of computers per team, each group can alternate the use of the computer to execute their project. At this moment, be mindful of the time of use so that everyone participates.
• When the project needs to be presented on a metal table, it is advisable to cover the table with a cloth or plastic towel, with cardboard or brown paper to not interfere with the project’s operation. If presented on the floor, a rubberized surface, such as EVA, is recommended.
• Opt for newer modeling clay, as older ones may be dried out and may not work.
• The wires cannot touch each other and must be secured with masking tape or Scotch tape.
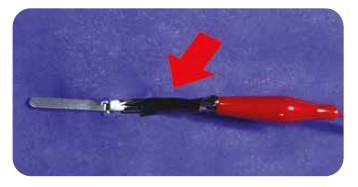
• The contact between the alligator clip and the aluminum foil needs to be very firm. Use insulating tape to secure them.
Step 1: gather the materials.
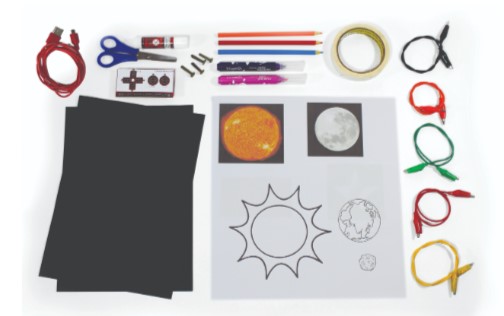 • 1 circuit board;
• 1 USB cable;
• 5 alligator clips;
• 1 piece of electrical tape;
• printed or drawn material
(Sun, Moon, and planet Earth);
• sheets of black cardstock, color set
or EVA foam;
• 4 ballerina-style brackets;
• 1 piece of masking tape;
• 1 pair of blunt scissors;
• 1 piece of glue;
• colored pencils or markers.
Step 2: Research images and information about the Earth-Moon-Sun System.
Step 3: Begin creating the poster.
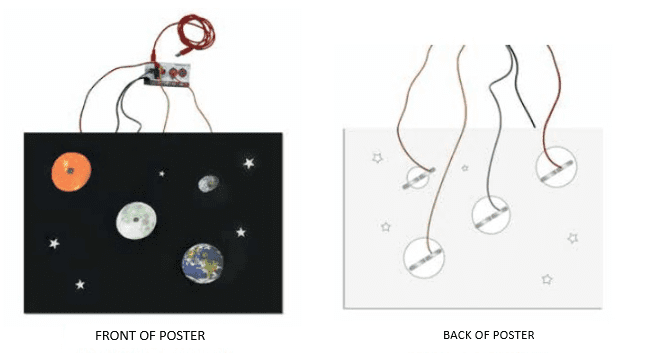
Step 4: To encourage interaction with visitors, use the ballerina brackets, which will act as buttons. They should be placed on the back of the poster, at least 5 cm apart, so they don’t touch. When placing the bracket on the front, be careful not to obscure any information on the poster.
Create the buttons by following these steps:
• Step 1: Choose the locations on the poster where you’ll place the buttons (SUN, MOON, and EARTH).
• Step 2: Create a button for each image of the Solar System. It’s important to measure the distance from the legs of the ballerina bracket to the edge of the poster. Insert a bracket into the front of the poster, and
at the back, bend the legs so they’re secure.
• Step 3: Make sure the bracket legs aren’t touching.
Step 5: On the back of the poster, attach one side of the alligator clip to one of the bracket legs and tape it in place. Do this to one leg of each bracket used on the poster, reserving one alligator clip for grounding.
Step 6: Connect the other side of each alligator clip and the ground wire to the corresponding inputs on the circuit board.
Step 7: Use the USB cable to connect the circuit board to the computer.
Step 8: Run the Scratch program at <https://scratch.mit.edu>. Each button will be programmed to perform the expected action when the corresponding key is pressed.
For example, we chose the Solar System theme to create the poster. By touching the buttons, we will hear and see information about the Sun, the Moon, and the Earth.
Step 9: Add the circuit board extension. To do this, click the Add Extension function and then the Makey Makey option.
To use this feature, you must be connected to the internet.
Step 10: then add the Text to Speech extension, in the same function.
Step 11: now, create the sound poster schedule.
a. Click the Makey Makey extension and drag the “When Spacebar Is Pressed” block to the script area. The “Spacebar” option should be changed according to the alligator clip connections made to the circuit board.
b. Click Sound, drag the “Stop All Sounds” block to the script area, and place it below the previous block.
c. Click Appearance, drag the “Say Hello!” block to the script area, and place it below the previous block. Then, change the “Hello!” text to the text related to the chosen theme.
d. Create another command block and repeat the steps performed in items a and b.
e. Click Text to Speech, drag the “Hello” block to the script area, and insert it below the previous block. Then, change the text “hello” to the same text chosen in item c.
f. For each button created on the sound poster, perform the steps described in items a through e. Remember to change the “space” option in item a to the options corresponding to the connections made
on the circuit board.
Step 12: To interact with the poster, you’ll need to hold the grounding alligator clip with one hand and one of the buttons with the other. Experiment and see how the sound poster works.
CONTINUE

Share the construction results with the class.
• What was it like creating a sound poster with the circuit board?
• Did you have any difficulty making the connections with the ballerina brackets?
When finished, all materials must be stored.