CONNECT
 Animation is the art of making drawings and images move on the screen. It creates the illusion of motion by showing a rapid sequence of images. Found in movies, games, and apps, animations entertain us and make us dream. With creativity and the right tools, we can create our own animations to tell stories in a unique way. Animating is like painting with movement, and the result is always special!
CONTEMPLATE
DO YOU KNOW WHAT A PROGRAMMING LANGUAGE IS?
A programming language is a way of communicating with computers, allowing programmers to create programs and instructions for various tasks. It consists of a set of rules and symbols that define how commands should be written and interpreted by the computer. These languages are used to develop apps, websites, and to automate processes in various fields, enabling programmers to efficiently solve complex problems and control specific computer actions.
An example is Scratch, a visual programming language developed by MIT. It offers an accessible and fun approach to learning programming by replacing lines of code with colorful blocks in a graphical interface. It can be accessed through the website: https://scratch.mit.edu/.

Learning programming with Scratch is simple, since it uses a graphical interface and blocks that snap together like LEGO pieces.
Watch the video to see some example projects:
WHAT CAN BE CREATED USING SCRATCH?

With Scratch, it is possible to create a variety of projects, such as interactive stories, games, animations, educational projects, and interactive applications.
The platform offers a wide range of creative possibilities for users to explore.
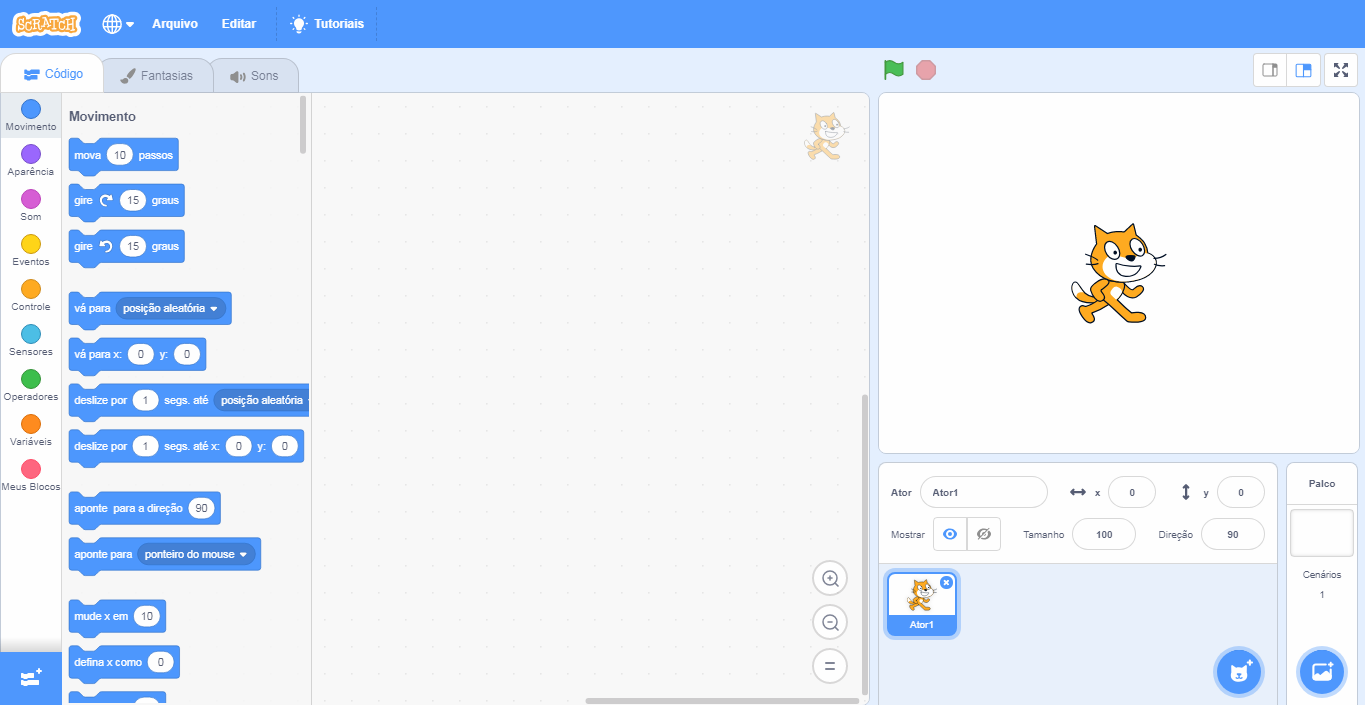
UNDERSTANDING THE PROGRAM INTERFACE
The program interface is very intuitive and easy to use.
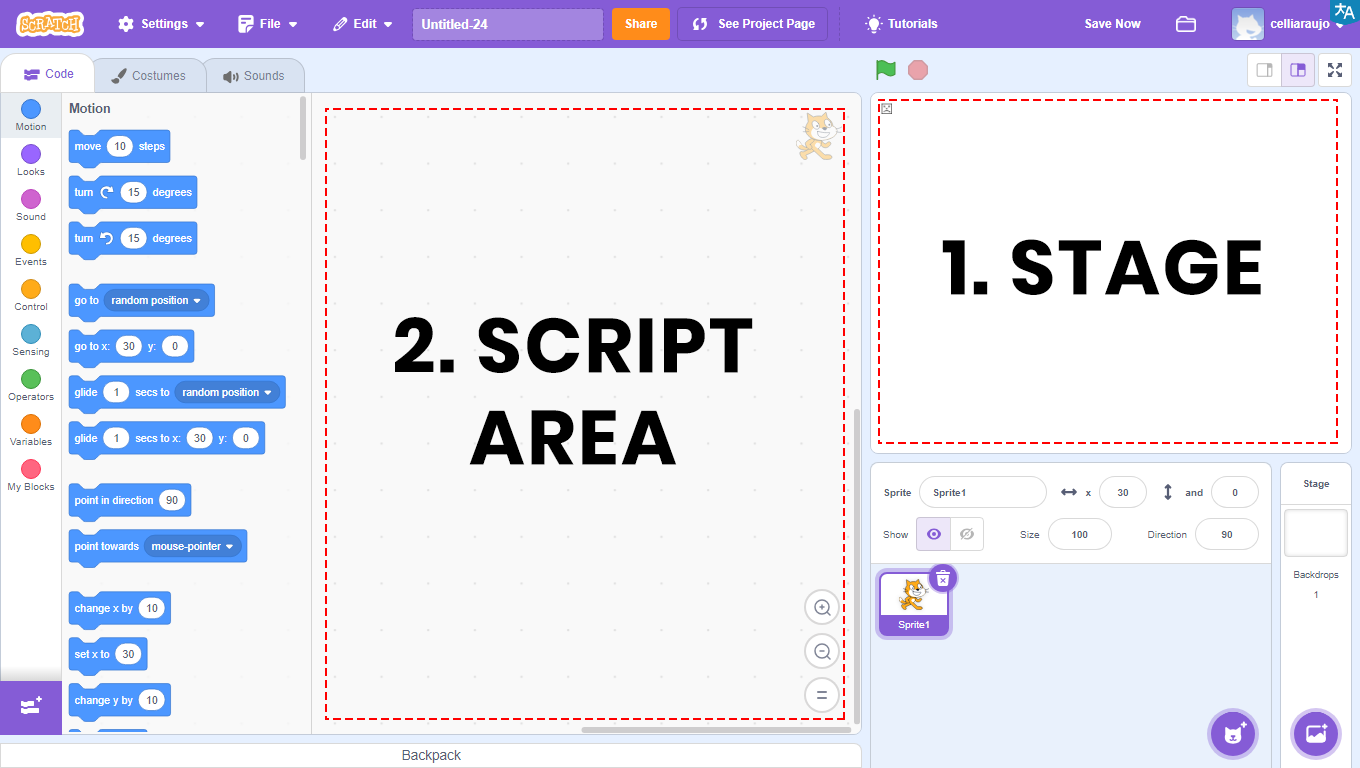
1 – Stage: area that allows the visualization of all graphical and animated parts of the project, where tests will be performed.
2 – Scripts Area: the area where programming takes place. This is where the code will be developed and blocks will be dragged.
![]()
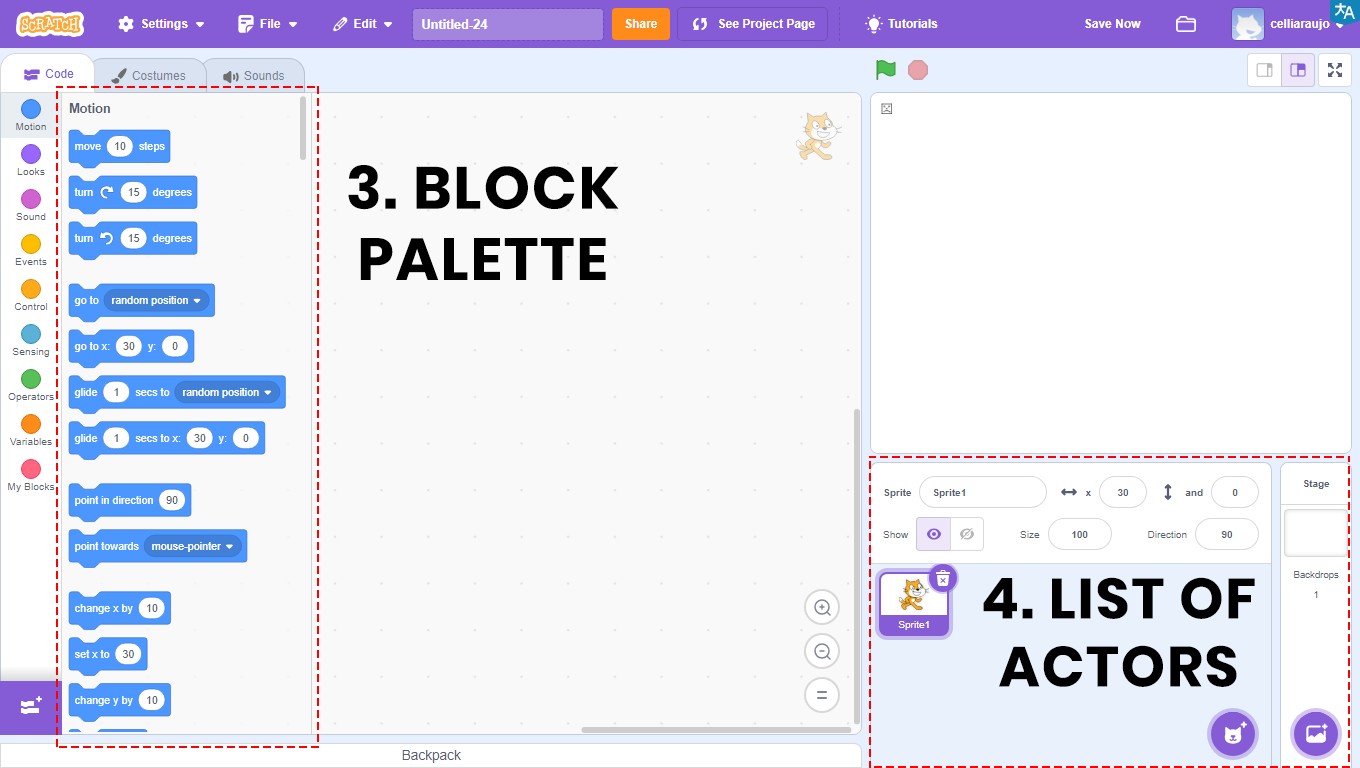
3 – Block Palette: all the blocks used are in this area. They are color-coded, and within each color, the blocks have different shapes. Each color corresponds to a function, and depending on the shape, the block returns or reads a specific type of value.
In the Scripts Area, the blocks that will be compiled (i.e., transformed into a program) will be placed, and the result will be visible on the Stage.
4 – Sprite List: area where you can view, insert, and modify images that appear on the Stage. Also known as Sprites.
BUILD
CHANGE THE SIZE
Go to the Scratch website at https://scratch.mit.edu/ and add a character that can be resized. Follow the step-by-step instructions and, when finished, click the green flag and watch the animation you created.
PROGRAMMING THE PROJECT
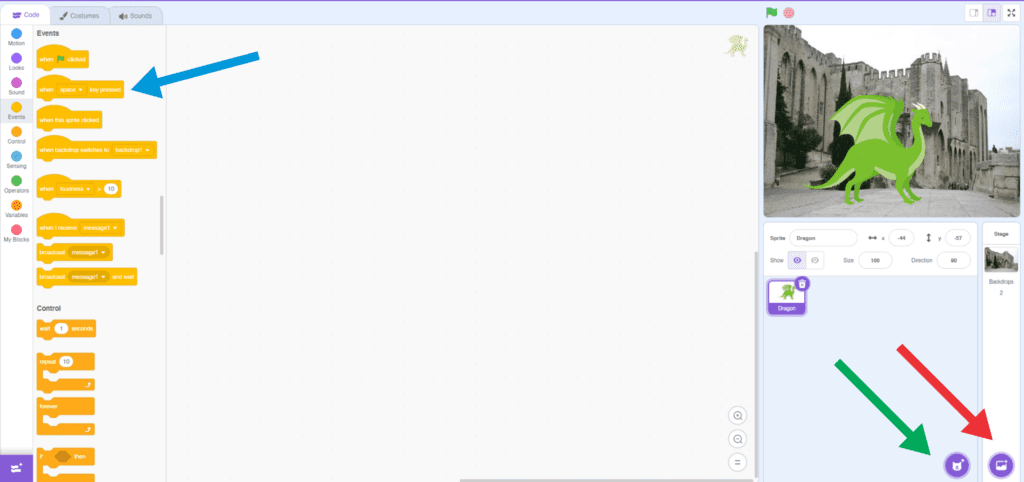
1. Click on the Cat Sprite and then click on the trash can icon to delete it.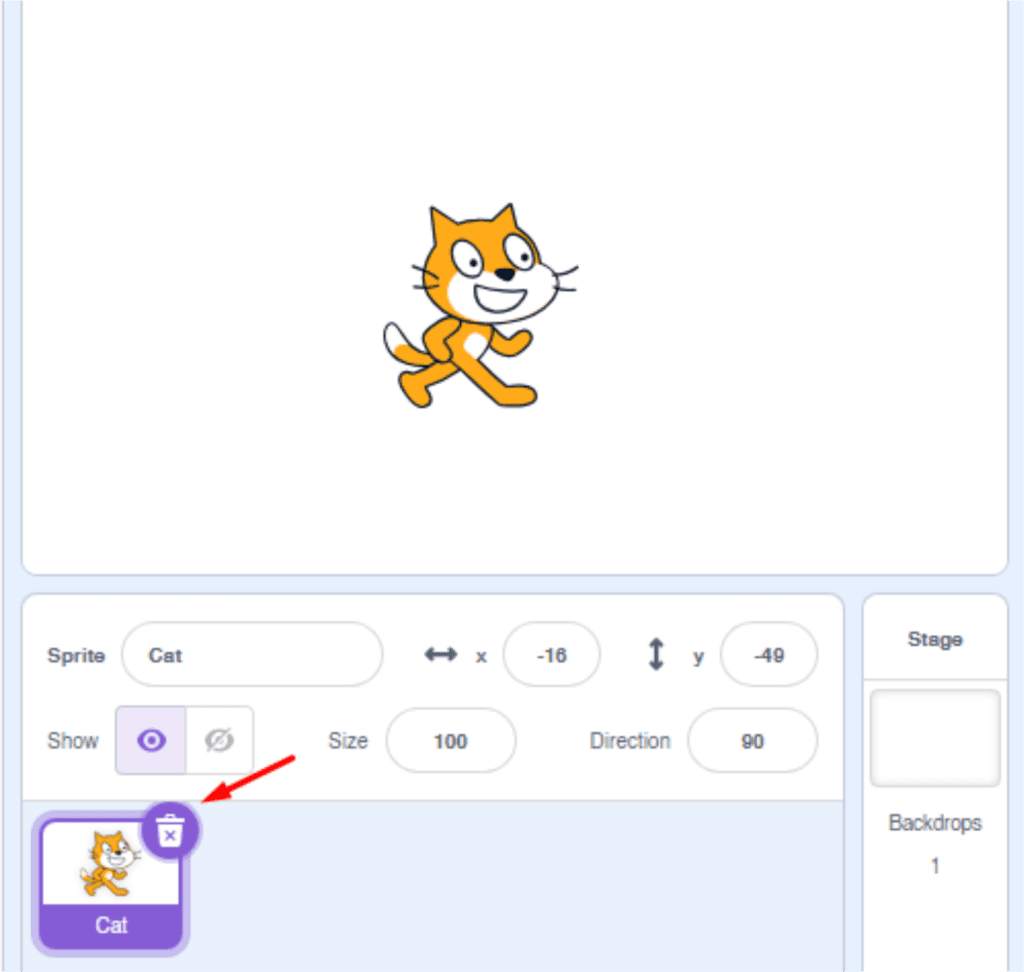
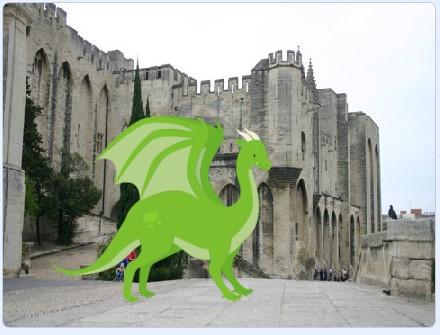
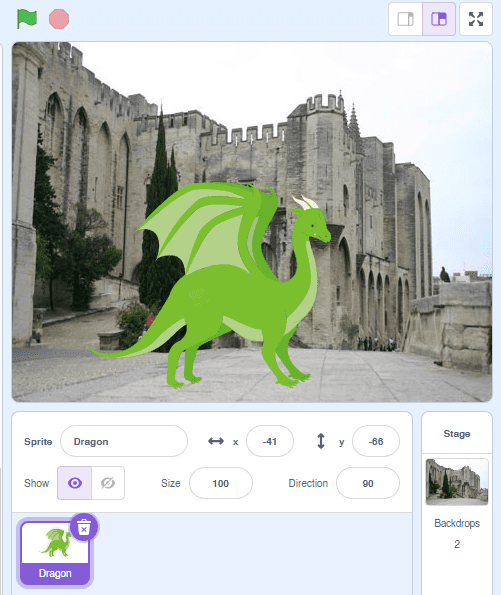
2. Click the area indicated by the green arrow to insert the Sprite (Dragon) that will be resized.
3. Click the area indicated by the red arrow to select the Backdrop (Castle4).
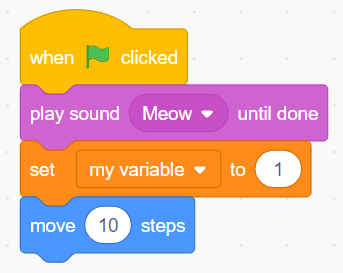
4. Select the Sprite (Dragon) and drag the block when space key pressed to the Scripts Area (blue arrow), and change the key from space to the letter a.
5. Then, under Looks, drag the block change size by 10 to the Scripts Area (purple arrow) and change the value to -10.
Now try different sizes, for example: 80, -50, 140, -20, and see the changes.
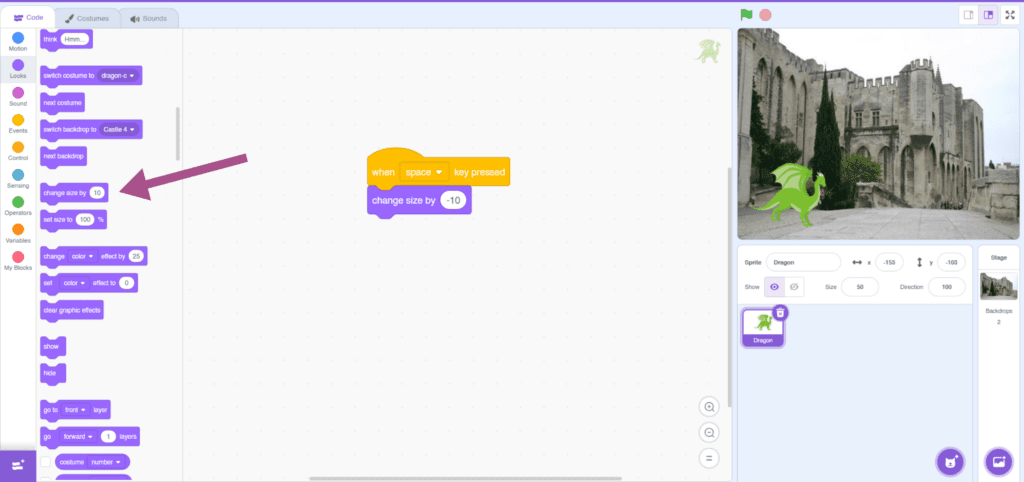
TIP: Value 100 is the original size of the Sprite (Dragon).
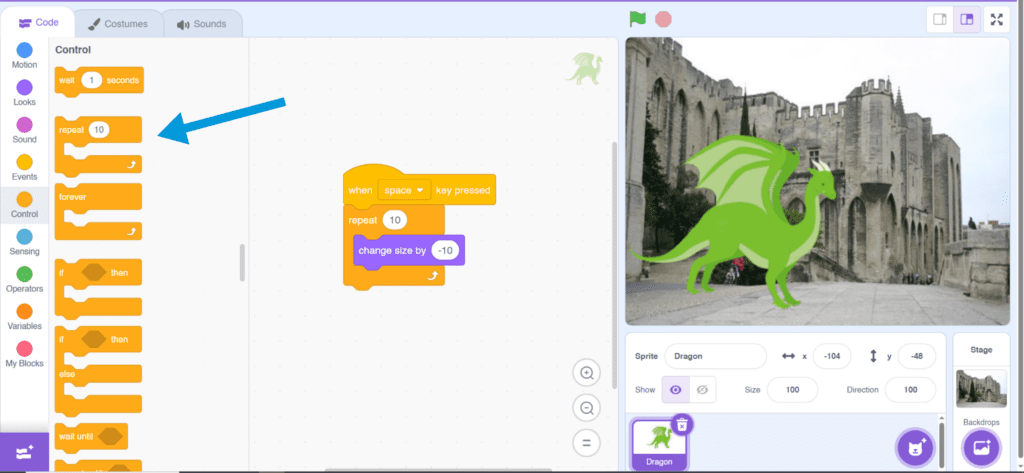
6. To create a continuous effect, click on Control and drag the block repeat 10 times (blue arrow) to the Scripts Area.
FINALIZING THE PROJECT
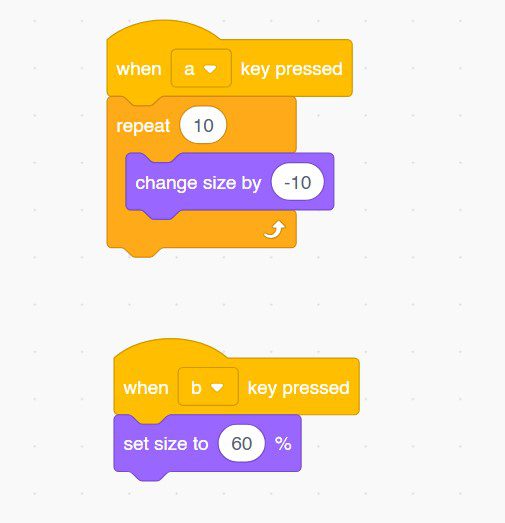 In this project, we used 2 different command blocks to demonstrate the same actions.
As we saw, in the first command block, we used the change size by 10 block, altering the value.
Now, let’s look at another way to perform the same command.
1. Under Events, drag the block when space key pressed to the Scripts Area and change the key from space to the letter a.
2. Under Looks, drag the block set size to 100% and change the number. Try using a larger number (300) or smaller (30).
CONTINUE

Share the results of your creation with the class:
• Which character became larger? And which one smaller?
• Did you understand the role of Looks in this project?