
CONNECT
 With the advancement of technology, new content has emerged that allows for closer interaction with users. A notable example is interactive posters, found in exhibitions, museums, cinemas, schools, and commercial establishments. These posters are a visual presentation format that integrates interactive elements like videos, animations, and graphics, offering a dynamic and engaging experience for users. This creative and innovative approach makes the content presentation more engaging and interesting.
MAKEY MAKEY BOARD
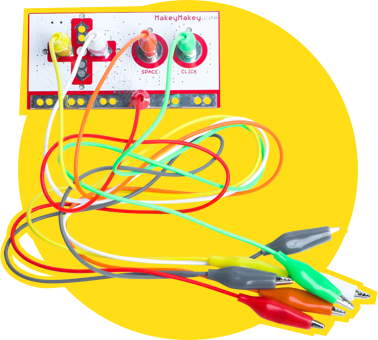
The creative interaction kit includes a circuit board that can turn ordinary objects into “commands” through touchpad technology. This board allows these objects to be used as input devices to send information to the computer, just like a keyboard and mouse. With this board, you can create various imaginative projects, such as a banana piano or a playdough video game controller.
*Touchpad: a sensitive device that executes a command when touched.
For the circuit board to function properly, conductive materials are required. These materials conduct electricity and include playdough, metals such as copper, gold, silver, and aluminum, as well as seawater and the human body. On the other hand, non-conductive materials like rubber, styrofoam, glass, pure water, and oil cannot be used for the circuit board to function.
Ask the students:
• Have you ever interacted with an interactive poster?
• What caught your attention the most about the interactive poster?
CONTEMPLATE
As we have seen, the board makes projects more fun as it turns any conductive object into a real keyboard.
Here are some of these objects:
• Fruits and vegetables: bananas, apples, lemons, or carrots can be used as keys or buttons.
• Aluminum foil: small pieces of aluminum foil connected to the board’s pins can be touched or pressed to send signals.
• Pencils: used to draw circuits or connect objects directly to the board’s pins.
• Water: it conducts electricity, so containers with water can be part of the circuit. For example, by dipping fingers into cups of water and touching conductive objects, signals are sent to the computer.
KNOWING THE BOARD
The board has the shape of a video game controller. On the front, there are contact points for the directional arrow functions (left, right, up, and down), space bar, and mouse click.
It is important to know that there is a lower bar called Earth, which serves as a grounding wire, meaning it diverts the electrical current from devices to the ground.
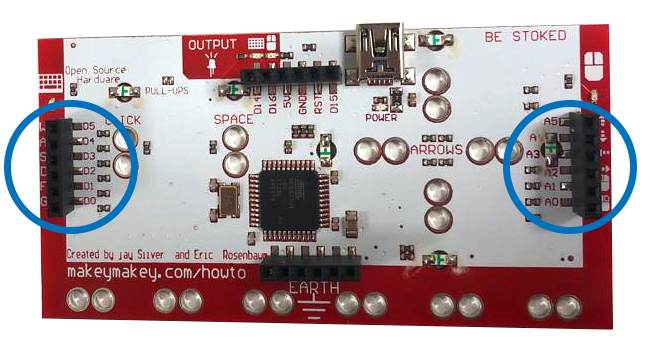
On the back of the board, there are jumpers (connectors) to be used as other keys (W, S, A, D, F, G) of a standard keyboard, as well as connections to control all mouse functions (right/left click).
HOW TO CONNECT THE BOARD
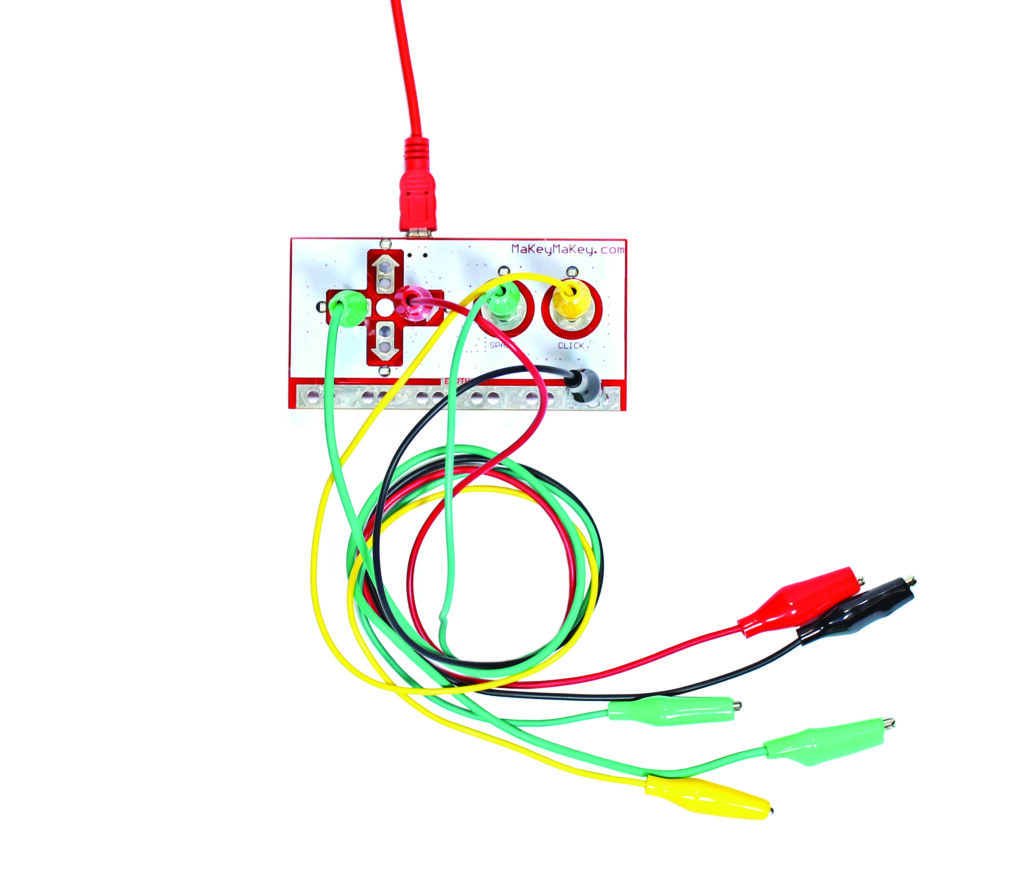 Connect the USB cable to the computer and attach the alligator clips to the board’s contact points and to the conductive objects used in the project.
The circuit with objects requires grounding. For this project, the grounding will be done by the person interacting with the circuit. They should hold the alligator clip connected to the Earth bar with one hand while pressing the object. See what happens!
BUILD
Divide the class into teams of up to five students and distribute a circuit board kit to each team.
Ask the students to create interactive posters using the circuit board. Guide them to follow all the steps in order.
Step 1: Gather the materials.
• 1 circuit board;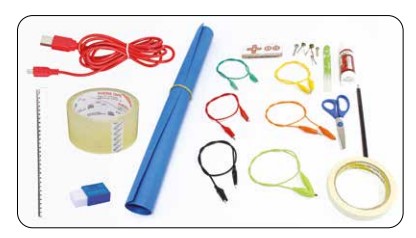
• 6 alligator clips;
• 1 USB cable;
• 1 sheet of poster board (the poster board can be replaced with color set, cardboard, or EVA foam);
• 5 paper fasteners (brads);
• 1 ruler;
• 1 pair of blunt-tip scissors;
• 1 roll of wide adhesive tape;
• 1 roll of electrical tape or masking tape;
• 1 pencil;
• 1 eraser;
• colored pencils or markers;
• 1 glue stick.
Step 2: Choose a theme and conduct research to collect the data that will be used on the poster.
Step 3: Begin constructing the poster.
Step 4: To make the poster interactive for visitors, use the paper fasteners to represent buttons on the poster. They should be at least 5 cm apart so they don’t touch on the back of the poster. When placing the fastener on the front, pay attention to its position to ensure it doesn’t cover any important information.
Create the buttons following these steps:
• Step 1: Choose the locations on the poster where the buttons will be placed.
• Step 2: Create one button for each block of information. It’s important to measure the distance from the fastener legs to the edge of the poster. Insert a fastener on the front of the poster, and on the back, fold the legs to secure them.
• Step 3: Make sure the fastener legs do not touch each other.
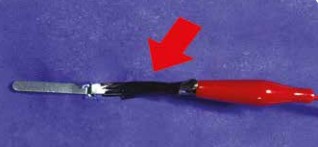
Step 5: On the back of the poster, connect one side of an alligator clip to one of the fastener legs and secure it with a piece of electrical tape. Do this for one leg of each fastener used on the poster.
Step 6: Reserve one alligator clip for grounding.
Step 7: Connect the other side of each clip and the ground wire to their corresponding inputs on the circuit board.
Step 8: To connect the circuit board to the computer, use the USB cable.
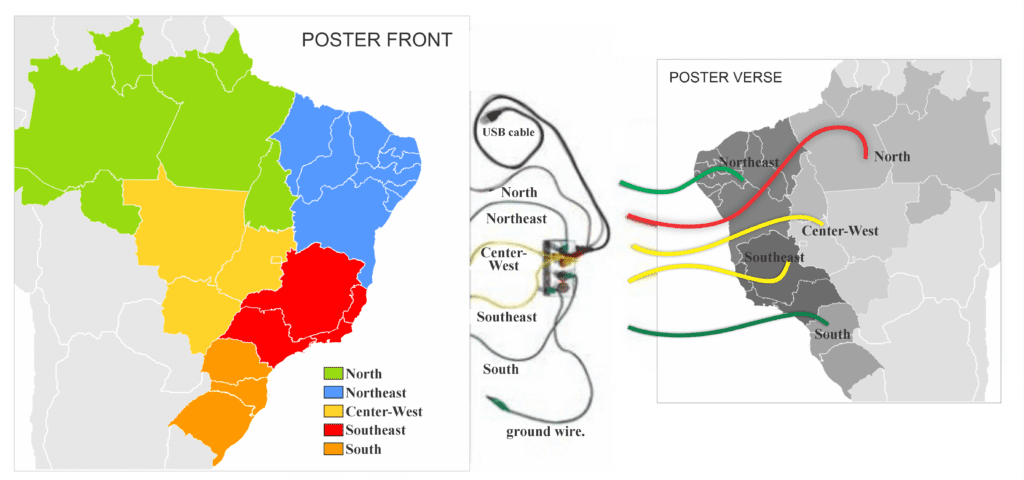
Step 9: Run the Scratch program. Go to <https://scratch.mit.edu>. The programming in Scratch should trigger the description of the chosen button when the key corresponding to that button is pressed. As an example, we selected the theme “The Regions of Brazil” for the poster. When you press the buttons, you will hear and see some information about each region.
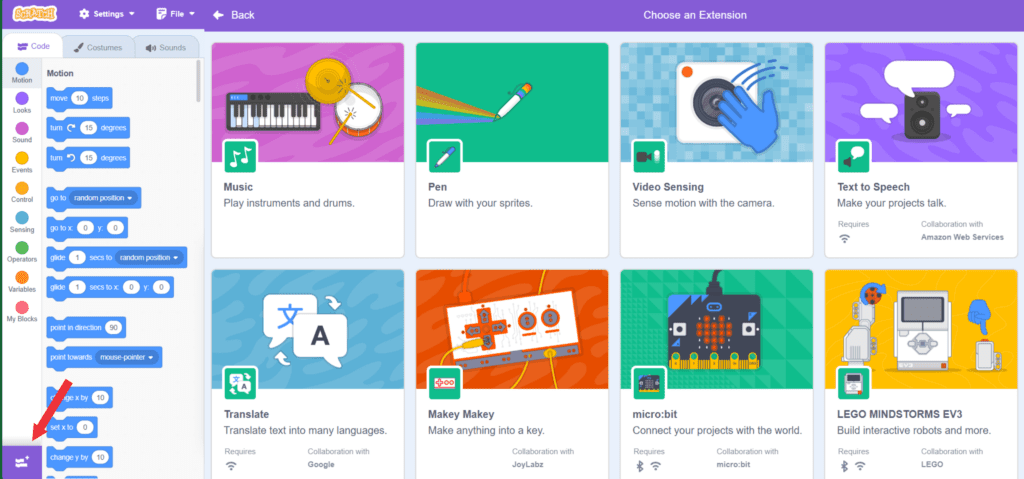
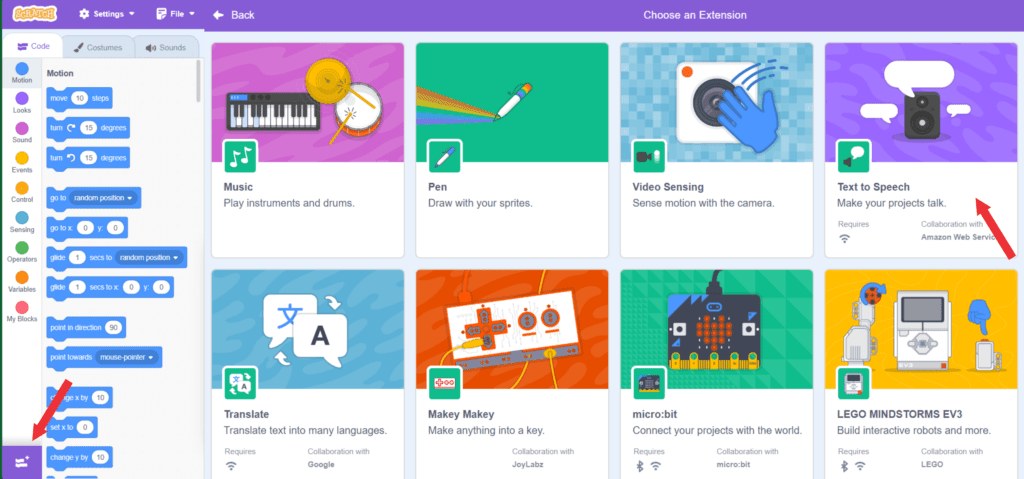
Step 10: Add the circuit board extension as shown in the image:
Step 11: Create the programming for the interactive poster. You can use the Text to Speech extension or the Sound function.
Step 12: If you choose the Text to Speech option, you need to add the extension. To do this, click on the Add an Extension function and then select Text to Speech.
ATTENTION: To use the Text to Speech function, you need to be connected to the internet.
Step 13: Follow the programming steps below using the Text to Speech option.
a. Click on the extension, drag the block when space key is pressed to the scripts area. The “space” option should be changed according to the alligator clip connections made on the circuit board.
b. Click on Sound, drag the block stop all sounds to the scripts area and place it under the previous block.
c. Click on Looks, drag the block say Hello! to the scripts area, place it under the previous block, and change the “Hello” text to the desired text about the chosen theme.
d. Create another command block and repeat the steps from items a and b.
e. Click on Text to Speech, drag the block speak hello to the scripts area, place it under the previous block, and change the “Hello” text to the same text chosen in item c.
f. For each button created on the interactive poster, you need to follow the steps described in items a to e. Remember that in item a, the “space” option should be changed to match the corresponding connections made on the circuit board.
In the previous programming, we used the Text to Speech function, but the same programming can be done using a custom sound. Record the audio in MP3 or WAVE format. Then, check the image sequence to see how to insert the audio into Scratch.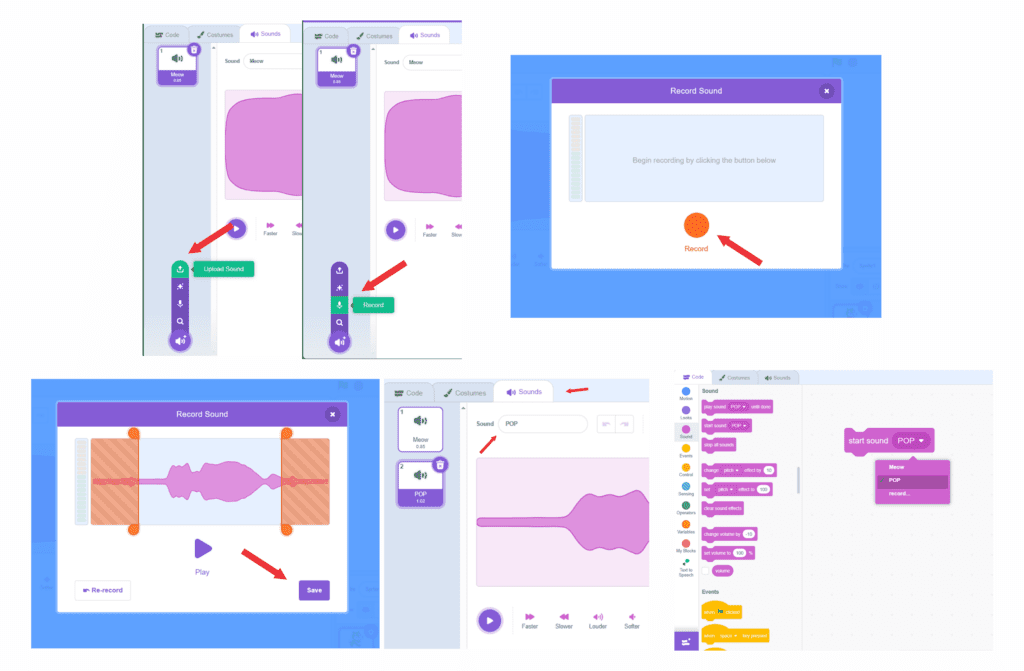
Step 14: To interact with the poster, you need to hold the ground wire with one hand and one of the buttons with the other. Now, see how the poster works.
CONTINUE
At the end, ask the students:
• What did you think about the topics covered?
• How was it to create an interactive poster with the circuit board?